Inside the Purchase Order Editor
The purchase order editor is where an order actually gets built, priced, sent, and received. Creating a Purchase Order covers the happy path from a high level; this is the full tour — every button that matters, so nothing on the screen is a mystery. You don't need to memorize it. Skim it once, then come back when you hit something specific.
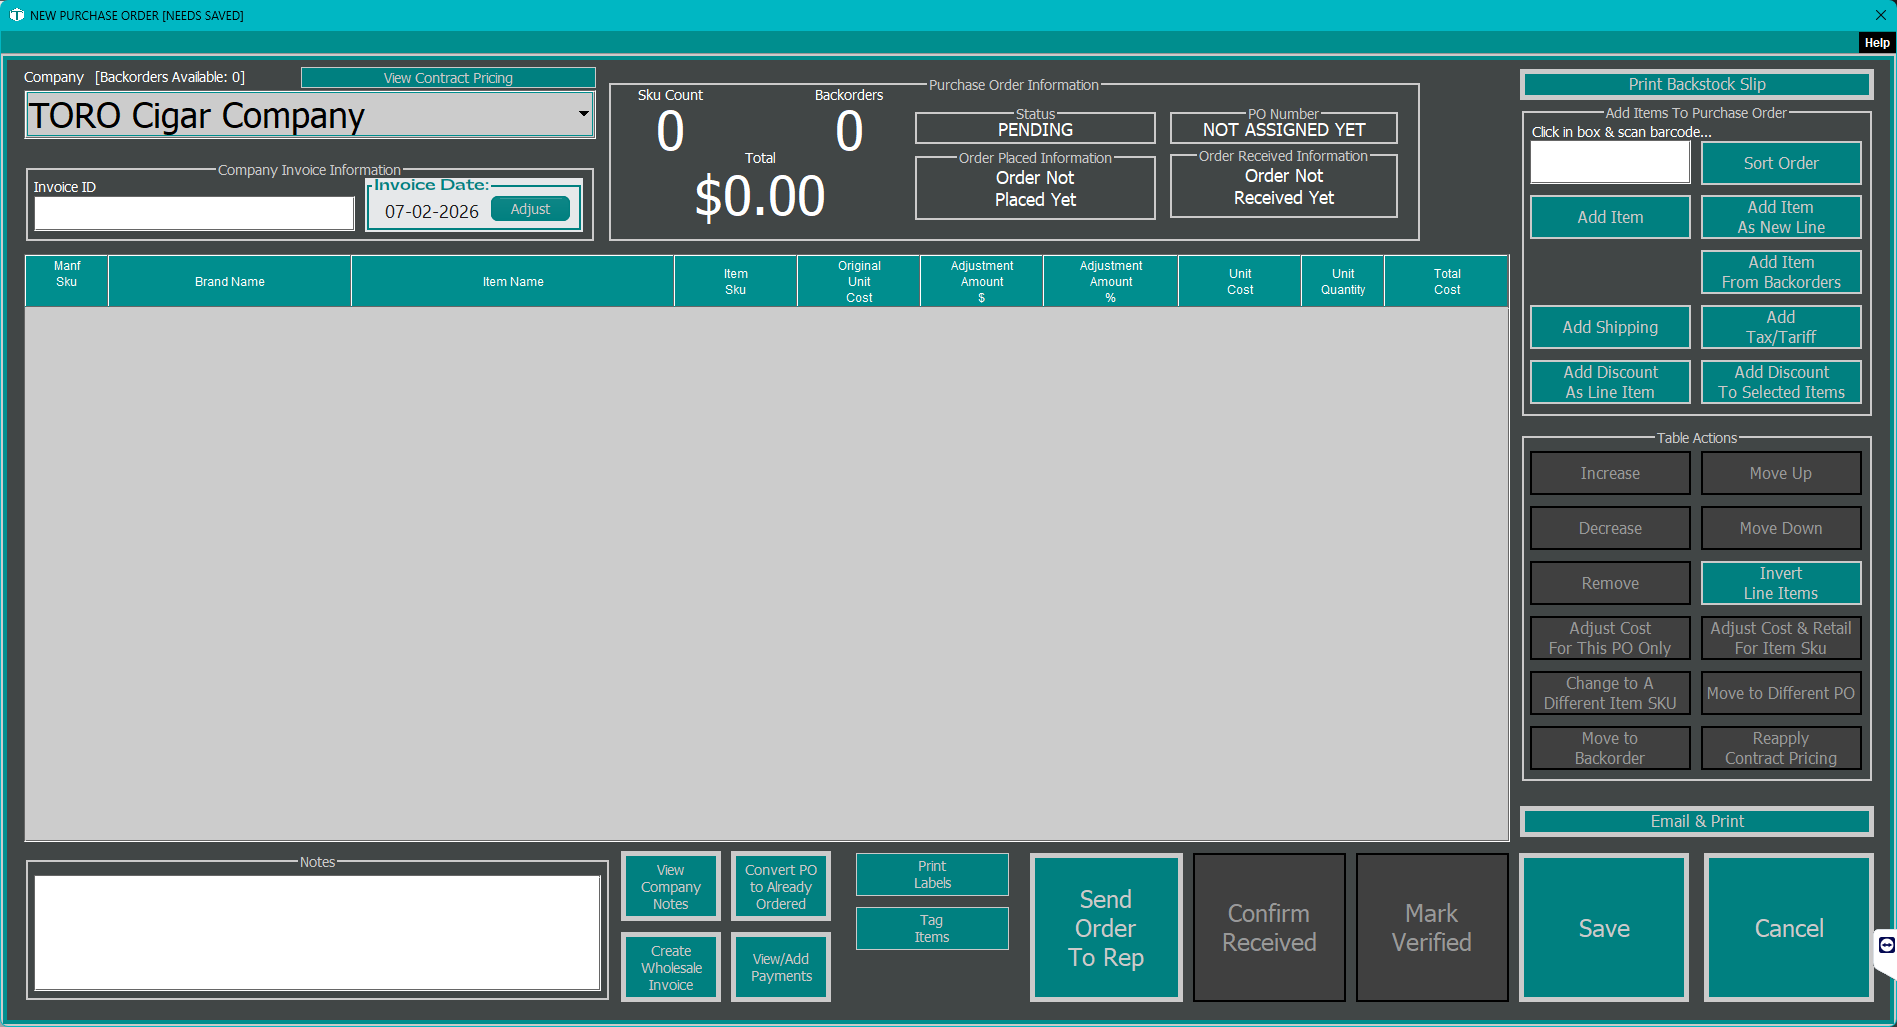
You reach the editor by opening an order from the Purchase Order screen, or by starting a new one. The teal bar across the top of the window shows the PO number (or "NEW PURCHASE ORDER") under the heading, and it tacks on [NEEDS SAVED] whenever you have unsaved changes — a small but useful nag.
The Top: Vendor and Invoice
- Company — the vendor this order is for. Pick it first; everything else keys off it. You can click the arrow and scroll, or just start typing the vendor's name and the box jumps straight to it — the same way the brand box works on Find Item. Handy once your vendor list runs long. If the vendor doesn't have a rep with contact info yet, TORO walks you through adding one on the spot, because it needs somewhere to send the order.
- Invoice ID — the vendor's invoice number. You'll enter this when the bill arrives; it's required before you can receive the order.
- Invoice Date — the date on the vendor's invoice.
- View Contract Pricing — if you have negotiated pricing on file with this vendor, this shows it.
A Purchase Order Information panel keeps a running summary: the status, the PO number (it reads "NOT ASSIGNED YET" until the first save), the SKU count, backorder count, the big Total, and who placed and received the order.
Adding Items
This is the heart of it. Several ways to get items onto the order, depending on how you work:
- Scan box — click in it and scan a barcode. The item drops onto the order. Scan the same item again and the quantity ticks up instead of adding a duplicate line.
- Add Item — search by brand or keywords and pick from the results.
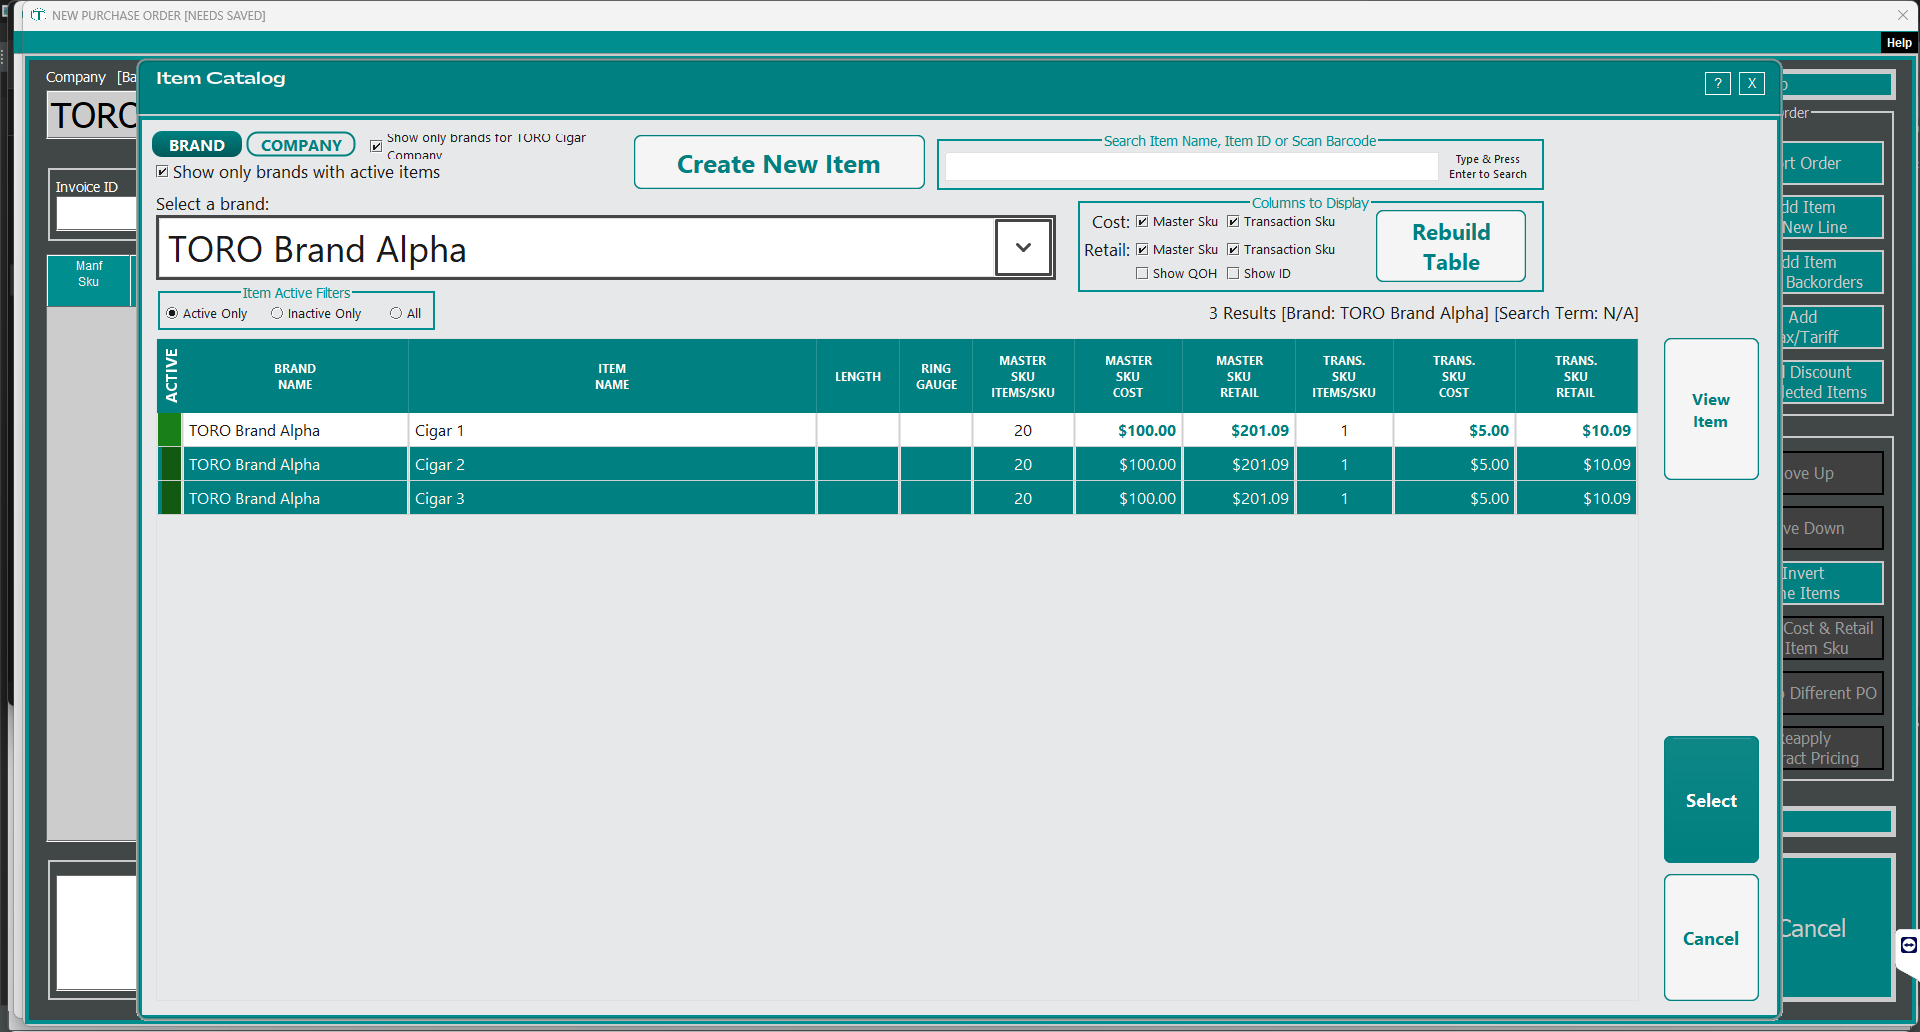
- Add Item As New Line — same search, but forces a separate line even if the item's already on the order (useful when you want two lines at different costs).
- Add Item From Backorders — pull items that were carried over from a previous order for this vendor. (Save the order first so backorders have something to attach to.)
- Sort Order — alphabetize the whole order by brand, then item.
You can also add the lines that aren't products:
- Add Shipping — enter a dollar amount; it becomes a shipping line.
- Add Tax/Tariff — choose Tax or Tariff and enter the amount.
- Add Discount As Line Item — a flat dollar discount as its own line.
- Add Discount To Selected Items — apply a discount as a dollar amount or a percentage, to just the selected items or the whole order (split proportionally). TORO asks for a reason so there's a record of why the price moved. Shipping, tax, and existing discount lines are left out of the math.
The Line-Item Table
Each item is a row with its brand, name, SKU, original cost, any adjustment, the unit cost, quantity, FET, totals, and current quantity on hand. You can drag rows to reorder them. Double-click a line to adjust its cost and retail; right-click for a quick Adjust Quantity.
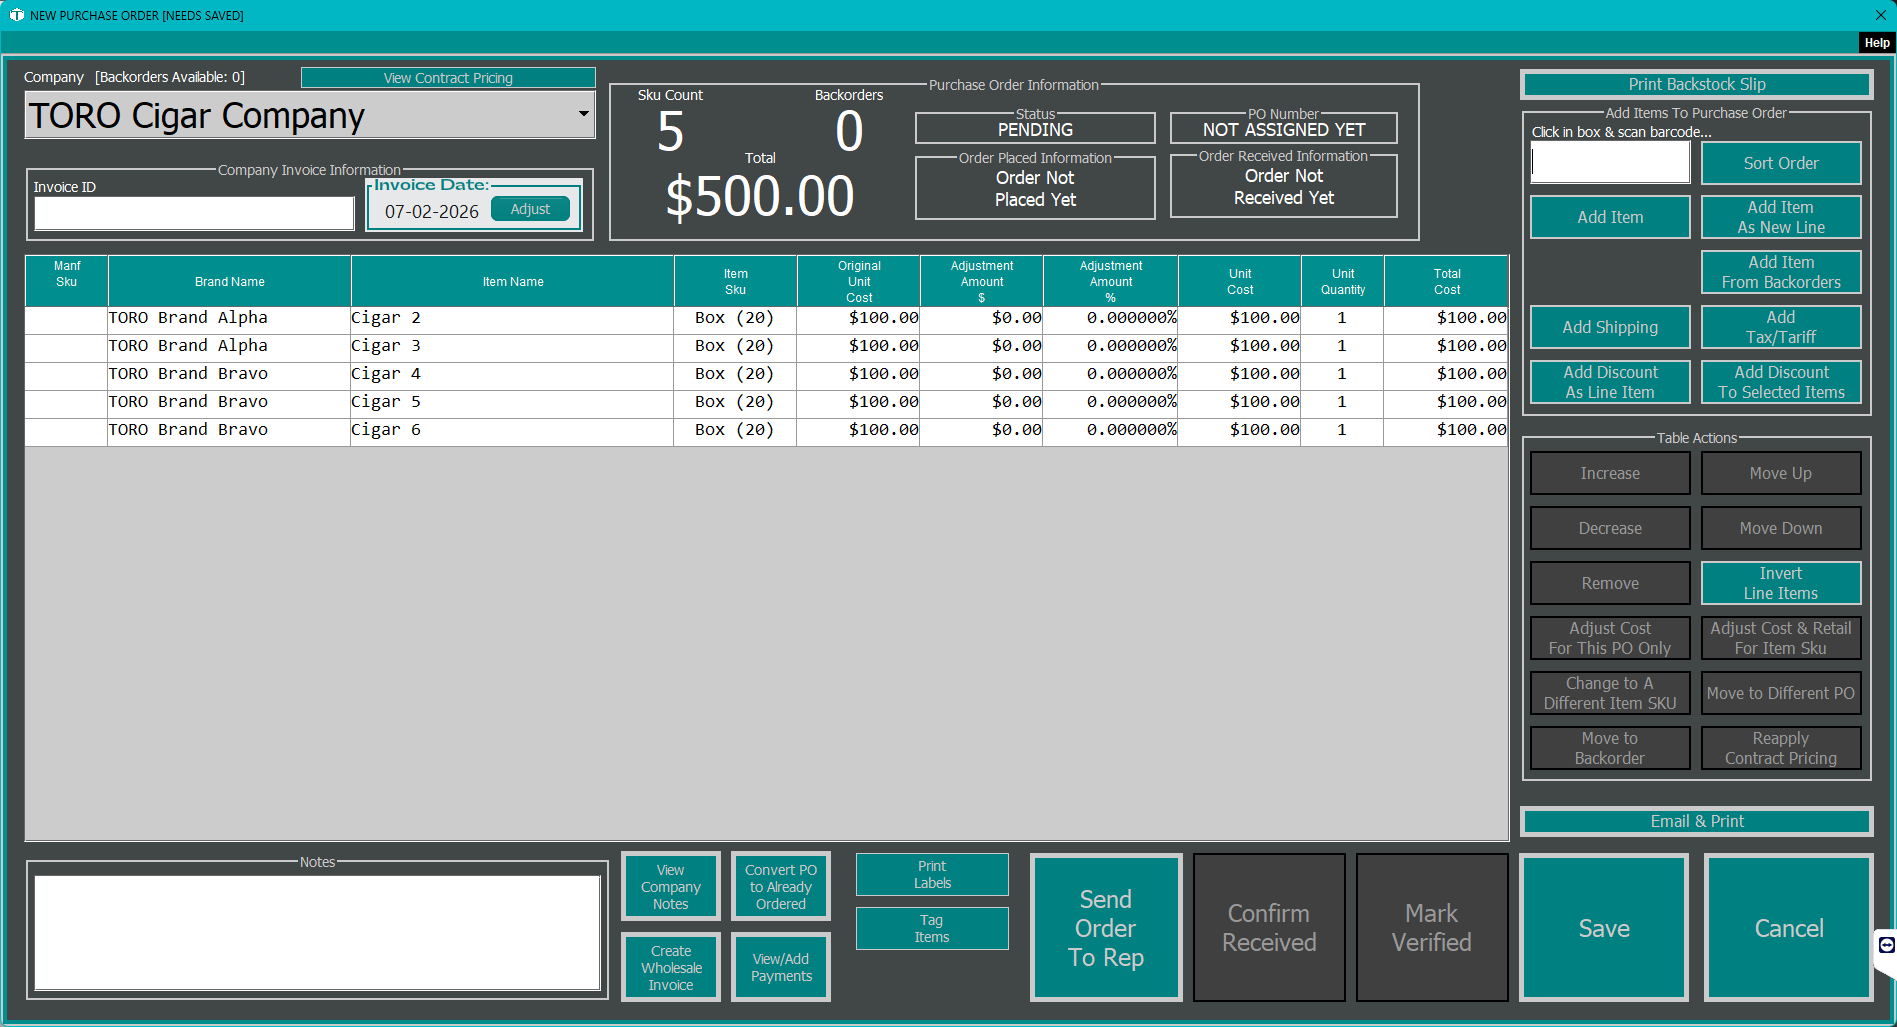
Alongside the table, the Table Actions panel works on whatever rows you've selected:
| Action | What it does |
|---|---|
| Increase / Decrease | Bump the quantity up or down by one (works across several selected rows) |
| Remove | Take the line off the order (offers to send it back to backorder if it came from there) |
| Adjust Cost For This PO Only | Override the cost on this order without changing the item's real cost |
| Adjust Cost & Retail For Item Sku | Open item details to change the SKU's actual cost and retail price |
| Change to A Different Item SKU | Swap the line to another size/SKU of the same item |
| Move Up / Move Down | Reorder a single line |
| Move to Backorder | Pull the line off this order and onto the vendor's backorder |
| Move to Different PO | Move selected lines to another order (new or existing) |
| Reapply Contract Pricing | Re-pull your negotiated pricing for the selected lines |
There's a free-text Notes area too, and a live Total that recomputes with every change.
The Bottom: What You Do With the Order
The buttons across the bottom change depending on where the order is in its lifecycle:
- Save — save your work without changing the status. (You'll do this a lot.)
- Send Order To Rep — confirm and email/text the order to the vendor's rep, moving it to Ordered. (On an order that's already been sent, this becomes Resubmit Order.)
- Convert PO to Already Ordered — for orders you placed outside TORO; flips it to Ordered without sending anything.
- Confirm Received — the shipment arrived. This is the big one: TORO checks you've entered an Invoice ID and that the invoice total matches, then raises your quantity on hand for everything received, activates any new items, and prints your barcode and backstock labels. (This is also where rolling inventory may prompt you for a count — see Rolling Inventory.) The full receiving walkthrough is in Receiving Inventory.
- Mark Verified — opens the scan-and-reconcile window to check the shipment against the invoice, then locks the order as Verified. Once verified, the editor goes read-only, and this button becomes Unverify PO if you ever need to reopen it. See Verifying a Received Purchase Order.
- Cancel — close the editor. If you have unsaved changes, TORO asks whether to save first.
The Extras Worth Knowing
- Email & Print — save silently and either email the order or print/export it as a clean HTML document.
- Message Rep — email the vendor's rep directly without sending the order: a small compose window for a subject and message, delivered as a clean branded email with your store's name and contact info. Perfect for a backorder ETA or a "what specials are running?" note. If the vendor has more than one rep with an email, TORO asks which one.
- View/Add Payments — record what you've paid the vendor against this order.
- Print Labels — print barcode labels for all or selected lines.
- Backstock Slip — a consolidated putaway list showing where each item on the order belongs. Items that don't have a backstock location yet are listed at the bottom under NO BACKSTOCK LOCATION, so whoever puts the order away knows what still needs a home.
- Backstock Labels — a small stick-on label for each box, showing the brand, the item and the shelf it goes to.
Both sit together at the top right of the editor, each with a printer icon. If any item on the order has no shelf location set, TORO tells you how many and offers to open the locations screen first — answer No and it prints straight away.
- Tag Items — apply item tags to everything on the order in one shot (great for a seasonal buy or a promo group).
- Create Wholesale Invoice — turn the order's lines into a wholesale invoice for a wholesale account.
- View Company Notes — the vendor's notes (the button turns green when there are notes to read).
- View Locations — opens the Inventory Locations screen showing only the items on this order, so you can see at a glance where every box goes and which items still need a shelf. Everything works the same as the full screen — search, set or move a location, print the list — it's just the short list instead of your whole inventory. (Available at stores using Inventory Locations.)
Why This Matters
The editor looks busy because it's doing a lot of jobs — it's your order pad, your receiving station, your cost-correction tool, and your vendor-communication hub all in one window. You'll use maybe a third of these buttons on a normal order. The rest are there for the day something doesn't go to plan: a short shipment, a price change, an item that showed up that you didn't order. Knowing they exist means those days are a quick fix instead of a phone call to support.