Setting Up a Vendor Company
Before you can write a single purchase order, TORO needs to know who you're buying from. That's what a vendor company is — the record for a distributor or manufacturer you order from. It's the hub that everything else hangs off of: your sales rep gets attached to it, the brands you carry get linked to it, and every purchase order points back to it. Get this set up once and the rest of the ordering process falls into place.
Think of it as the difference between "I called that guy about the Padróns" and "here's the vendor, here's the rep who covers us, here's every brand we buy from them, and here's every order we've ever placed." One of those is a business. The other is a shoebox of receipts.
Where to Find It
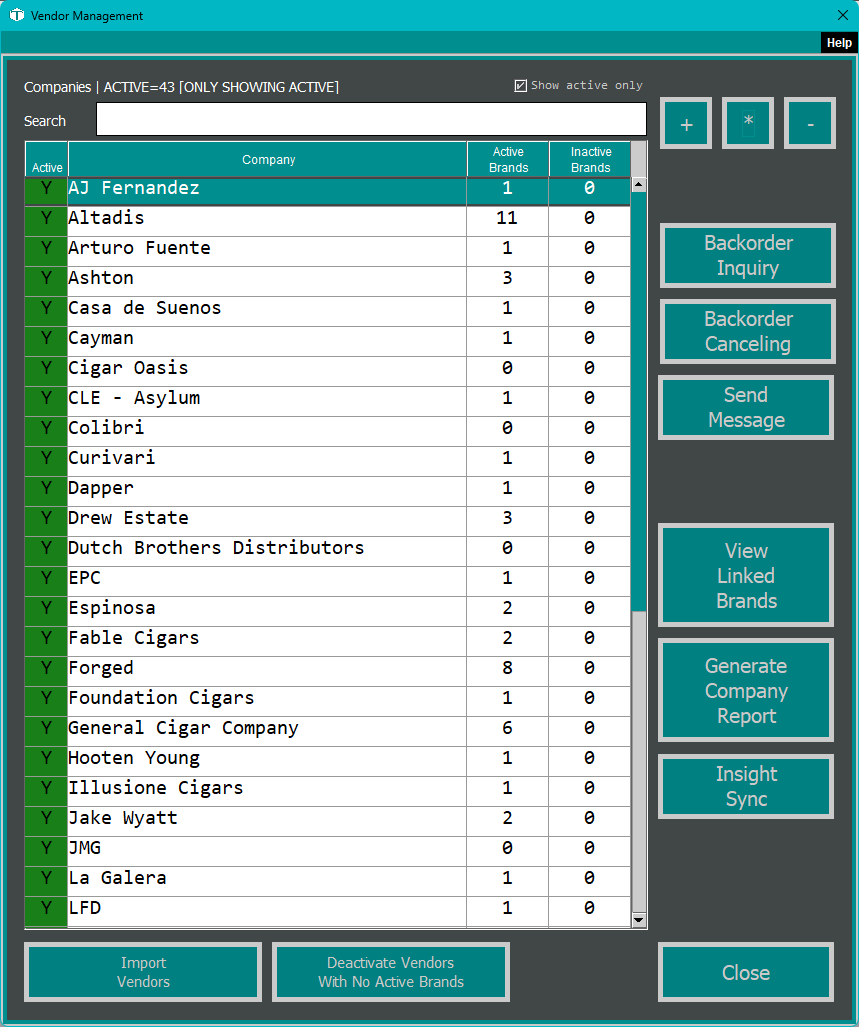
Open the Dashboard, click the Purchasing tab on the left, and click the Manage Vendor Companies card. (Can't find it? Type "vendor" in the search box at the top right.) This opens the Vendor Companies screen — a list of every vendor you've set up, with a search box and a Show active only checkbox so you can hide the ones you no longer use.
To create a new one, click Add a Vendor. To change an existing one, select it and click Edit Vendor (or just double-click it). Either way you land in the Vendor Company window.
Filling In the Vendor
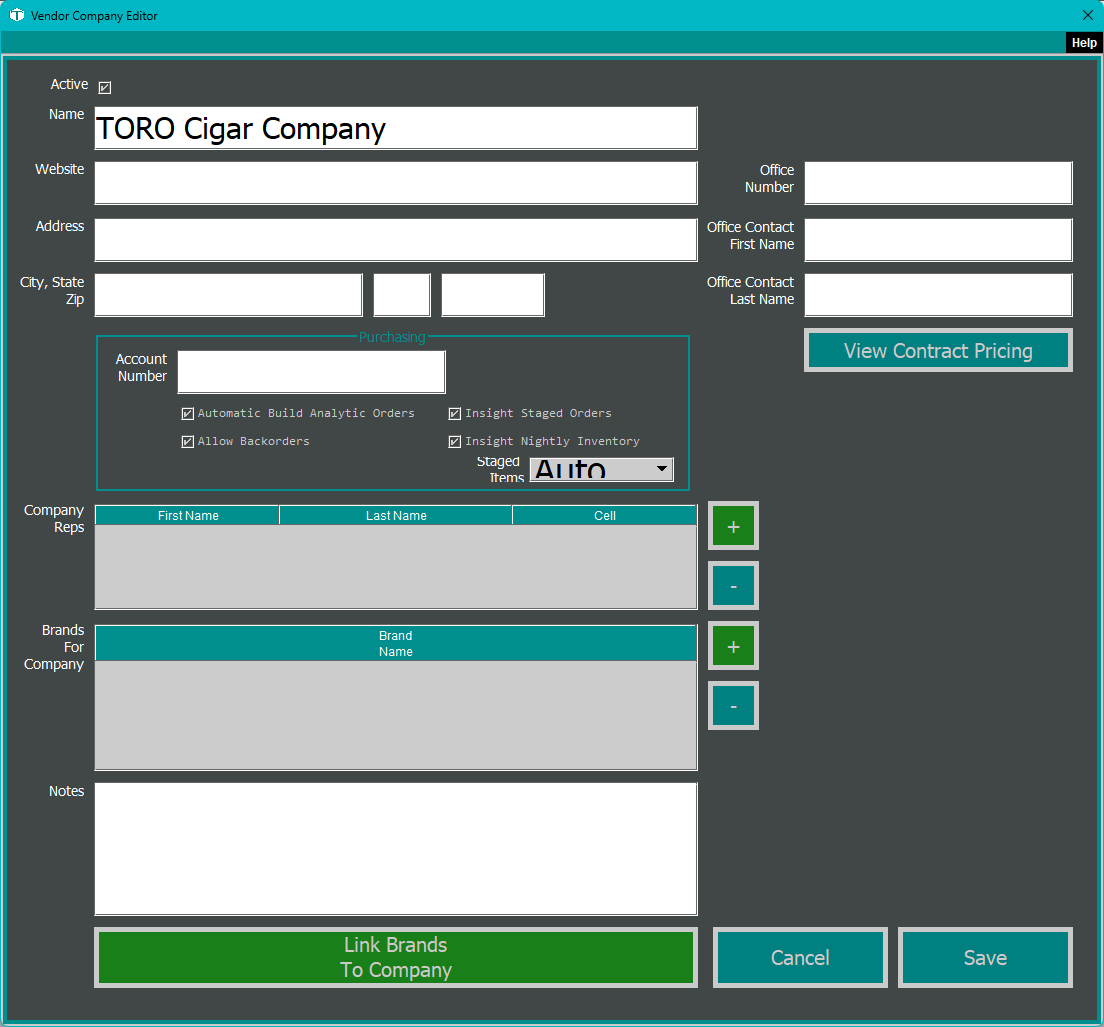
The top of the editor is the basic contact card — the who and where of your vendor:
- Name — the company name. This is the only truly required field; TORO won't let you save without it. It's what you'll see in the vendor dropdown when you build a PO, so name it the way you think of them.
- Website
- Address, and City / State / Zip
- Office Number — the main business phone.
- Office Contact (First Name and Last Name) — the person who answers when you call the main line (as opposed to your sales rep, who gets set up separately).
- Active — leave this checked for vendors you currently order from. Unchecking it hides the vendor from your everyday lists without deleting any of its history. (If you try to deactivate a vendor that still has active brands linked to it, TORO gives you a heads-up so you can unlink or deactivate those brands too.)
- Notes — a free-text area for anything worth remembering: order minimums, cutoff days, the fact that they close the first week of July, whatever.
The Purchasing Settings
Lower in the editor is a Purchasing panel. This is where you tell TORO how you do business with this particular vendor:
- Account Number — your account number with them. Handy to have it on file, and it can print on the orders you send.
- Allow Backorders — turn this on if this vendor lets you carry items over from one order to the next. When it's on, anything short-shipped can be moved to backorder and pulled onto a future PO instead of disappearing.
- Automatic Build Analytic Orders — turn this on and TORO can build suggested reorders for this vendor automatically, based on your sales history and stock levels. This is the engine behind the Create Analytic Purchase Order feature. (It only works well once your brands are linked to the vendor — see Linking Brands to Vendors.)
- Insight Staged Orders and Insight Nightly Inventory — these feed the TORO Insight service if you use it. The Staged Items dropdown (Auto, All Items, Ordered Only, Top 200) controls how much of your catalog gets staged. If you're not on Insight, you can leave these alone.
Reps and Brands Live Here Too
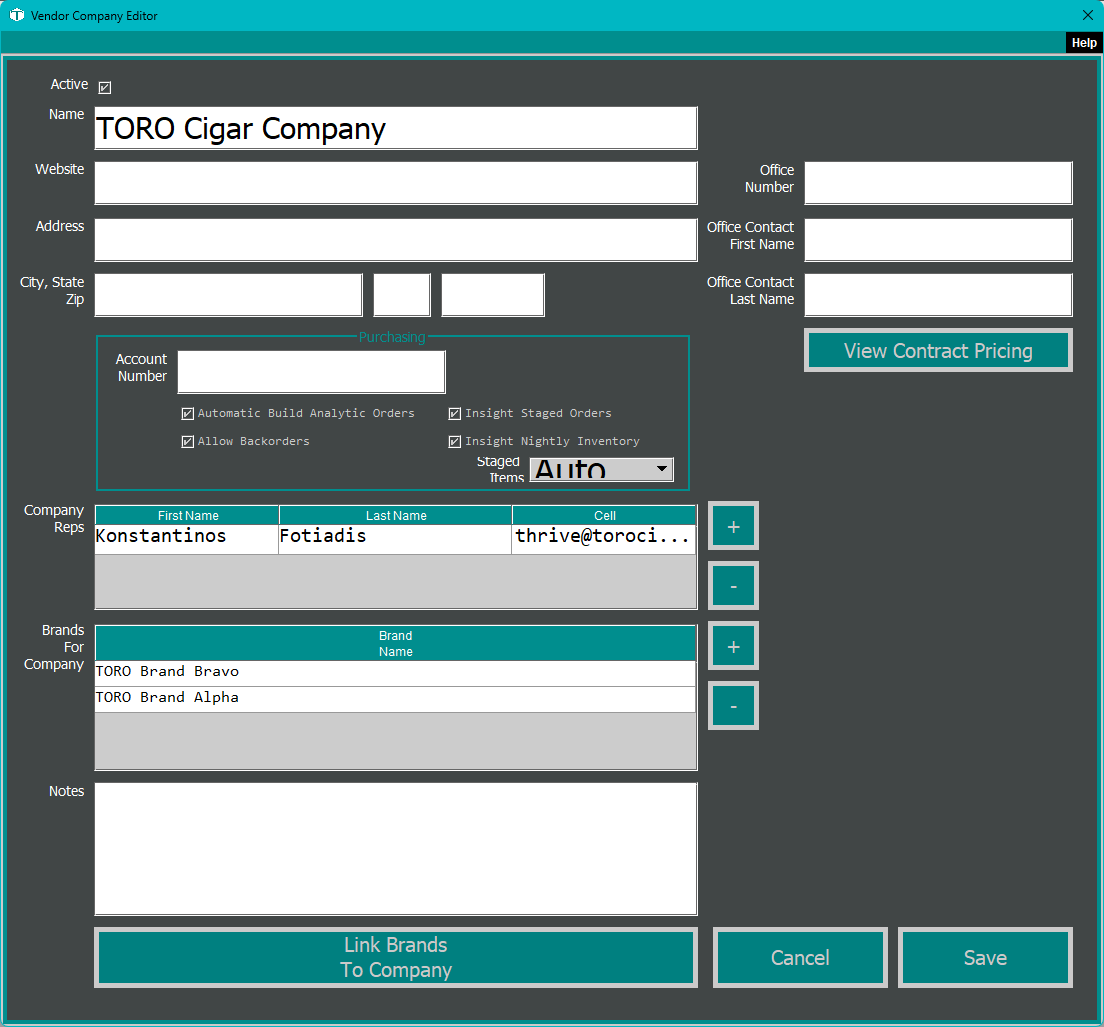
Two tables inside the vendor editor are where the vendor connects to the rest of your ordering setup:
- Company Reps — the sales rep(s) who cover you for this vendor. Click Add to add one. This is important enough that it has its own article: Adding Vendor Sales Reps. When a vendor has no rep yet, that Add button turns green to nudge you — because without a rep, TORO has no one to email the purchase order to.
- Brands For This Vendor — the brands you buy from this vendor. Click Add to link them. This is what lets a purchase order pull the right items. The full explanation is in Linking Brands to Vendors, and here too Add turns green when nothing's linked yet.
You don't have to have the rep and brands ready the moment you create the vendor — you can come back and add them. But you do need all three before a purchase order will work end to end: the vendor to order from, a rep to send it to, and brands so the right items come up.
Saving
Click Save. TORO stores the vendor and, if you have the TORO Insight service, quietly refreshes your vendor directory so it stays in sync. That's it — the vendor is ready to be used on a purchase order.
Why This Matters
A clean vendor list is quietly one of the most valuable things in your system. It's what makes your Vendor Report Card meaningful — you can't grade a vendor you never recorded. It's what lets a new employee send an order to the right rep without asking you. And it's what turns "did we ever order from them?" into a two-second lookup. Five minutes setting up a vendor properly saves you that question a hundred times over.