TORO Onboarding Set Up
Welcome to TORO. This is the one-time set-up checklist every new store works through before opening day — 23 steps that turn a fresh install into your shop, tuned to your hours, your pricing, your staff, your cigars, and your customers. Work through them top to bottom. You only do this once.
Each step is short and self-contained. Do them in order the first time; after that, come back to any single step whenever something changes.
You don't have to read everything. Each step starts with a short list of numbered things to do — that list is all you need to finish setup. Underneath it is a section called "What these settings do," which explains every button in plain English. Read that part only if you're curious, or if something didn't work the way you expected. Skipping it will not leave anything undone.
Pictures in this guide come in two looks — Light and Dark — to match however your own TORO screen looks. Use this switch to flip every screenshot below:
Want it on paper? Download the whole guide as a PDF — pick the look you like:
⬇ Download PDF — Light ⬇ Download PDF — Dark
The 23 steps — jump to any one
- Sign Your Licenses
- Set Up AutoPay
- Set Up Store Hours
- Set Up Controlled Climate Environments
- Import Customers & Virtual Gift Cards
- Set Up Receipts
- Set Up Store Email
- Manage Daily Open/Close Checklist
- Manage Product Types
- Set Up Tips
- Manage Notifications
- Set Up Age Verification
- Set Up Transactions & Tabs
- Set Up Credit Cards
- Set Up Gift Cards
- Set Up Mailchimp
- Set Up Discount Levels
- Set Up Your Rewards Program
- Set Up Your Employees
- Order Gift Cards
- Order Shelf & Barcode Labels
- Order Receipt Paper
- Build Your Humidor — Load Your Cigars
1. Sign Your Licenses
What this step is for: sign your store's license agreement. TORO does this automatically the very first time it starts up, before you reach the home screen.
Do this:
- Start TORO from the icon on your desktop.
- A window pops up and asks "Is someone with ADMIN rights nearby and available?" An admin is the owner or a manager — so if that's you, click Yes. (Nobody with admin access around right now? No problem — you get a 7-day grace period to come back and sign.)
- The owner (or a manager) logs in with their PIN.
- The HellasBAE LLC Agreement appears (HellasBAE is the company behind TORO). Read it over.
- In the top box — labeled Input "your name" below — type the owner's name exactly as it appears on the account.
- In the box below it — labeled Input "I ACCEPT" below — type I ACCEPT.
- Click the I ACCEPT button.
That's it — your agreement is signed and TORO continues to the home screen. Both boxes have to match exactly — the owner's full name as it's spelled on the account, and the words I ACCEPT. If you click the button and nothing seems to happen, that's almost always the reason: check the spelling (no extra spaces, no nickname) and try again. Clicking I DO NOT ACCEPT closes TORO — if that happens by accident, just start TORO again and it will ask you to sign once more. If you have questions, reach out to your TORO rep before signing.
Good to know
This screen has just two boxes and two buttons, and it only asks one thing of you: prove that the store owner is really the one agreeing. Nothing here is a "setting" you tune — it's a signature you type.
- Input "your name" below (top box) — Type the owner's name exactly as it appears on the account. Not a nickname, not "Bob" if the account says "Robert," and no extra spaces on the ends. TORO compares it letter for letter (it does ignore capital vs. lowercase). This box is the "who is signing" half.
- Input "I ACCEPT" below (box beneath it) — Type the words I ACCEPT. Nothing else fits. This is the "yes, I agree" half.
- As both boxes fill in correctly, a little confirmation forms on the right — the owner's name, the words I ACCEPT, and today's date and time — turning green when it's valid. Green means "you may proceed."
- I ACCEPT (the big button) — Saves the signed agreement and continues to the home screen. If you press it and nothing happens, one of the two boxes doesn't match yet — re-check the spelling.
- I DO NOT ACCEPT (button below it) — Closes TORO entirely. You can't use the system until the agreement is signed, so this is only for someone who genuinely doesn't agree. Pressed it by accident? Just start TORO again and it will ask once more.
Why it's built this way: a license agreement is a legal promise between your shop and HellasBAE (the company that makes TORO). Typing the name and the words by hand — instead of just clicking one button — is what makes it a real, time-stamped electronic signature that holds up later.
2. Set Up AutoPay
What this step is for: keep a payment method on file so your monthly TORO invoice pays itself — no logging in, no missed payments. Have the store owner do this step, and grab a check first — you'll need the routing number and account number printed on it.
When you first launch TORO, it asks "Setup AutoPay?" — the easy path is to tap Yes. (You can also open it later from the home screen: tap HELP in the left sidebar, choose TORO Marketplace, then Set Up Auto Pay.) You'll need an internet connection, and only an Admin can set it up.
Do this:
- In the TORO Auto Pay window, click Create Auto Pay Account.
- Click Add Payment Method and choose ACH (that just means paying from your bank account). The owner signs a short authorization.
- A web browser window opens — this is TORO's secure payment processor, Paya, and it's where you type the routing and account numbers from your check, protected the same way your bank's own website is. Enter them and submit. (This browser window is expected — it's a normal part of setup, not a scam.)
- Come back to the TORO Auto Pay window and click Refresh. When your payment shows in green, you're set. (Still not green after a minute? Click Refresh once more, or close and reopen the window. If it still won't show your payment, reach out to your TORO rep.)
Your monthly TORO invoice will now pay itself automatically.
Good to know
Think of this window as a little vault that holds one payment method so your monthly TORO bill pays itself. It only ever shows a few buttons at a time — it hides the ones that don't apply yet, so it always shows you just the next step.
- Create Auto Pay Account — Step one, and it only shows until you've done it. It sets up your store's account with Paya, the secure payment company TORO uses to move the money. It doesn't ask for bank details yet — it just opens the account. Once created, this button disappears for good.
- Add Payment Method — After the account exists, this attaches how you'll pay. Click it and TORO asks "Which type?":
- ACH — Pays straight from your bank checking account using the routing and account numbers on a check. No fee. This is what almost every shop uses, and for most stores it's the only choice offered.
- CREDIT CARD (3% FEE) — Pays with a credit card, but the card networks add a 3% fee on every bill. This only appears for stores that arranged it; if you don't see it, that's normal.
- Pick ACH if you have a business checking account and want to avoid fees (nearly everyone). Only pick Credit Card if you've arranged it and are fine paying 3% extra.
- The web browser window — When you add a method, TORO hands you to a secure Paya web page to actually type your bank or card numbers. This is on purpose — TORO never stores those digits itself. A browser opening here is expected, not a scam.
- Refresh — After you finish in the browser and come back, this pulls the new method in. When it shows in green, you're done. Still not green after a minute? Click Refresh again, or close and reopen.
- Close — Leaves the window; your saved method stays on file.
How the billing dates work: TORO generates your invoice on the 1st of each month, and AutoPay charges your method on the 10th. So you always see the bill before it's paid.
First-timer gotchas: grab a physical check before you start ACH (you need the routing and account numbers on it); only an Admin can set this up; and green = good — if it never turns green, the browser step didn't finish, so try Add Payment Method again.
Before You Begin — Getting to the Setup Screen
Most of the steps below live in one window, so it's worth learning the way there once.
- On any register, look at the left sidebar on the home screen and tap the Admin button (the bar-chart icon). A small menu pops up — tap Dashboard.
- The Dashboard opens. Along the left is a column of tabs (the buttons stacked down the left edge). Click TORO Configuration.
- Click the Set Up System card. A window opens with "Setup" at the top. Throughout this guide we'll call it the Setup window.
The Setup window works just like the Dashboard: down the left side is a column of tabs — Setup, Store, Printers, Communications, Employee Tasks, and Import Tools. Click a tab, and its buttons (we call them tiles) appear on the right. So every step below tells you two things: which tab to click on the left, then which tile to click on the right.
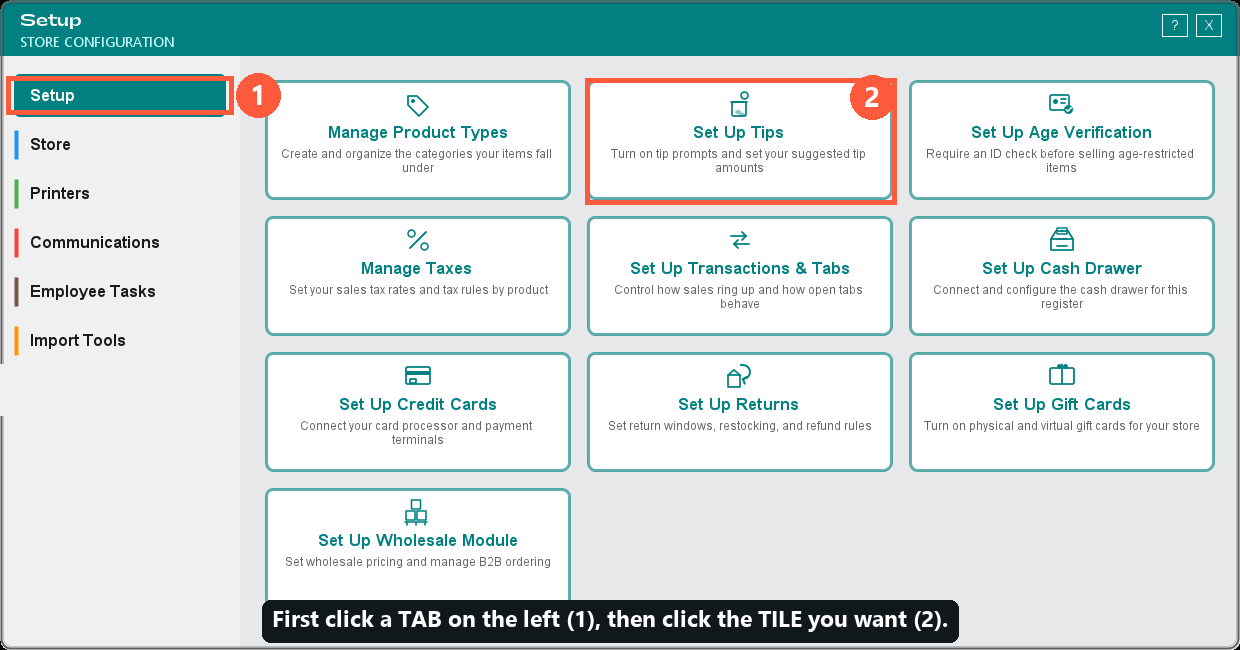
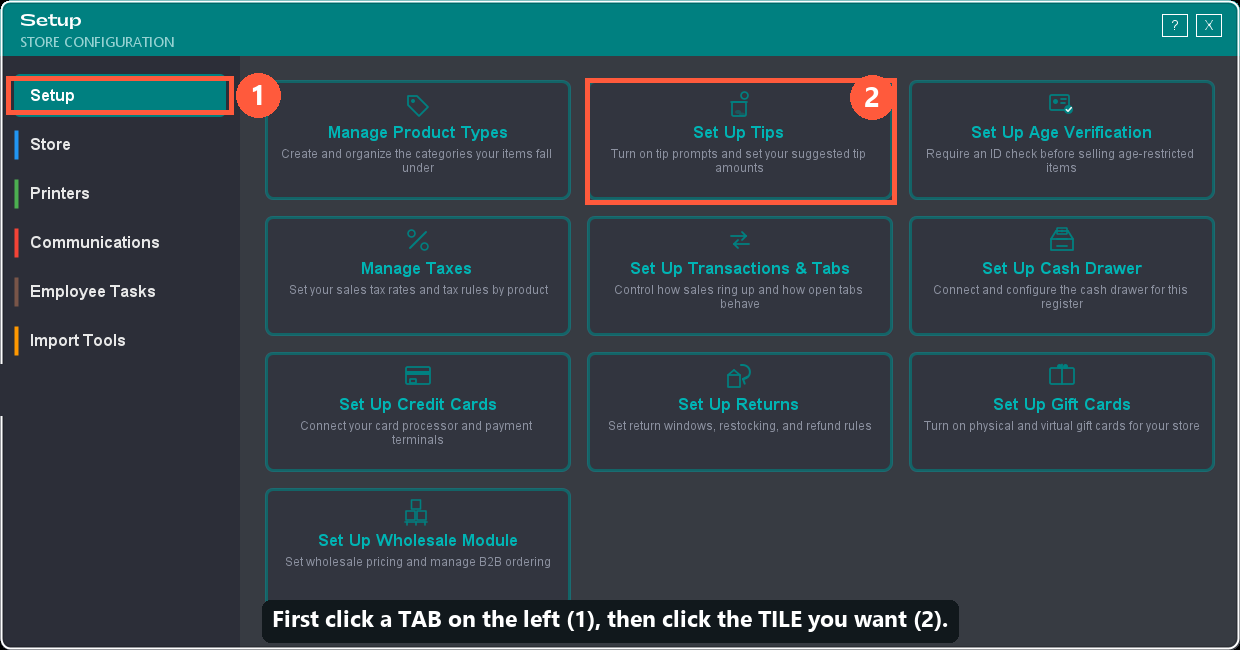
A few steps happen outside this window — at startup, on other Dashboard tabs, through the HELP button in the home-screen sidebar, or on our website — and each of those says so.
3. Set Up Store Hours
Get to the Setup window: Admin → Dashboard → TORO Configuration → Set Up System — need help finding it?
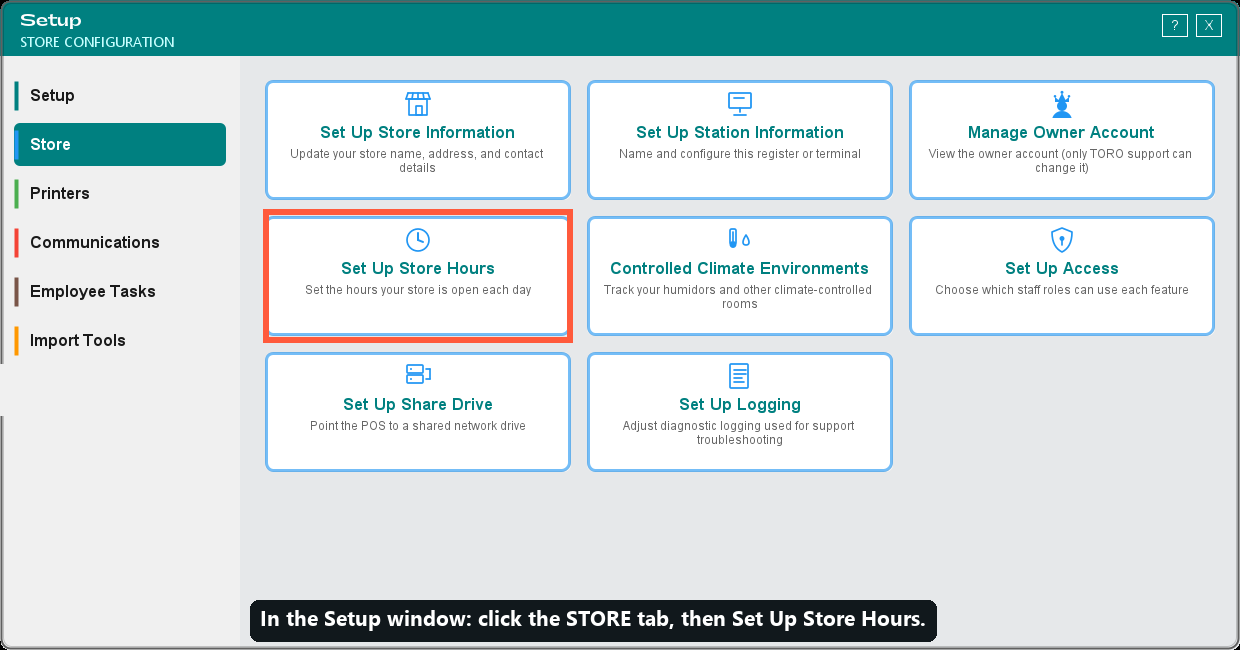
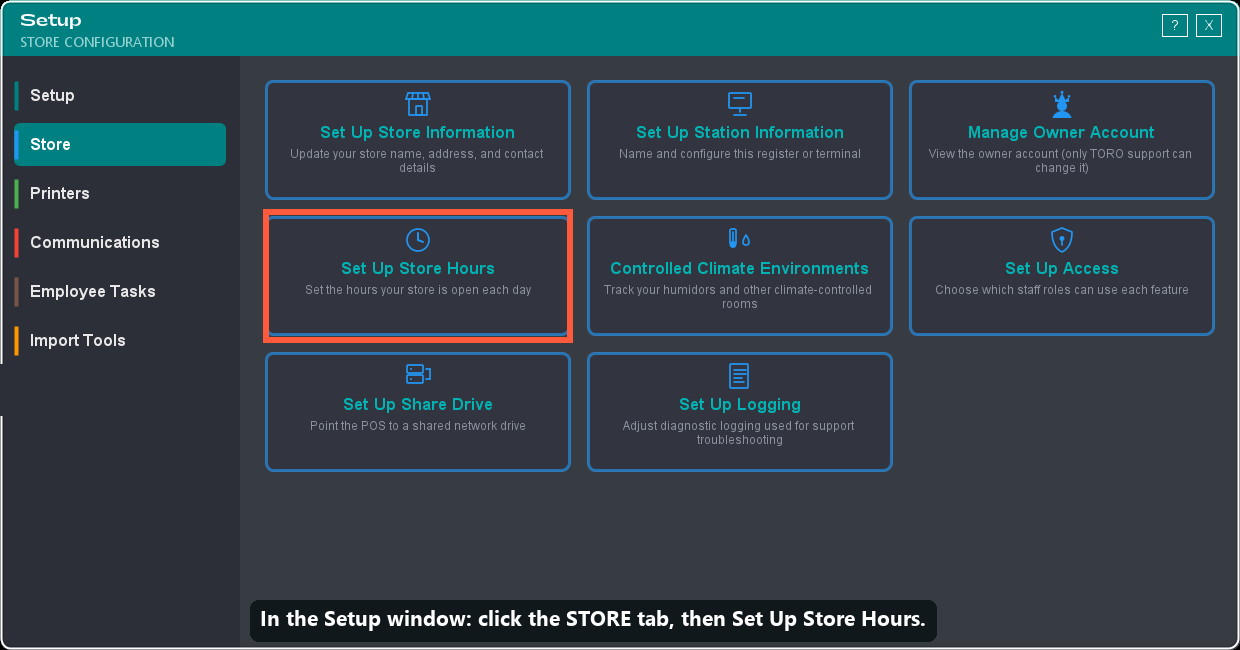
What this step is for: set your weekly open and close times. TORO uses them on your public website, your live customer banner, and your reports — so they're worth getting right.
Do this:
- Open the Setup window and click the Store tab on the left.
- Click the Set Up Store Hours tile.
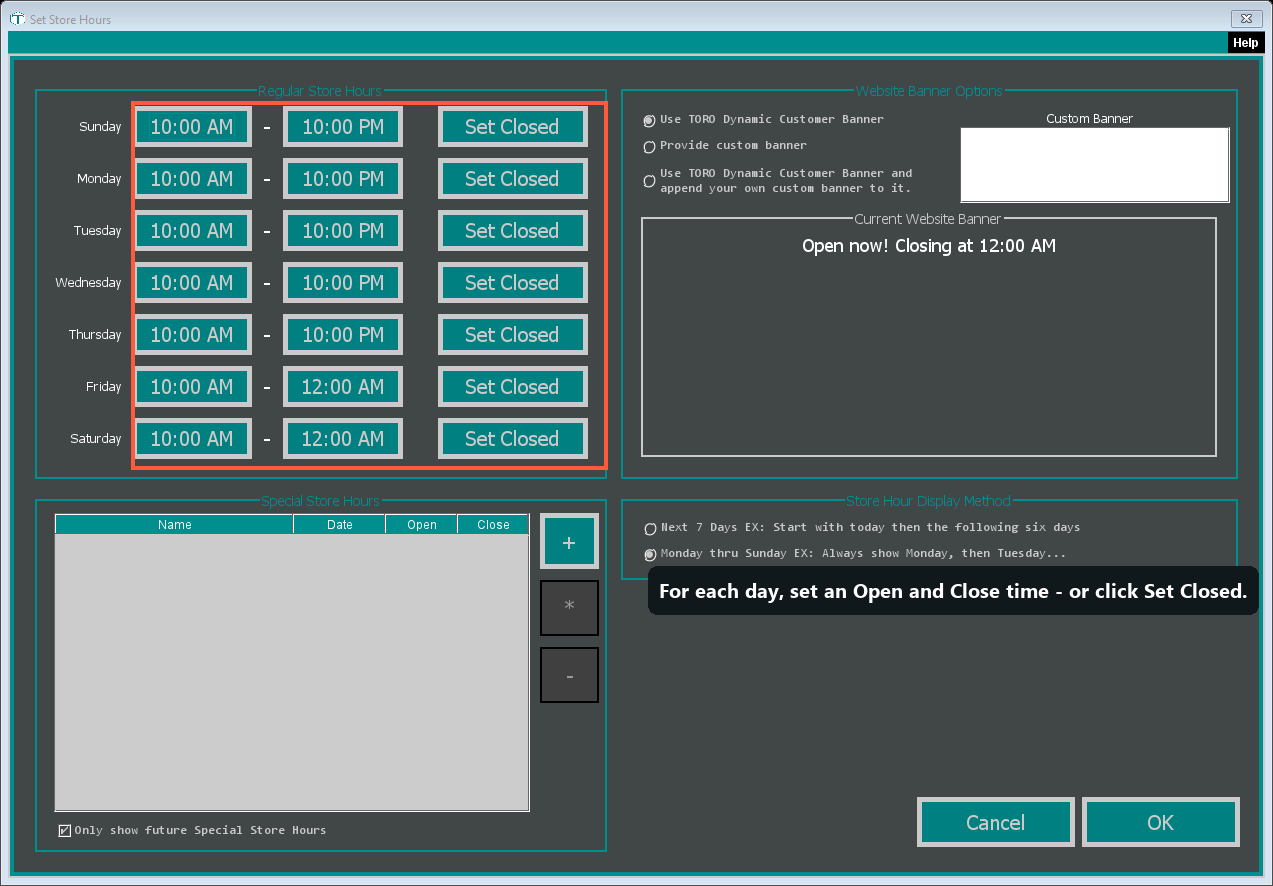
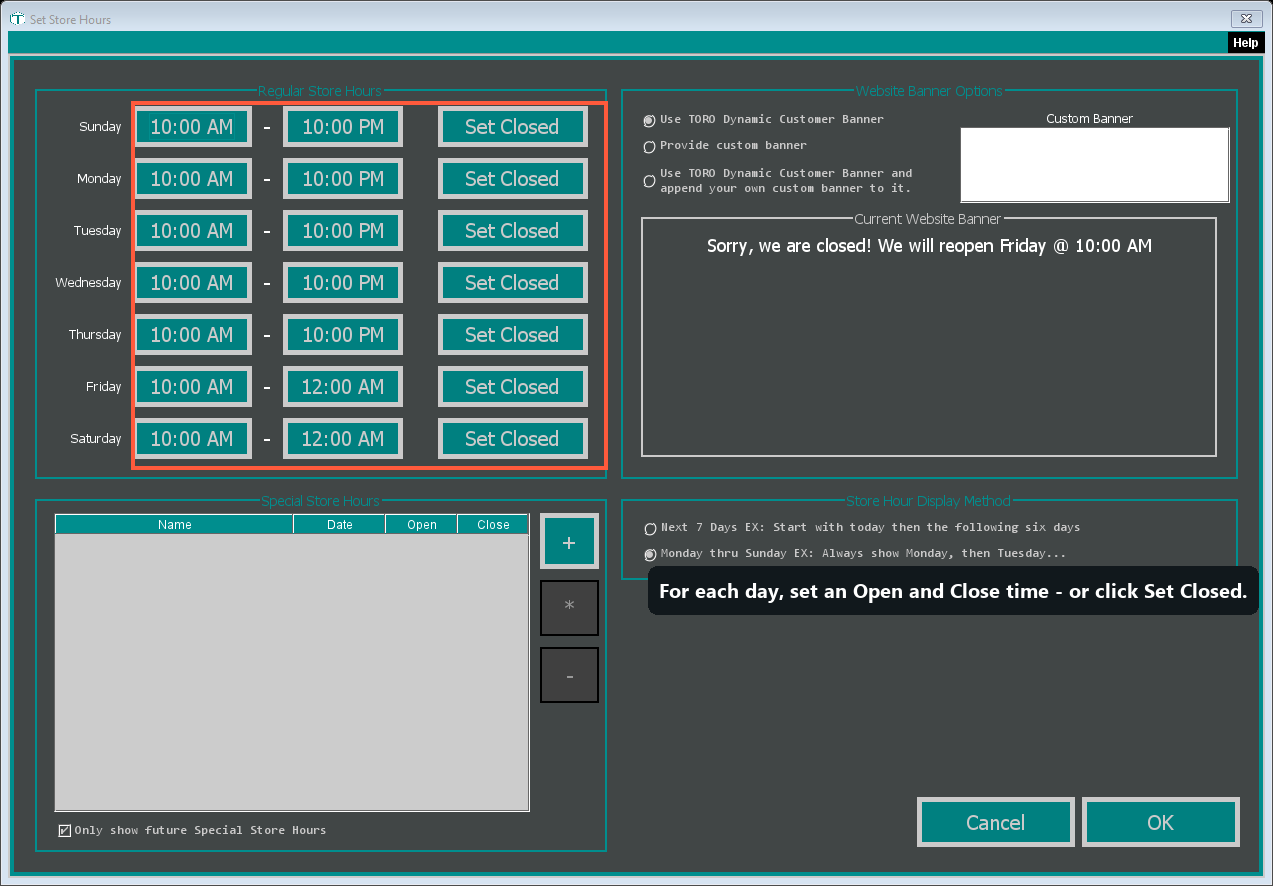
- For each day, click the Open and Close buttons and pick your times (in 15-minute steps), or click Set Closed for days you're not open. Overnight hours are fine — a close time earlier than the open time simply rolls into the next morning.
- Click OK to save. (No hours yet? You can skip for now — every day reads "CLOSED" until you set them — so come back when you know them. Closing the window sends your hours to your website.)
Other Features of This Window
You don't have to touch any of these to open — but here's what else this window can do, matched to the numbers on the picture:
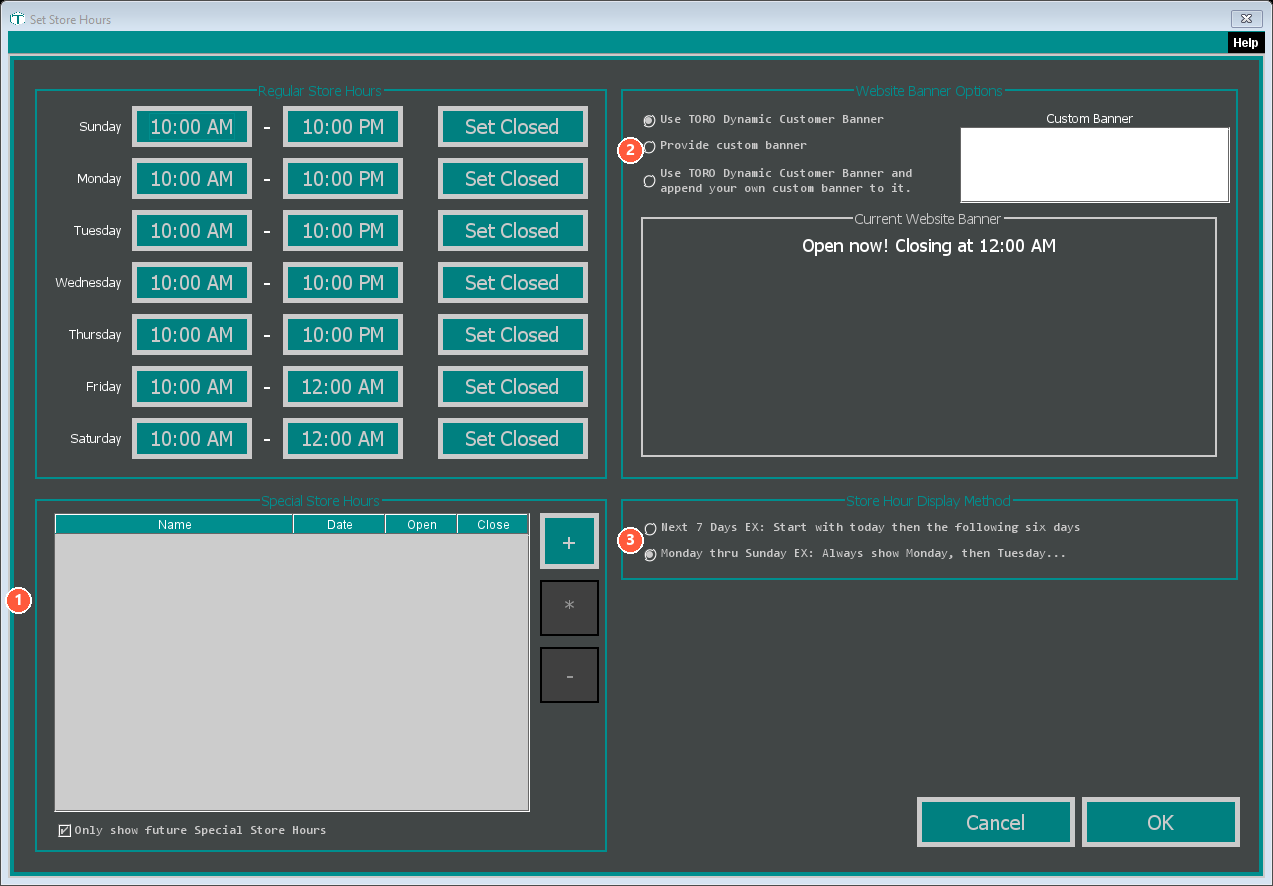
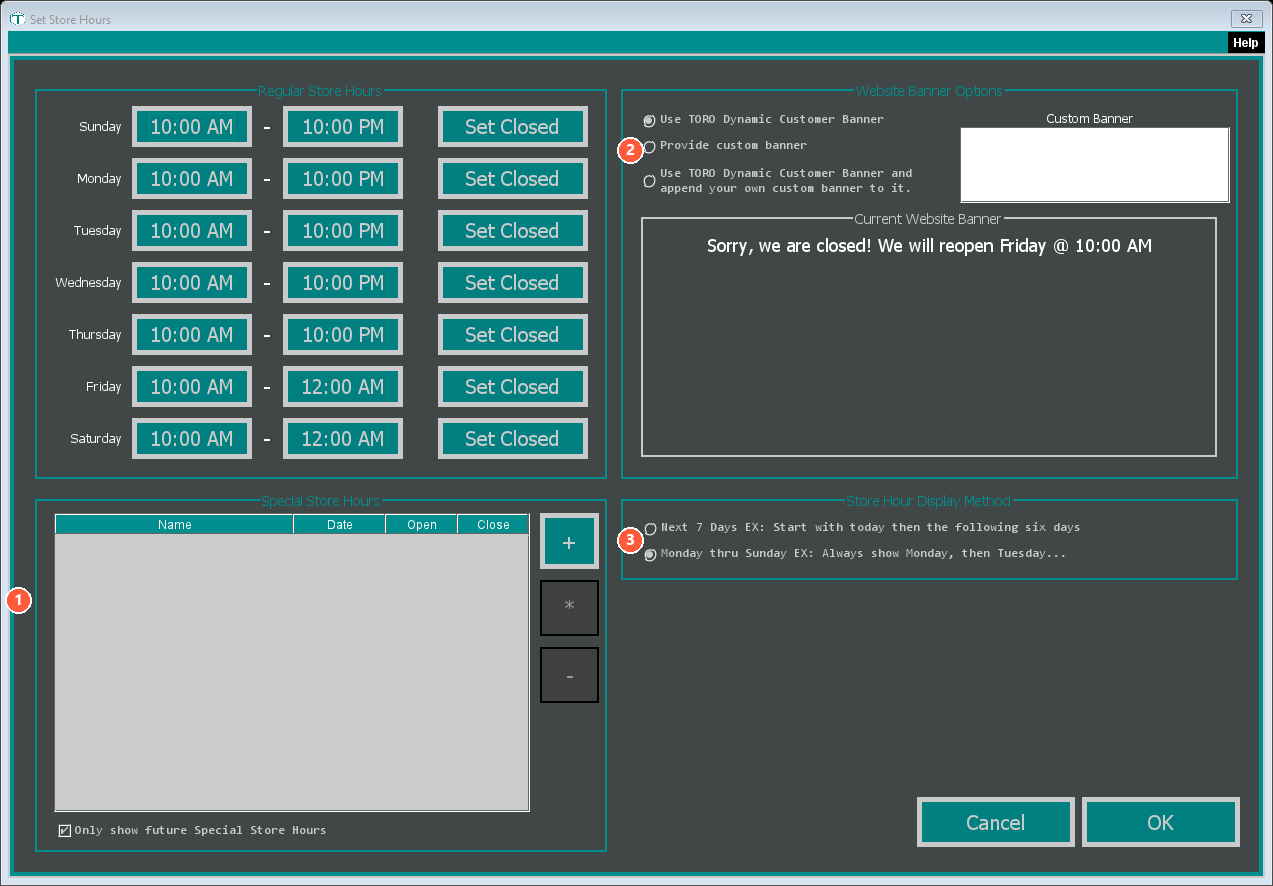
- Special Store Hours (bottom-left) — one-off exceptions: holidays, a half-day for inventory, an early close for an event. + adds one, * edits the selected row, – deletes it; these override your weekly hours just for those dates. Only show future Special Store Hours (checked) hides holidays that already passed. Use it whenever a day differs from your normal week.
- Website Banner Options (top-right) — the message strip on your public website. Use TORO Dynamic Customer Banner (default) — TORO writes and updates it for you ("Open until 8:00 PM today"). Provide custom banner — you type your own and only that shows (good for "Now serving espresso!"). Use dynamic + append your own — TORO's live hours line PLUS your note. Whatever you pick shows live in the Current Website Banner preview.
- Store Hour Display Method (bottom-right) — the order your website lists the week. Monday thru Sunday (default) is fixed calendar order, like a printed sign, and shows no dates — the list reads the same every day. Next 7 Days always starts with today and shows the date beside each day — pick that if you want visitors to see "today and what's coming." If your website's hours table has a date column that suddenly looks empty, you're on Monday thru Sunday — that's the setting, not a fault.
- Publish Hours To Your Website (bottom-right, below the display method) — this is where you tell TORO which website to send your hours to. The line at the top says either "Your hours are sent to yourstore.com" or "Your hours are not being sent to a website", so you can tell at a glance whether anything is going out. Click Website Settings to enter your website address and your WordPress username and application password, then press Send Hours Now — TORO sends your hours straight away and tells you whether it worked, so you never have to wonder. You only do this once.
Finish with OK — it saves your edits and sends your hours to your website. (Overnight hours like a 2:00 AM close are fine; TORO knows they roll into the next morning.)
Sent your hours but the website still shows the old ones? Nine times out of ten your website is showing a saved copy of the page rather than the live one. Add
?x=1to the end of your web address (for exampleyourstore.com/?x=1) — if the hours are right there, your hours went through fine and your website just needs its cache cleared. Your web person can do it in a few seconds. Your front page is usually the last one to catch up.
4. Set Up Controlled Climate Environments
Get to the Setup window: Admin → Dashboard → TORO Configuration → Set Up System — need help finding it?
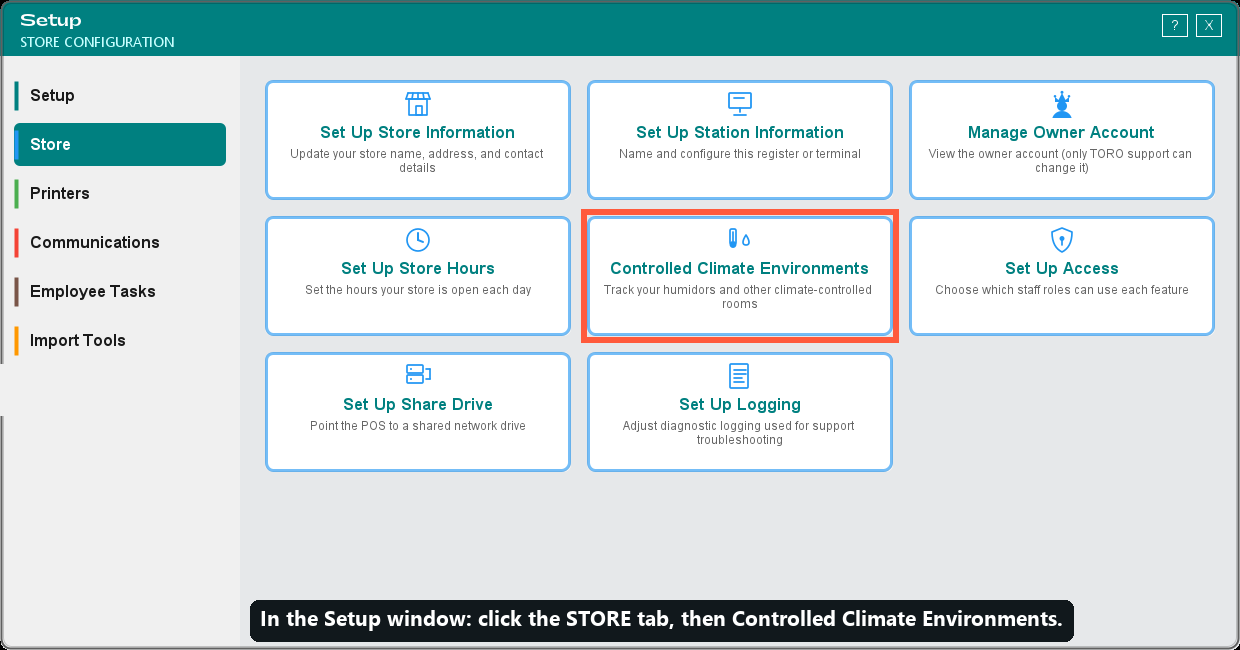
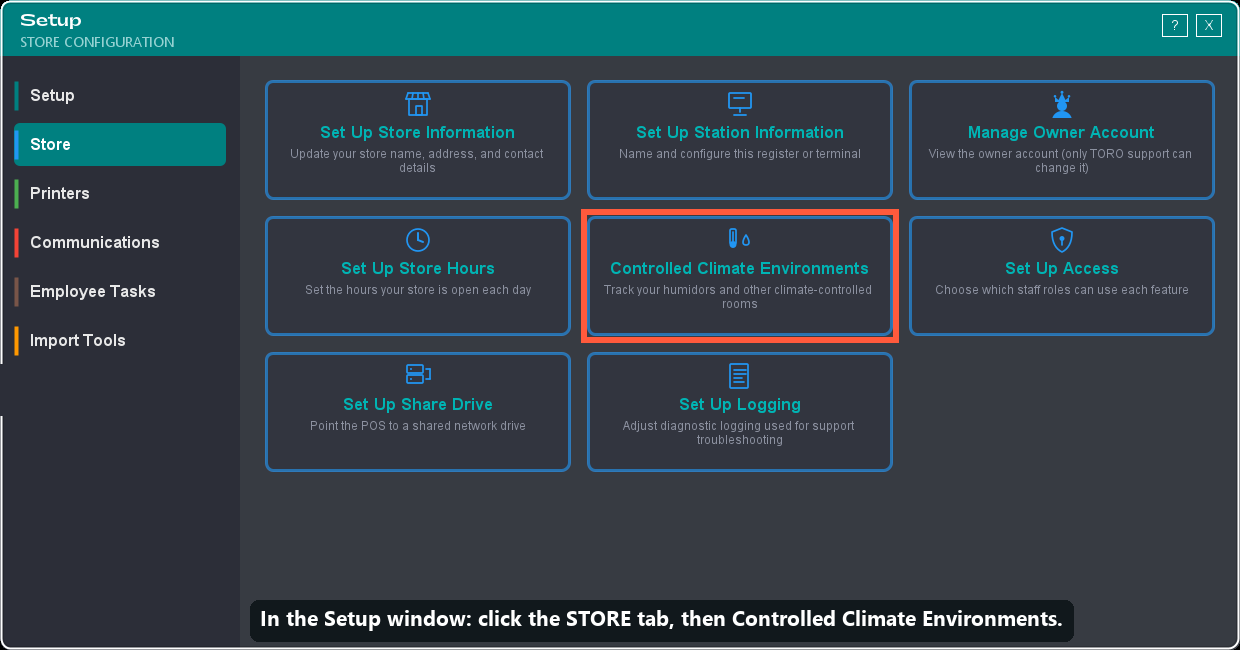
What this step is for: (optional) keep an eye on your humidors. Once you set one up here, your employees are prompted to jot down the temperature and humidity each day when they open and close the cash drawer. You can pull reports on those readings anytime, and they show up in TORO Insight (our app for when you're away from the store).
Do this:
- Open the Setup window and click the Store tab.
- Click the Controlled Climate Environments tile.
- Click the + button to add a humidor or climate-controlled room.
- Give it a Name and Description, check Capture Humidity and set a good Minimum/Maximum range (and Capture Temperature with its range if you want temperature tracked too), and write a short Warning Directions note for staff. Save.
- Repeat for each space you want to track.
A few things to know: the daily prompt only appears on your main register, and only once you've added at least one active environment (that's what makes it optional — add none, and nobody's prompted). Humidity is always asked; temperature is only asked if you checked Capture Temperature. (This built-in daily check is separate from the paid SensorPush sensor add-on, which reads your humidor automatically.)
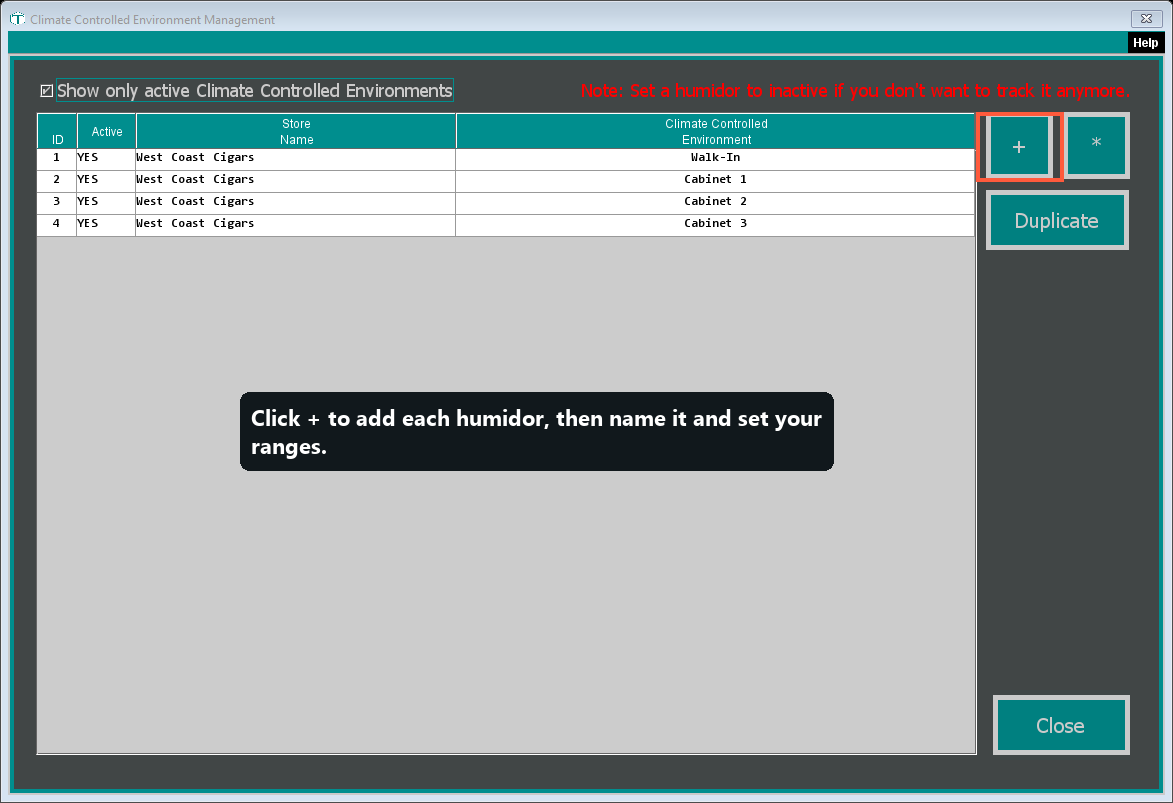
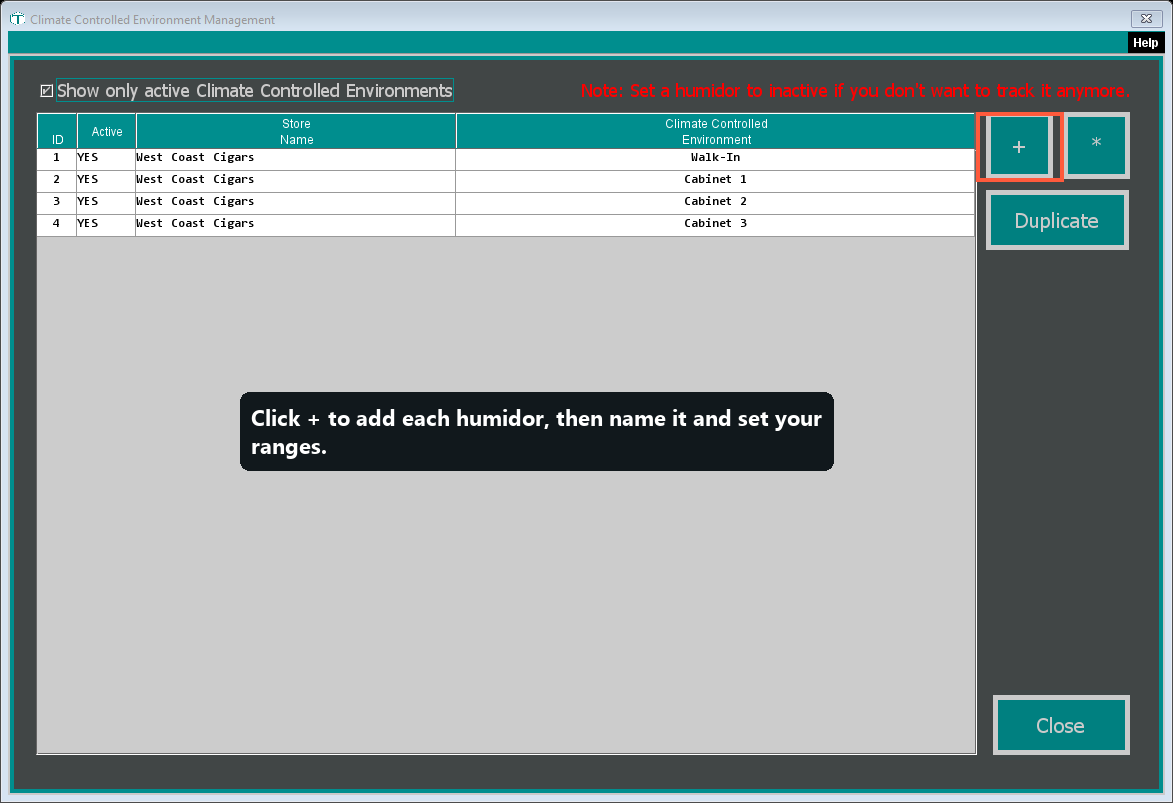
Other Features of This Window
This happens in two windows: the list of your humidors, and the Editor (opened by +) where you fill in one humidor's details.
The list window: Show only active… (checked by default — hides retired humidors); + adds a new one; * edits the selected one (double-clicking a row works too); Duplicate copies the selected humidor so you can just rename it (handy if you have several similar ones); Close closes the list (already saved).
The editor — the real settings:
- Climate Controlled Environment Name (labeled in full on screen) — Plain words for the space: "Walk-In Humidor," "Front Display Case." This is what staff see on the daily prompt, so make it obvious. Required.
- Active Climate Controlled Environment (checked by default) — Checked = staff get prompted for this space daily. Retiring a humidor? Don't delete it — uncheck this so it drops off the prompt but its old readings stay in your reports.
- Capture Humidity (checked by default) — Checked = staff are asked the humidity reading each day. Set the Minimum (starts 62) and Maximum (starts 72) — a normal cigar range. Uncheck it and TORO stops asking.
- Capture Temperature (checked by default) — Same for temperature, with its own Min/Max (also 62 / 72). Uncheck it to ask only about humidity.
- Warning Directions boxes — Short instructions for staff, in your words, for when a reading is too low or too high ("Crack the door 10 minutes and re-check"). This hands your know-how to a new employee automatically.
- Only send SMS if out of Min & Max Ranges (checked by default) — Checked = TORO only texts a warning when a reading falls outside your range, so you're only pinged when something's wrong.
- Description — A longer note about the space. Required.
- Save / Cancel — Set a Maximum below the Minimum and TORO turns the box red until you fix the typo.
5. Import Customers & Virtual Gift Cards
Get to the Setup window: Admin → Dashboard → TORO Configuration → Set Up System — need help finding it?
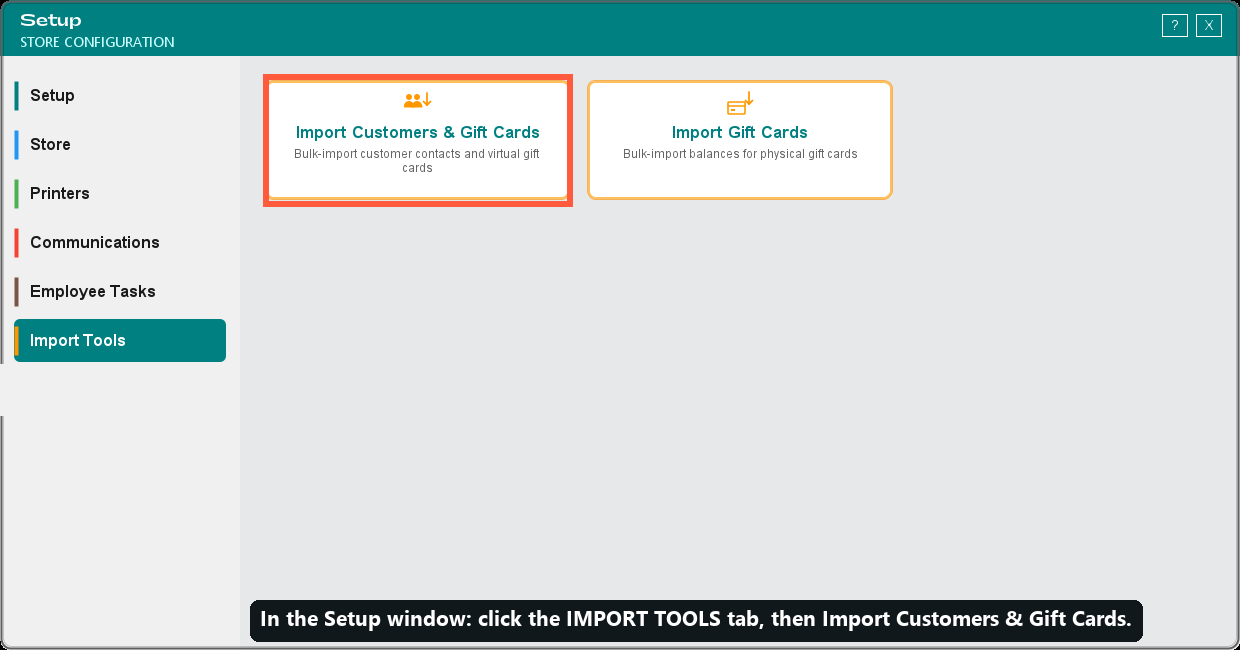
What this step is for: (only if you're switching from another system) bring your existing customers — and any store-credit (virtual gift card) balances — into TORO in one pass, from a spreadsheet. Not switching? Skip this step. This one is more involved than the others; if it feels fiddly, your TORO rep can do it with you over the phone.
Do this on your main register. The importer only opens on the main station.
Do this:
- Prepare a CSV file (a simple spreadsheet, like one saved from Excel) with any of these columns: First Name (required), Last Name, Date of Birth, Email, Phone Number (required), Rewards Points, Virtual Gift Card Balance. First and last name must be in separate columns. Every row needs both a First Name and a Phone Number or it won't import.
- Phone Number must come out to 10 digits. Parentheses, spaces, and dashes are fine — for example
(913) 271-0372— TORO strips the formatting. - Date of Birth goes in
MM/DD/YYYYformat (for example07/04/1985).
- Phone Number must come out to 10 digits. Parentheses, spaces, and dashes are fine — for example
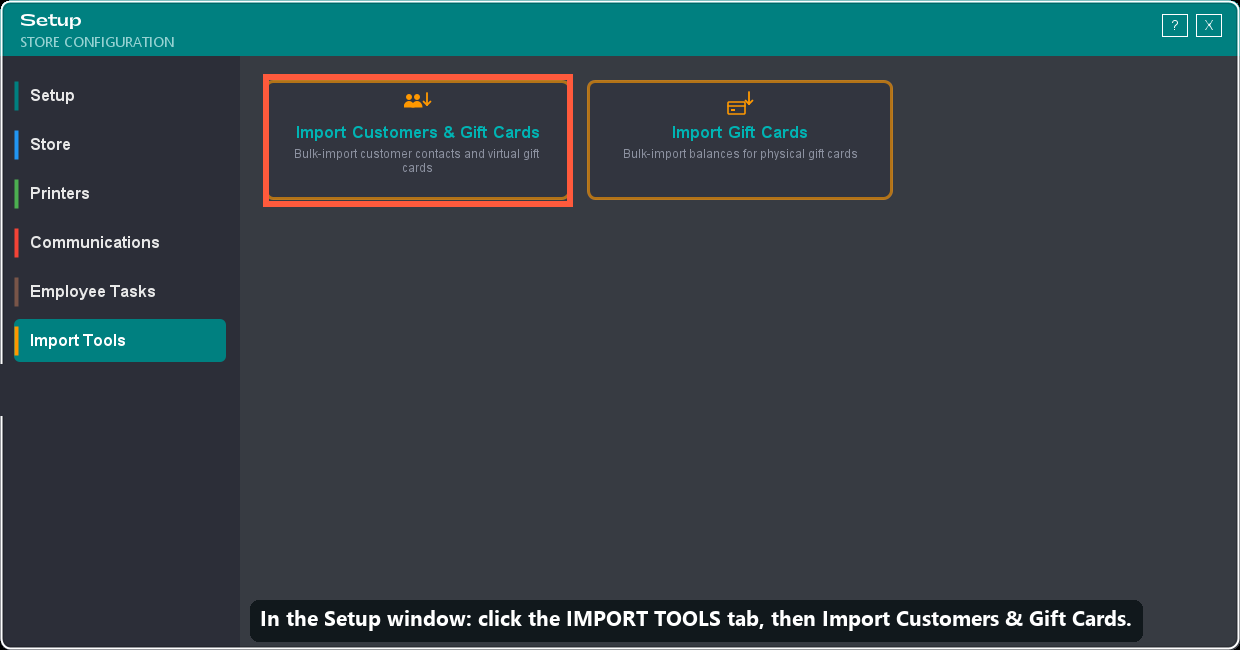
- Open the Setup window, click the Import Tools tab, and click the Import Customers & Gift Cards tile.
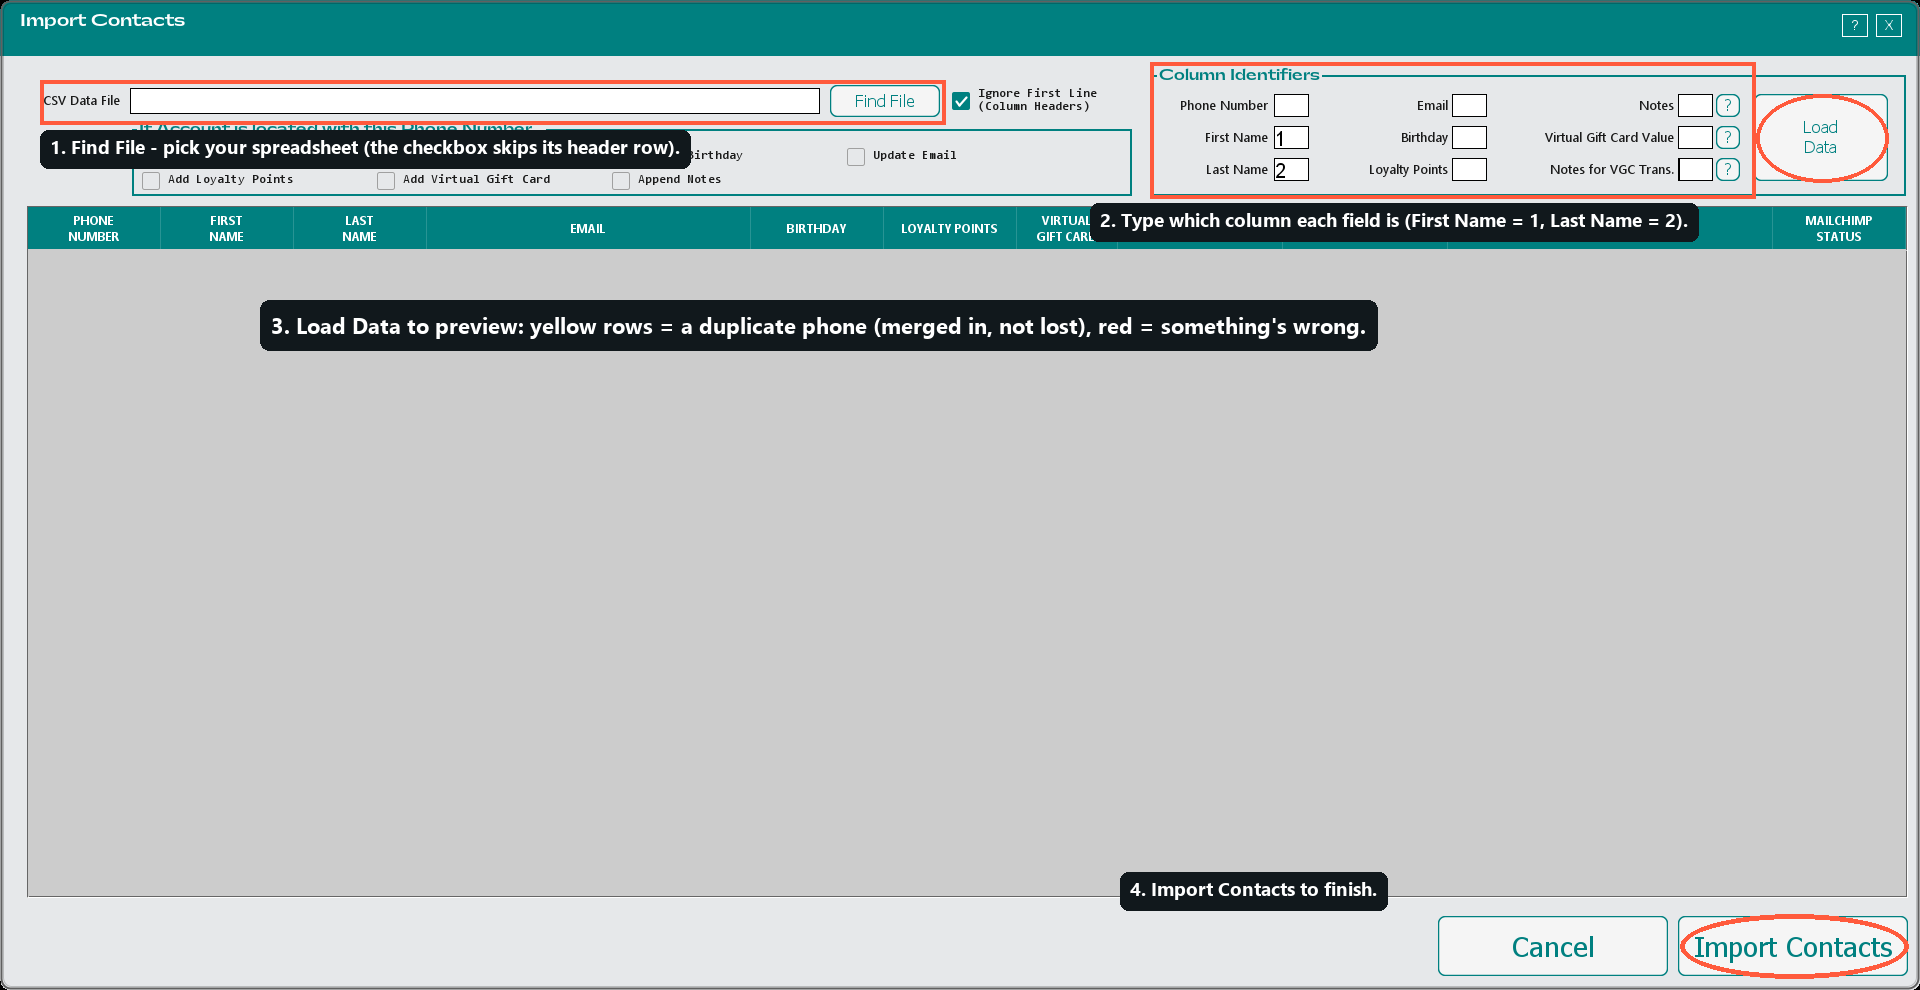
- Click Find File and choose your CSV. If your first row is column headings, check Ignore First Line (Column Headers).
- In the Column Identifiers box, type the column number for each field — the first column in your file is 1, the second is 2, and so on. For example, if phone numbers are in the first column, type 1 next to Phone Number. (You match by column number, not by the heading name.)
- Click Load Data and look at the preview: make sure names line up under Name and phone numbers under Phone. If they're in the wrong spots, your column numbers are off — fix them and click Reload Data. Rows in yellow are extra copies of a phone number that already appears on another row — since a phone number can only belong to one customer, TORO merges them into the most complete row (filling in any details the copies have) and skips the yellow ones, so nothing is lost. The kept row's Status column tells you what got merged in. Red means a required field is missing. (This step is the fiddly one — if it feels like too much, stop and let your TORO rep do it with you over the phone.)
- If you're bringing over gift-card balances, check Add Virtual Gift Card (in the "If Account is located with this Phone Number…" box). This is the one switch that turns balance-loading on.
- Click Import Contacts.
A heads-up on gift-card balances: loading them puts real store credit on each account (recorded as a Store Comp), so TORO shows a confirmation first. Only run that part when the numbers are right — it can't be undone from this screen.
Other Features of This Window
This window has three jobs: pick your file, tell TORO which column is which, and decide what to do when a customer is already in TORO.
Find File — Browse to your .csv spreadsheet (saved from Excel or Google Sheets). "Ignore First Line (Column Headers)" is checked by default — it skips the top row of titles that most exported files have. Leave it checked unless row one is already a real customer.
Column Identifiers — the little number boxes — The part people misread. You're not typing customer data here — you're telling TORO which column number holds each piece of info. The first column in your file is 1, the second is 2, and so on. So if phone numbers sit in the third column, type 3 in the Phone Number box. Boxes: Phone Number (each customer's unique fingerprint — practically required), First Name (pre-filled 1, required), Last Name (pre-filled 2), Email, Birthday, Loyalty Points, Virtual Gift Card Value, Notes, Notes for VGC Trans. Leave a box blank if your file lacks that column. The little ? buttons explain a column if you're unsure.
Load Data / Reload Data — Reads your file with the numbers you entered and fills the preview. Your safety check: click it, then look at the table. Names under Phone means your numbers are off — fix and reload. Yellow rows = extra copies of a phone number found on another row; TORO merges them into the most complete row (a phone number can only belong to one customer) and skips the yellow copies, so no data is lost — the kept row's Status column shows what was merged in. Red = a required field is missing.
"If Account is located with this Phone Number…" panel (seven checkboxes) — Read slowly. These only affect customers already in TORO (matched by phone). A brand-new customer always comes in complete. But for someone TORO already has, you decide what your spreadsheet may change:
- Update First Name / Last Name / Birthday / Email — check to let your file overwrite the existing customer. Leave unchecked if your spreadsheet might be older/messier (protects good info you already have); check if your spreadsheet is the fresher source.
- Add Loyalty Points — adds the file's points to their balance.
- Add Virtual Gift Card — the master on/off switch for loading store-credit balances. Even with the value column filled, nothing loads unless this is checked. TORO double-checks first. Check it only when you truly mean to load balances — real money, can't be undone from this screen.
- Append Notes — tacks your file's notes onto theirs (adds, doesn't erase).
All seven start unchecked — the safe default. Nothing is written until you click Import Contacts.
6. Set Up Receipts
Get to the Setup window: Admin → Dashboard → TORO Configuration → Set Up System — need help finding it?
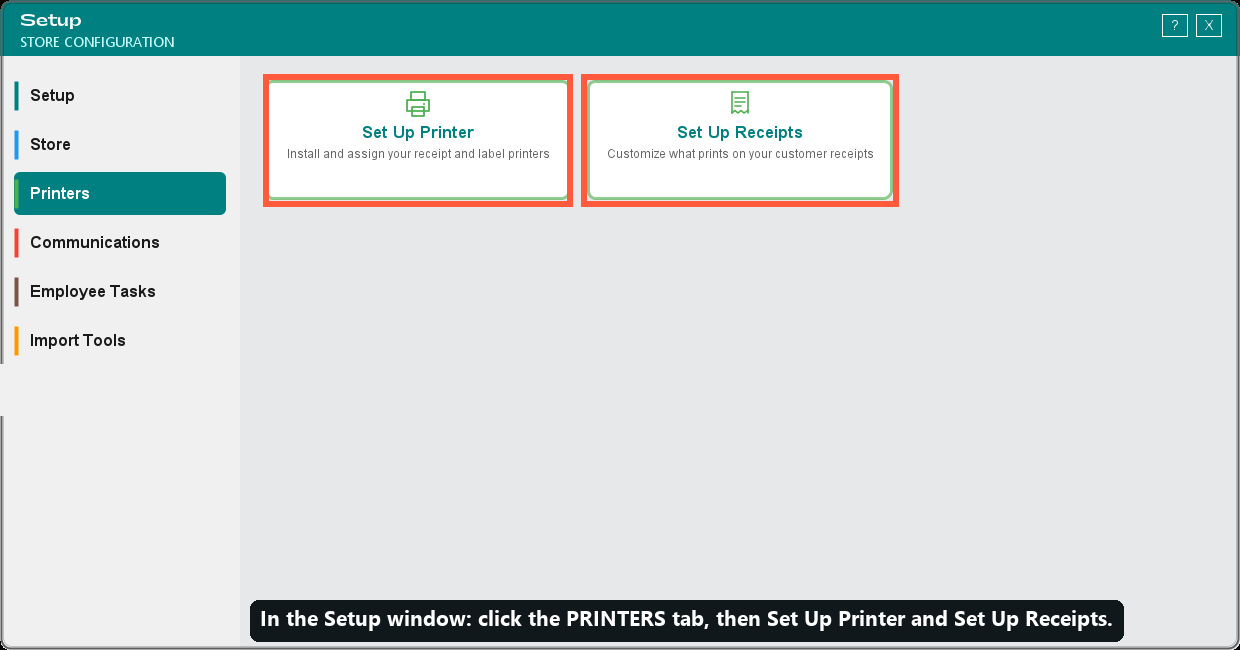
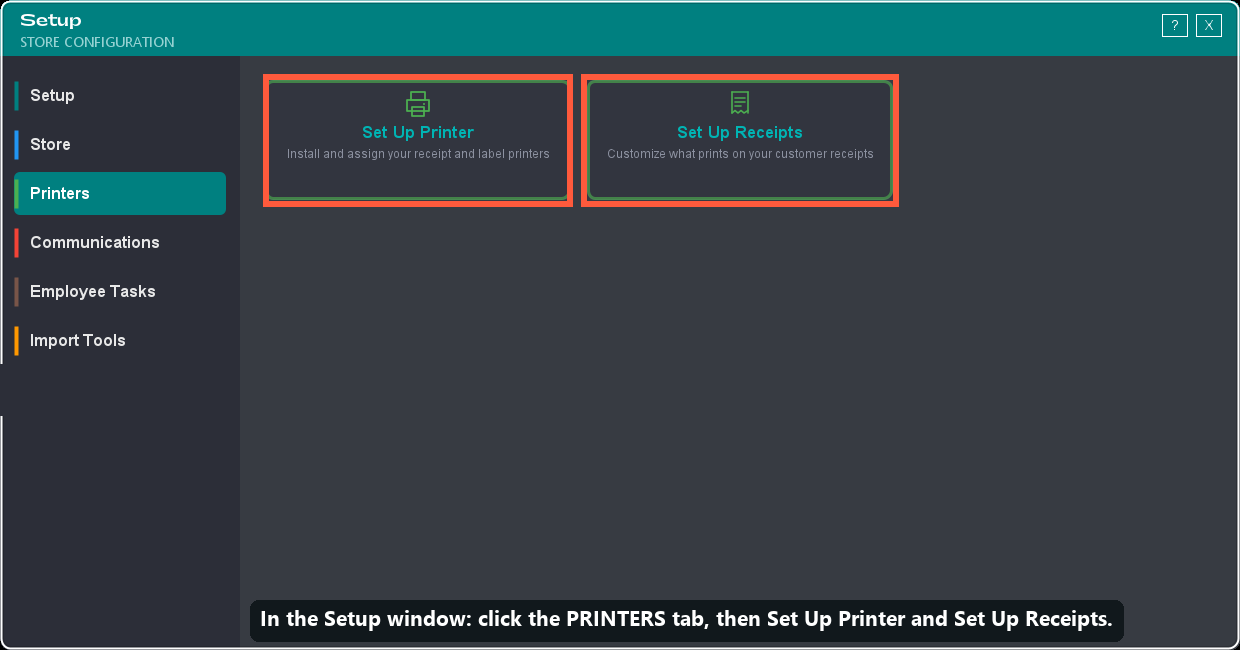
What this step is for: point TORO at your receipt printer, then decide what prints on the receipt.
Do this:
- Open the Setup window and click the Printers tab.
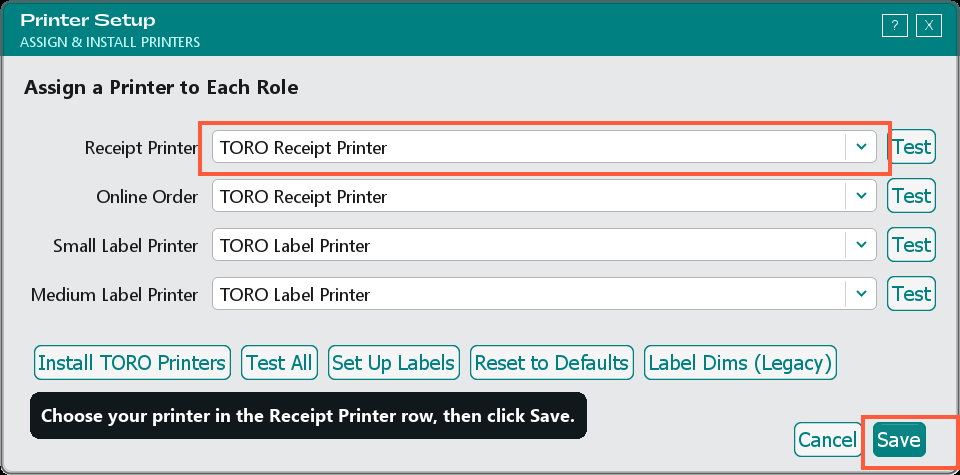
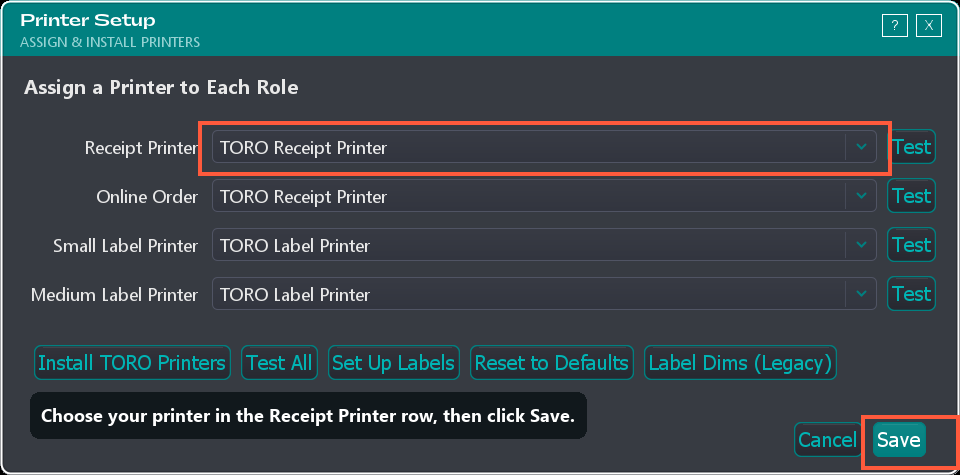
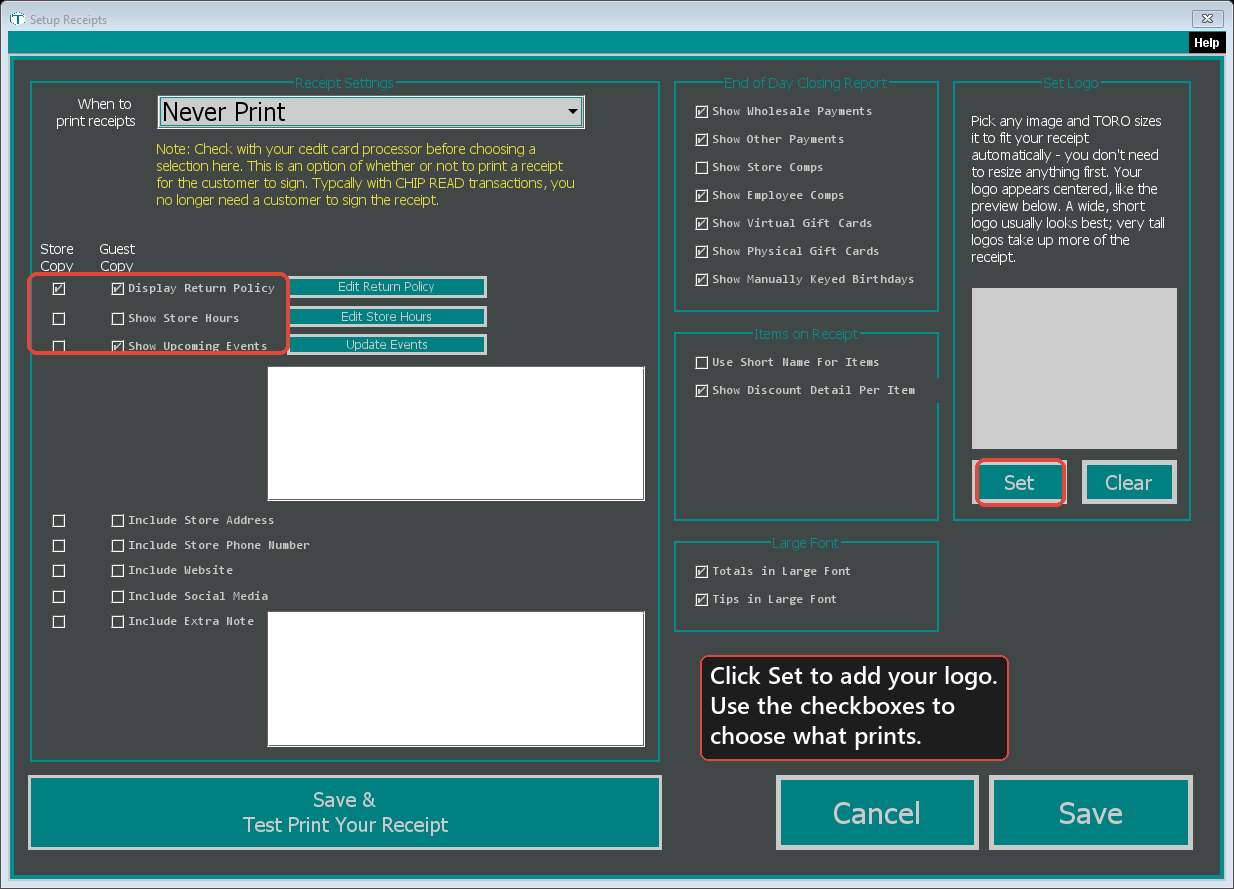
- Click the Set Up Printer tile. In the Receipt Printer dropdown (a list that opens when you click it), choose your printer — click Test to print a test if you like — then click Save. (Don't see your printer? Click Install TORO Printers first.)
- Back on the Printers tab, click the Set Up Receipts tile.
- To add your logo, look in the Set Logo box and click Set, then pick your logo image. TORO automatically sizes it to fit — any PNG or JPG works, no resizing needed.
- Use the Store Copy / Guest Copy checkboxes to choose what prints — your address, phone, website, social media, store hours, upcoming events, a return policy, and an extra note.
- Click Save, then Save & Test Print Your Receipt (TORO asks whether you want a Store Copy or Guest Copy).
Other Features of This Window
Step 6 is two windows: Set Up Printer (which physical printer does which job) and Set Up Receipts (what prints on the paper).
Set Up Printer — one row per job: a name, a dropdown (the printers your computer sees), and a Test button. You're saying "for this job, use that printer."
- Receipt Printer — the little printer for customer receipts. Every shop needs this; TORO fills it in for you when blank, so most never touch it.
- Online Order — where a website order ticket prints. Most shops point it at the same receipt printer.
- Small Label Printer / Medium Label Printer — the barcode price stickers and the larger box labels. Most shops use the same label printer for both.
- Test (per row) — prints a tiny "this is the printer" page so you can walk over and confirm the right machine woke up.
- Install TORO Printers — the "set it all up for me" button. Click it if the dropdowns look empty or you just unboxed new hardware — it installs drivers, names the printers, and fills every row. Windows will ask permission — click Yes. Needs internet.
- Test All prints to every printer; Set Up Labels sets the physical label size (only if labels print off-center); Reset to Defaults undoes your fiddling; Save keeps your choices — these are saved for this one register, so set up each register at its own screen.
Set Up Receipts — what prints, matched to the numbers on the picture:
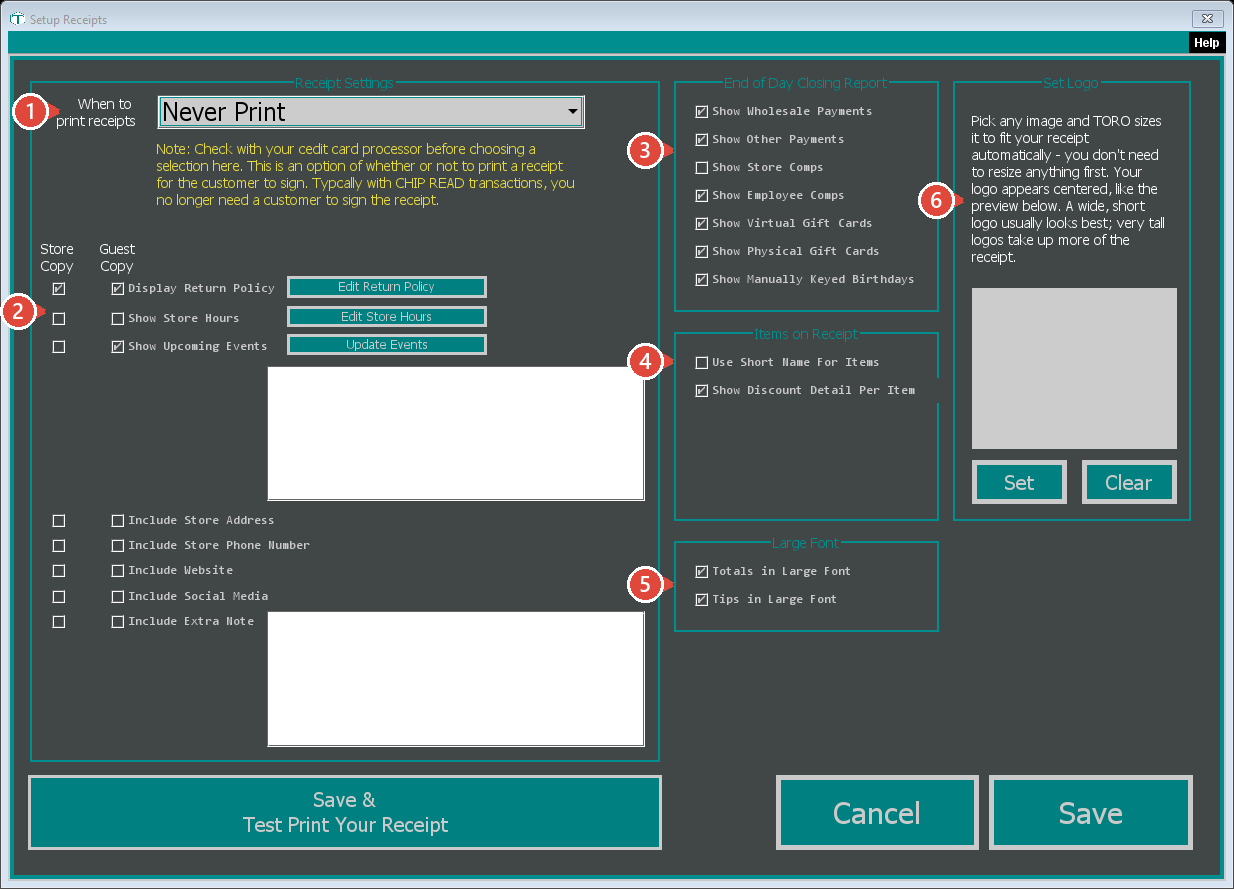
- When to print receipts (dropdown) — whether a signature copy prints on card sales. Always Print (default, the safe pick), Only Print When Bank Requests (saves paper on chip/tap — only pick this if your processor confirmed it), or Never Print. When in doubt, leave it on Always Print.
- Store Copy / Guest Copy checkboxes — most footer items have two boxes: the copy you keep and the copy the customer takes, so you can print your return policy on the customer's copy but skip it on your own. Turn on/off: Return Policy (default on; Edit Return Policy sets the text), Store Hours, Upcoming Events, Store Address, Store Phone Number, Website, Social Media, Extra Note. Leave these on for the Guest Copy — customers walk out with your hours, address, and policy, which is free marketing. These save the instant you click them.
- End of Day Closing Report — what shows on your nightly close-out summary. Most are on by default; Show Store Comps (free give-aways) is off by default to keep it short — turn it on if you want a nightly tally.
- Items & Taxes on Receipt — three switches for how item and tax lines print.
- Use Short Name For Items (default off) — prints each item's short name (capped at 18 characters) instead of its full one, so long names don't wrap and eat paper. Out of the box TORO prints the full name; turn this on if your receipts are wrapping. The sale screen has its own separate setting for the same thing — see Setting Up Your Receipt for both.
- Show Discount Detail Per Item (default on) — each discounted item prints its original price and exactly what came off, with any coupon or member discount listed under it. Turn it off to print just the final price per item and keep the breakdown to the summary at the bottom.
- Combine All Taxes Into One Line (default off) — prints a single Total Tax row instead of one row per tax. Handy where a city stacks its own sales or tobacco tax on top of the state's. The amount is unchanged and your sales tax reports still break out every jurisdiction — see Setting Up Your Receipt before you turn it on.
- Large Font (default on) — Totals in Large Font prints the Pay Cash / Pay Credit lines and Total Savings bigger. Worth leaving on — these are the lines customers squint at. The suggested-tip table has its own size setting (Normal / Large / Extra Large) in Set Up Tips — see step 10.
- Set Logo — Set picks your logo; TORO auto-shrinks it to fit, so you don't resize anything first (a wide, short logo looks best). Clear removes it.
Save keeps the logo, extra note, and print choice; Save & Test Print Your Receipt also prints a sample (it asks Store or Guest copy first).
7. Set Up Store Email
Get to the Setup window: Admin → Dashboard → TORO Configuration → Set Up System — need help finding it?
What this step is for: give TORO an email account to send from. Your nightly reports, the purchase orders you send to manufacturers, and receipts you email to customers all go out from it.
Do this:
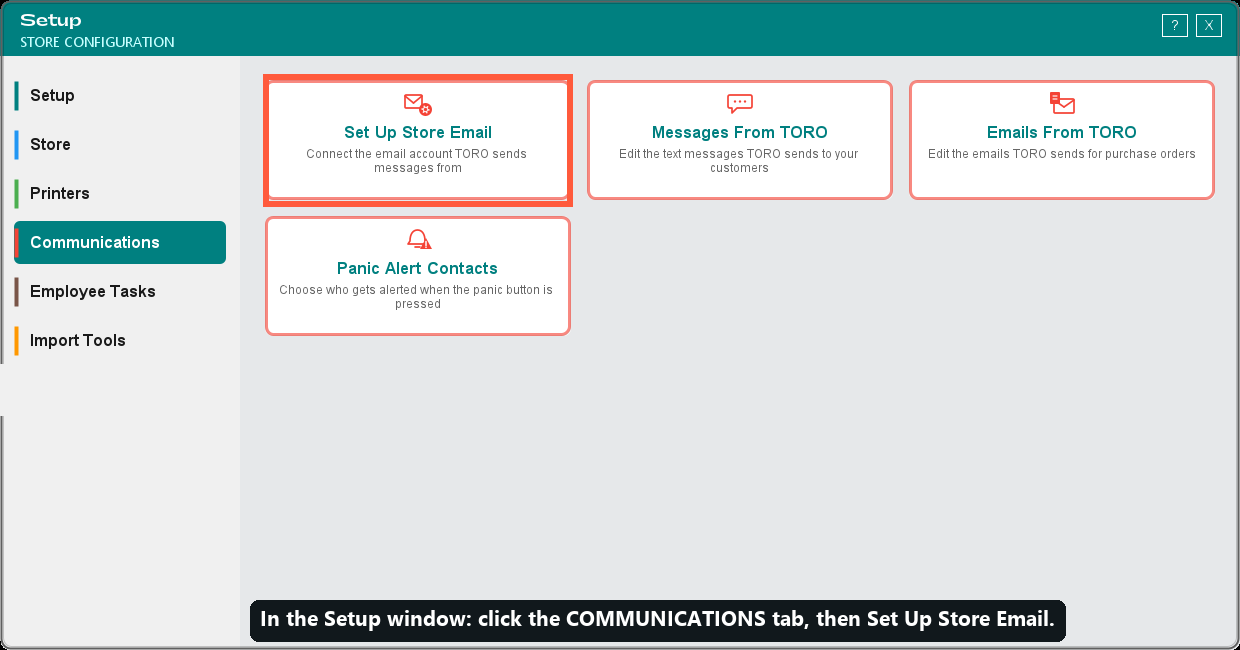
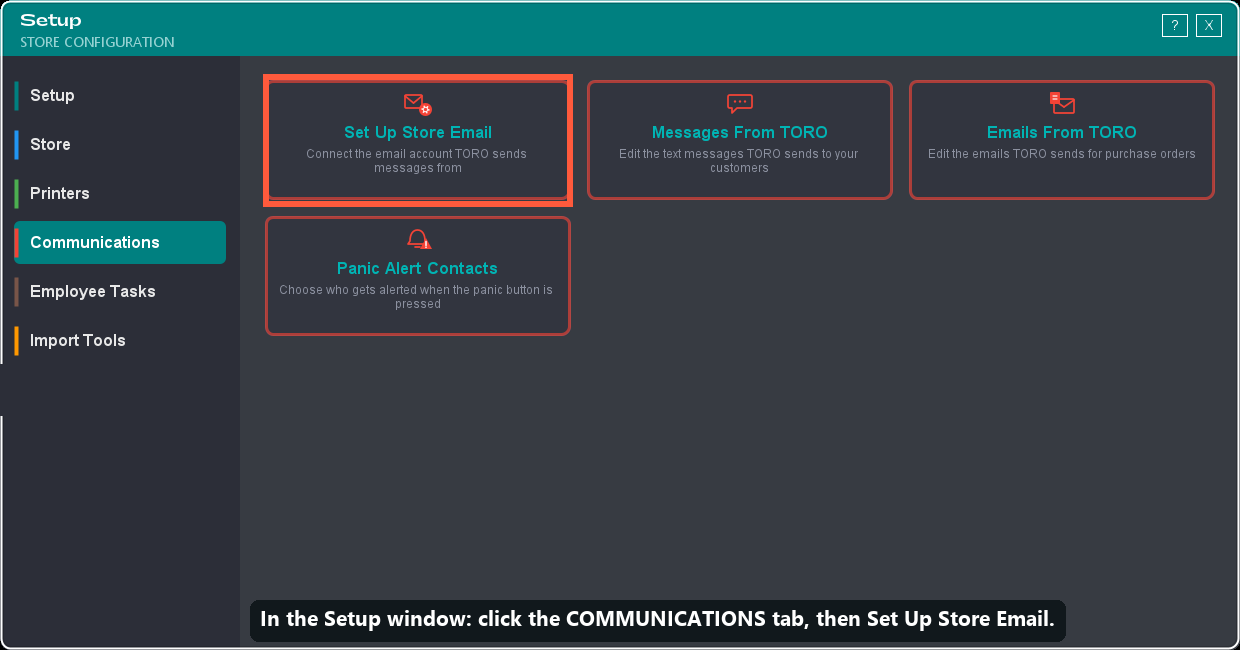
- Open the Setup window and click the Communications tab (an Admin has to do this one).
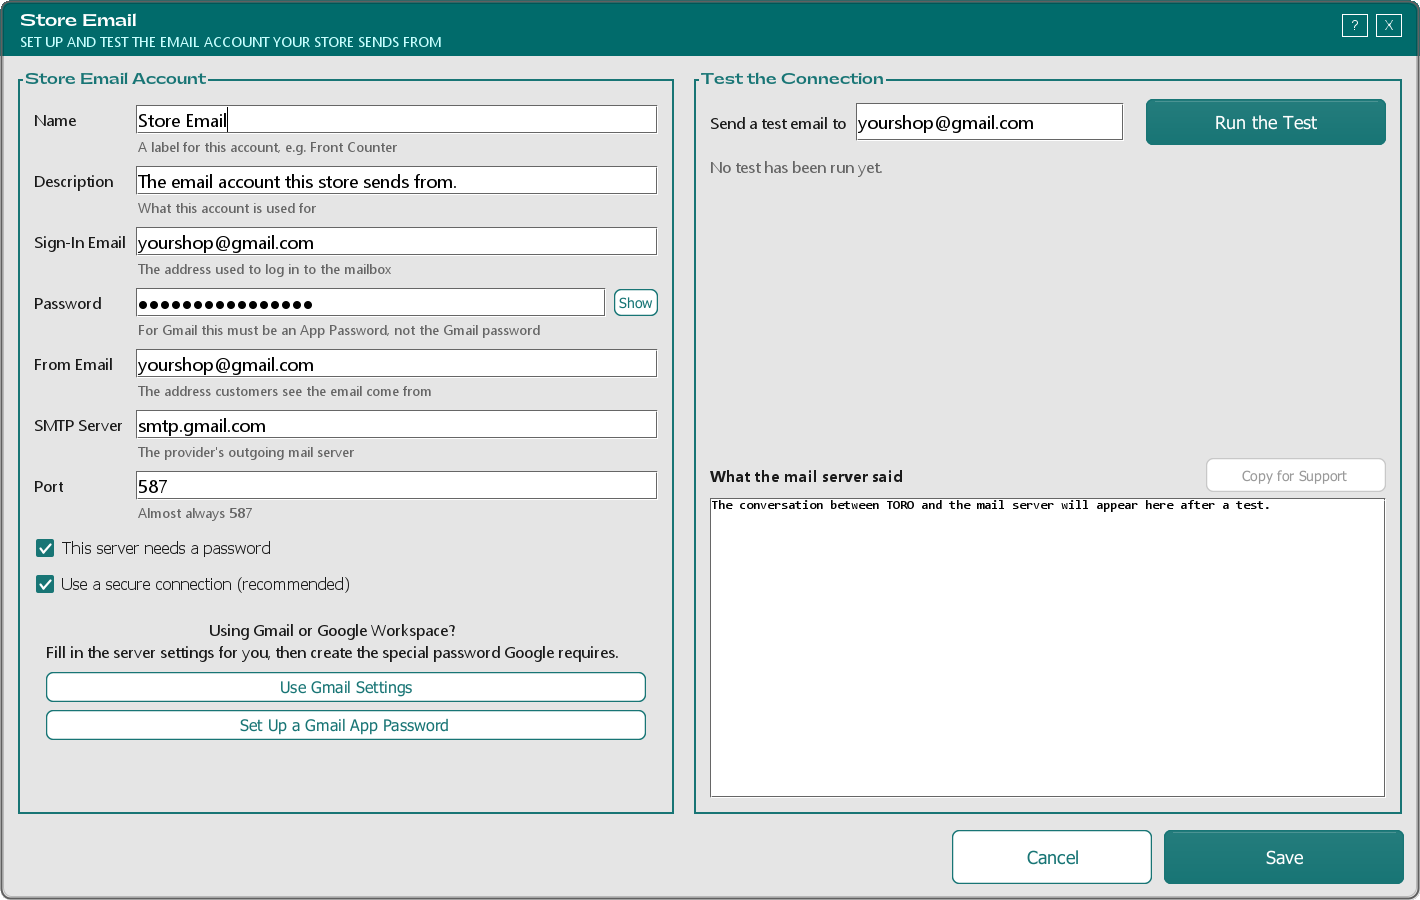
- Click the Set Up Store Email tile. The Store Email window opens — settings on the left, a connection test on the right.
- Most shops use Gmail — if that's you, click Use Gmail Settings. That fills in the technical settings (server, port, and the two checkboxes) for you.
- Click Set Up a Gmail App Password. TORO walks you through Google's screens in three steps and hands you a 16-character App Password — a special password Google makes just for apps like TORO. You set it up once, but you use it every time. It is not your everyday Gmail password, and it's not a single-use text-message code.
- Heads-up: Google only offers App Passwords once you've turned on 2-Step Verification. The walkthrough covers this, but if you don't see an App Password option, that's why.
- Put your Gmail address in Sign-In Email and From Email — for Gmail these must be the same address, and TORO will remind you if they don't match. Paste the App Password into Password (it's fine if it pastes with spaces — TORO handles that).
- Click Run the Test. TORO checks the connection one step at a time and shows a green or red dot for each one. If everything is green, click Save.
If a step comes up red, TORO tells you in plain English what to fix — a mistyped server name, a blocked port, or the wrong password. Fix it and press Run the Test again. Nothing is saved until you press Save, so you can test as many times as you like.
Pasted your everyday Gmail password by mistake? TORO can tell — an App Password is always 16 lowercase letters — and it will stop and point you to the Set Up a Gmail App Password button instead of running a test that's doomed to fail.
Not using Gmail? Ask your email provider for their outgoing mail server name and port (most use port 587), type those into SMTP Server and Port along with your Sign-In Email, From Email, and Password, then Run the Test. Your TORO rep can do this with you over the phone. One honest warning: if the test keeps failing, the settings are wrong, and TORO can't fix your mailbox for you — you'll need the correct details from your email provider.
If your provider only offers port 465: TORO can't use that kind of connection yet. The test will tell you so and suggest port
587. Nearly every provider offers 587 — ask them for it.
Later on, if an email won't send because the password stopped working (say you changed your Gmail password or deleted the App Password), TORO shows Message Not Sent! with two buttons. FIX STORE EMAIL opens this Store Email window straight away, so you can paste a new App Password and run the test. DO IT LATER closes the message.
Other Features of This Window
Everything is on one screen: your settings on the left, the connection test on the right. Most shops need only one store email account.
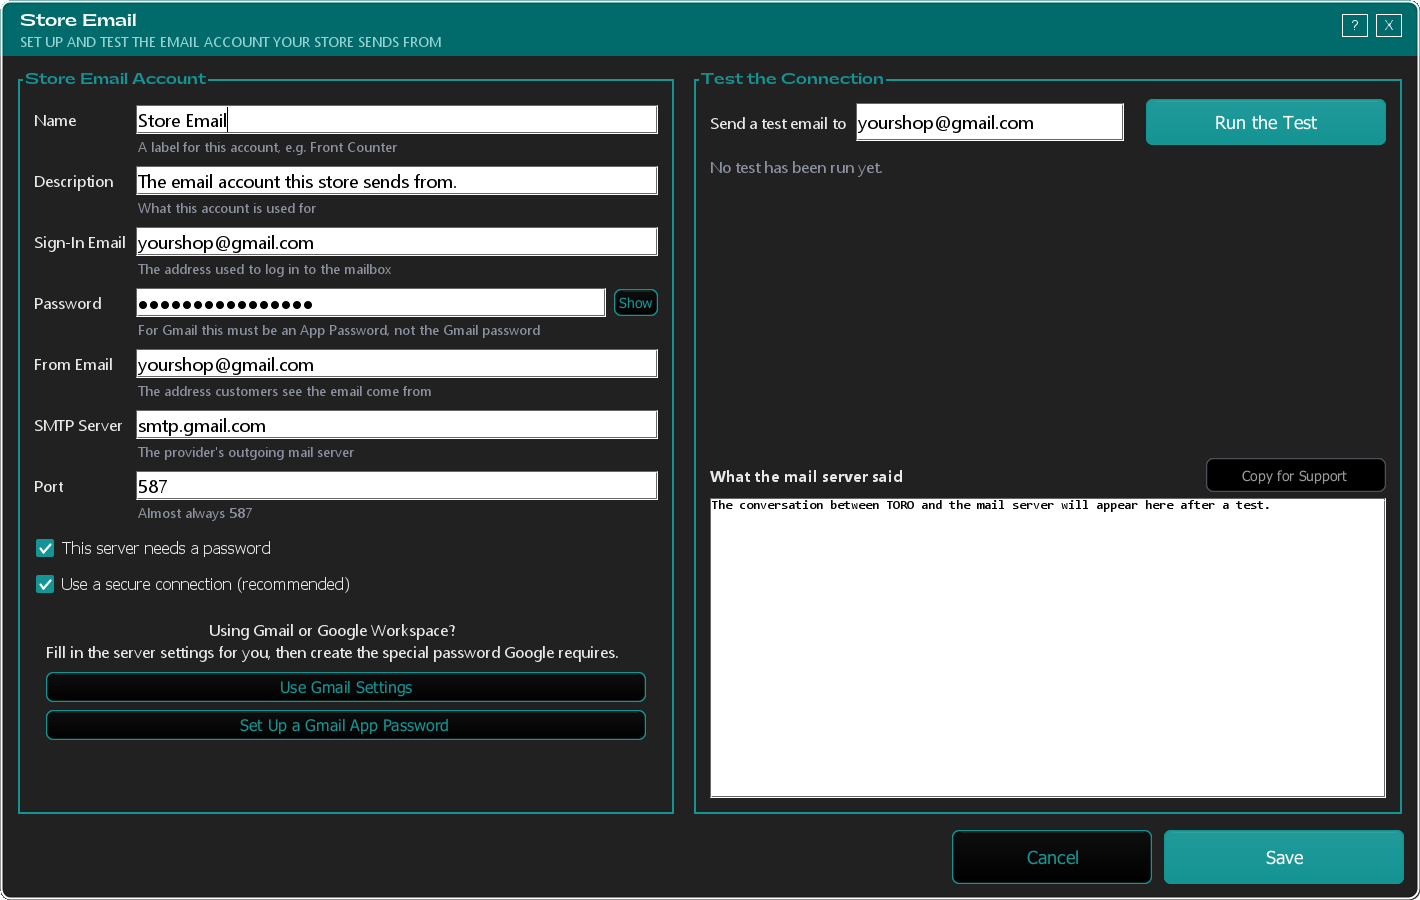
The settings (left side) — the easy Gmail path is the two buttons at the bottom; do those and skip the technical fields.
- Name / Description — a friendly label, filled in for you (leave them alone).
- Sign-In Email — the address TORO logs in with (your full Gmail address).
- From Email — the address customers and manufacturers see it come from (usually the same; for Gmail it must be the same as Sign-In Email, and TORO checks).
- Password — the single biggest gotcha. For Gmail this is not your everyday password and not a texted code — it's a special App Password Google makes just for TORO. You make it once and paste it here. Click the eye next to the box to see what you typed; click it again to hide it. If what's in the box looks like your everyday Gmail password instead of an App Password, TORO stops and points you to the Set Up a Gmail App Password button.
- SMTP Server / Port — the technical "address" of your mail server (
smtp.gmail.com/587for Gmail). Use Gmail Settings fills these for you — don't type them by hand unless you're not on Gmail. - This server needs a password / Use a secure connection — two security switches nearly every provider needs on; Use Gmail Settings checks both for you.
The Gmail box at the bottom: Use Gmail Settings (one click sets the server, port, and both checkboxes) and Set Up a Gmail App Password (walks you through Google's screens in three steps — turn on 2-Step Verification, then create the password; name it TORO when Google asks).
The connection test (right side). Type where you want a test message sent, then press Run the Test. TORO checks the connection one step at a time:
- Find the mail server — is the server name spelled right?
- Open a connection — is the port open, or is something blocking it?
- Start the secure connection — will the server talk securely?
- Sign in to the mailbox — is the email address and password right?
- Send a test email — does a real message actually go out?
Green means that step worked, red means it didn't, and grey means TORO never got that far. Under the list, TORO tells you in plain English what to fix. Nothing is saved until you press Save, so testing is free — try as many times as you need.
What the mail server said shows the raw back-and-forth between TORO and your mail server. You don't need to read it — but if you call TORO support, press Copy for Support and paste it into an email. It tells us in seconds what would otherwise take a long phone call. Your password is never included.
Bottom: Save keeps the settings; Cancel throws away your changes.
8. Manage Daily Open/Close Checklist
Get to the Setup window: Admin → Dashboard → TORO Configuration → Set Up System — need help finding it?
What this step is for: print daily reminders for your staff. The opening list prints when the drawer is opened for the day; the closing list can print automatically a set number of minutes before you close (90 minutes is the usual starting point).
Do this:
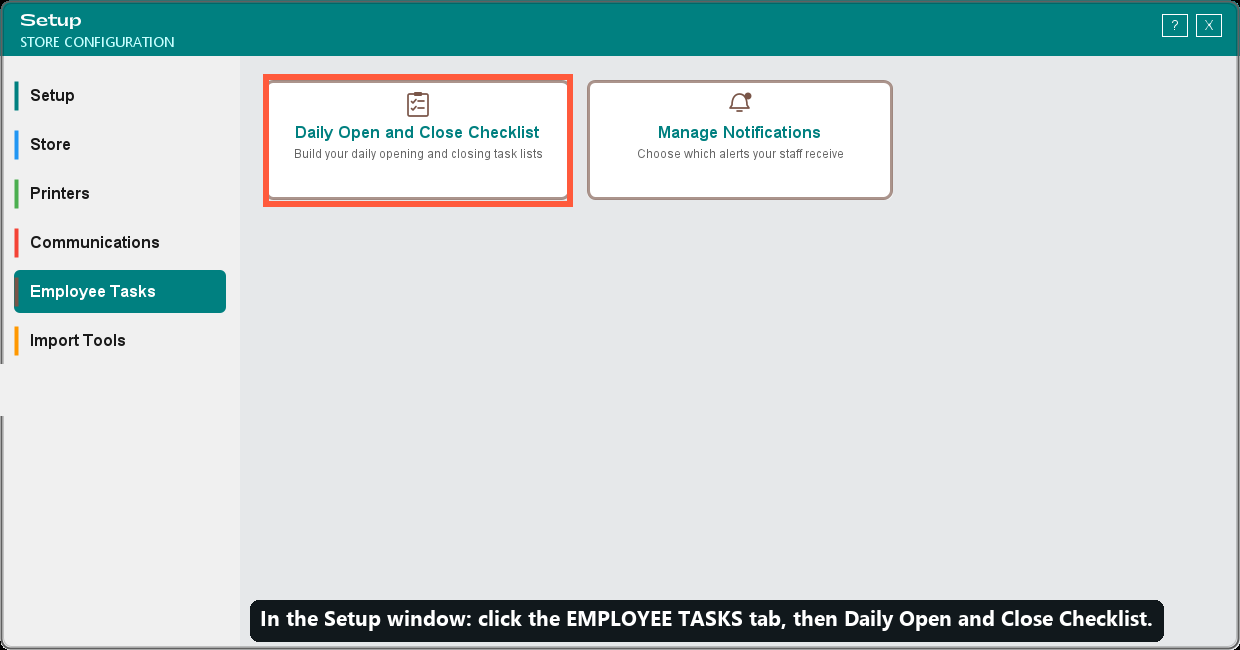
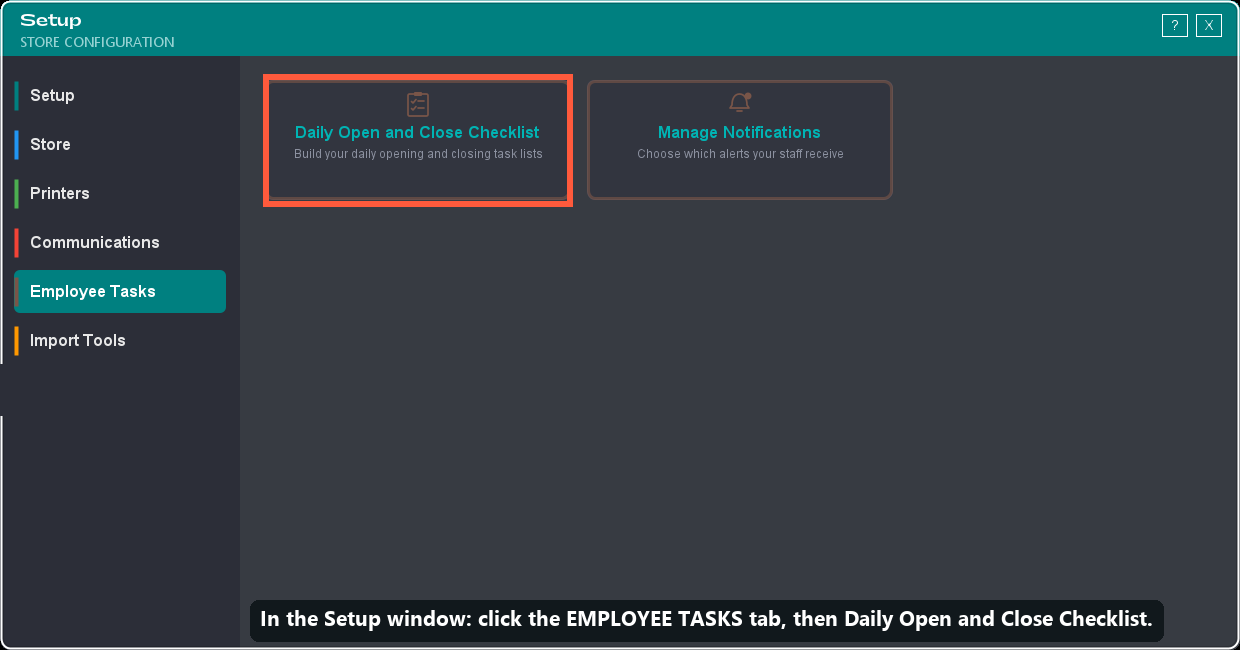
- Open the Setup window and click the Employee Tasks tab.
- Click the Daily Open and Close Checklist tile.
- At the top, choose Opening Checklist or Closing Checklist (the lit-green one is the one you're editing).
- On the left, pick a day — or pick All Days for reminders that print every day.
- Use Add Item, Edit Item, and Remove Item to build the list. Double-click a row to edit it quickly.
- For closing, the Minutes before closing to auto-print box controls when the closing list prints (often set to 90). Type a number of minutes, or clear the box to turn auto-printing off.
The smart move: put everything that happens every day on All Days once, and use the individual days only for exceptions (like "Take out the trash" on Thursdays).
Other Features of This Window
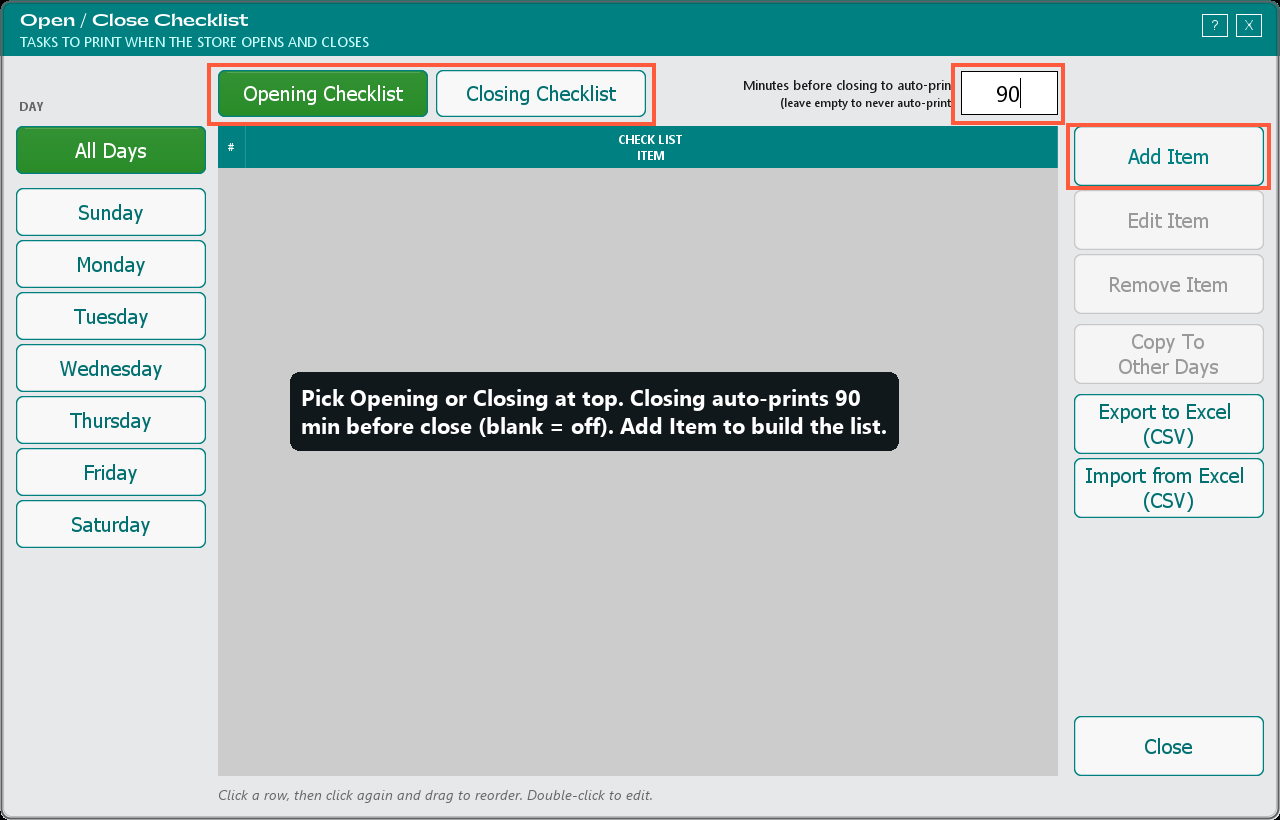
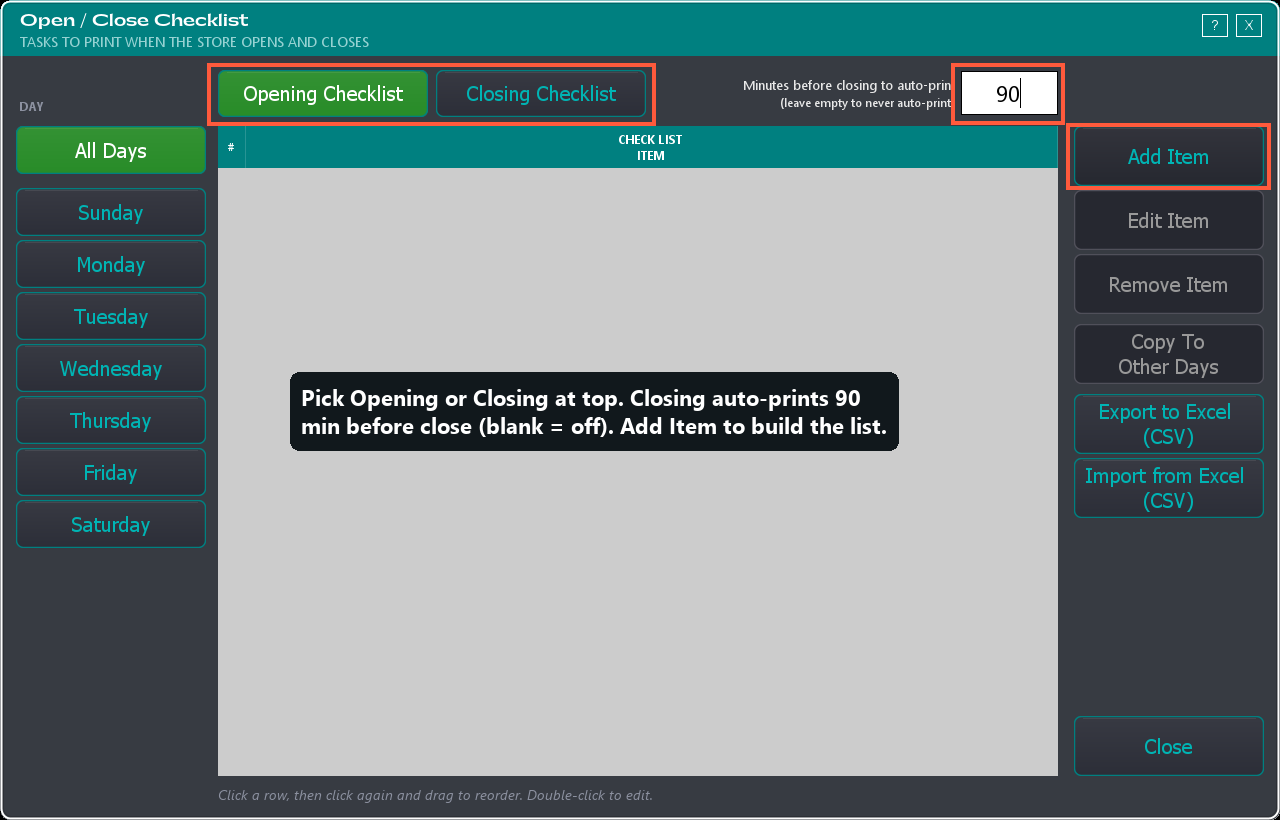
You edit one list, for one day, at a time. Here's what else this window can do, matched to the numbers on the picture:
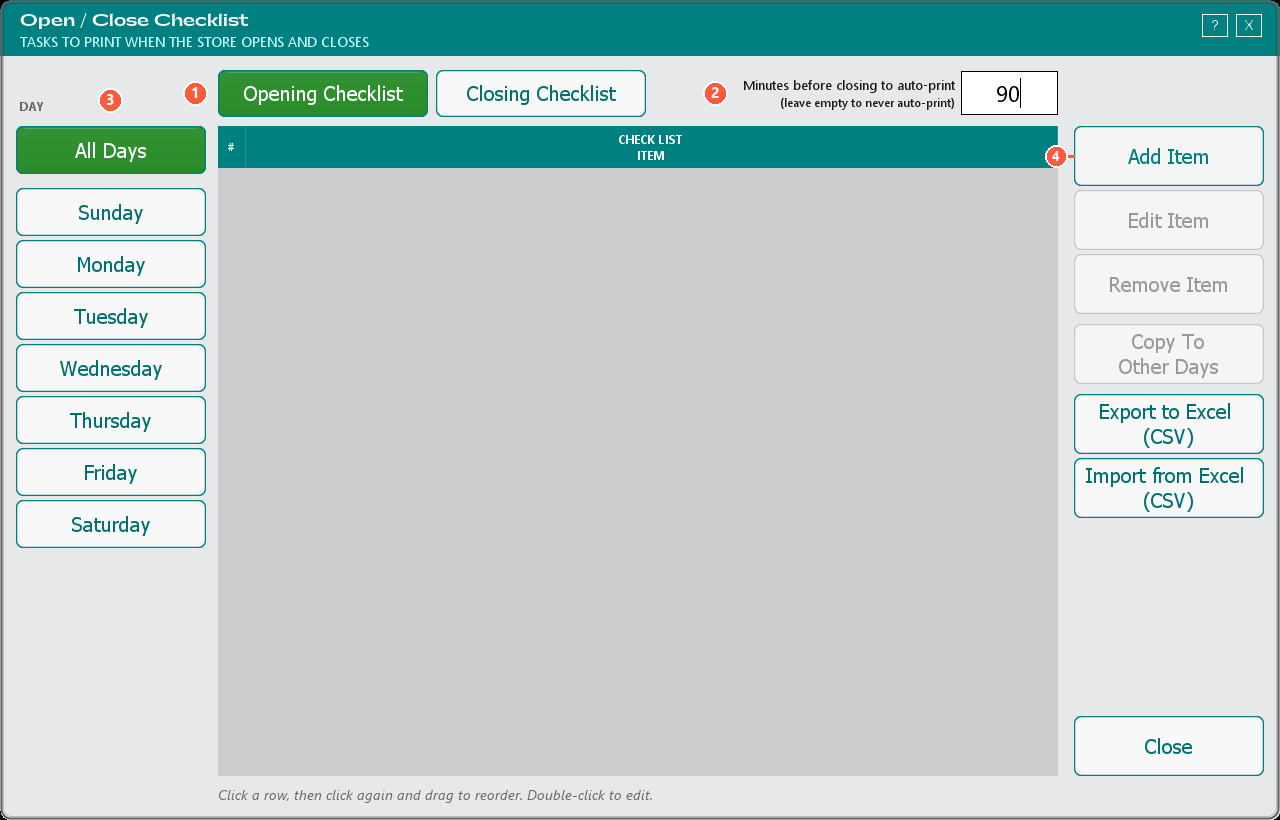
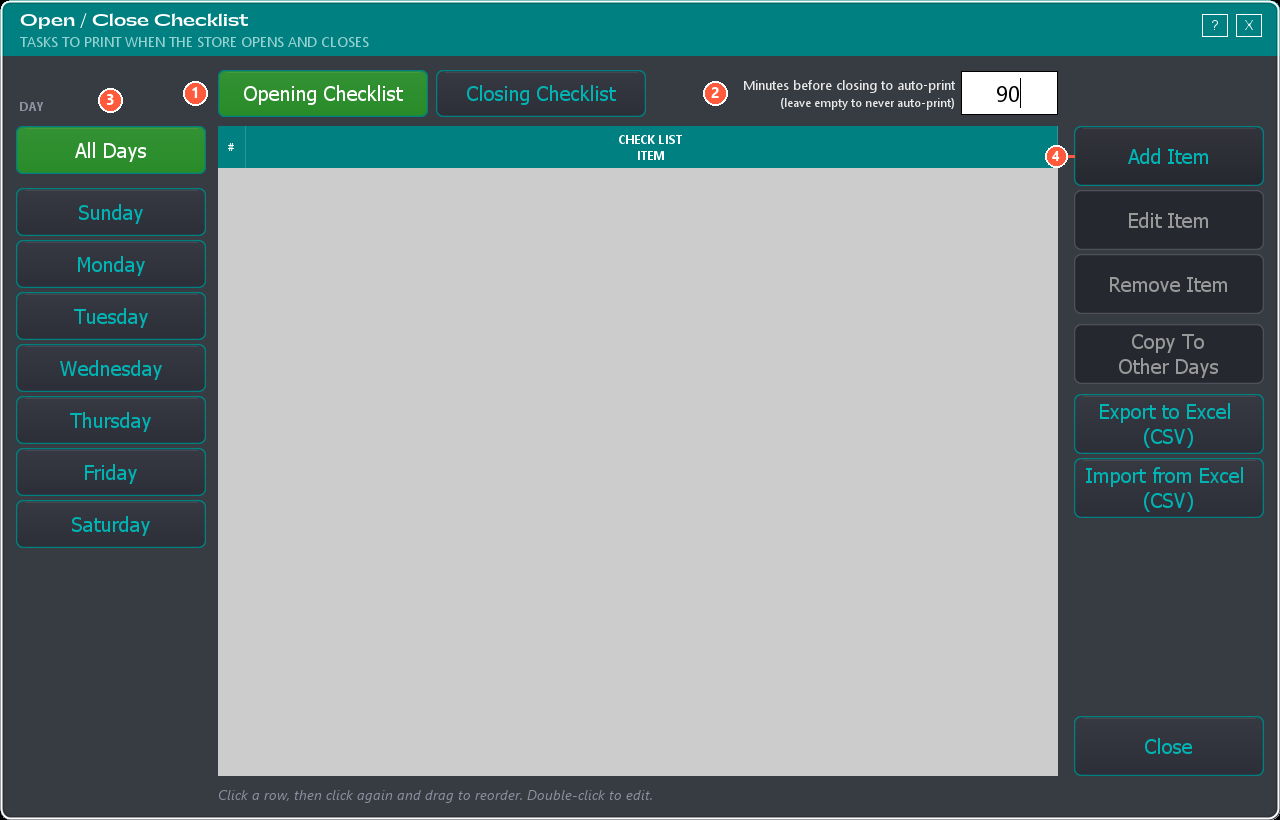
- Opening Checklist / Closing Checklist (top toggle) — flip between the morning and evening list. The one glowing green is the one you're editing. If a task you added seems to "disappear," you were probably on the other list — check which is green.
- Minutes before closing to auto-print — how many minutes before your closing time the closing list prints itself. 90 is the usual start. Type a number to auto-print that early; leave the box empty to never auto-print. (Only the Closing list; the Opening list prints when the drawer opens.)
- The day rail (All Days, Sunday…Saturday) — pick which day. All Days is the important one: anything here prints every day, so put everyday tasks here once ("Count the drawer") instead of retyping them seven times; use an individual day only for exceptions ("Take out the trash" on Thursday). Click a row, then click again and drag to reorder (the order here is the print order); double-click to edit.
- The action buttons (right side) — Add / Edit / Remove Item build the list; Copy To Other Days drops a task onto other days you pick (great for "Monday–Friday but not weekends"); Export / Import to Excel (CSV) backs up or loads a list from a spreadsheet.
The Add / Edit Item window: the Day and Open/Close are pre-set to what you were viewing (usually leave them); Checklist Item Text is the reminder (up to 200 characters, can't be empty); Active (checked by default) prints it — uncheck to hide a seasonal task without deleting it.
9. Manage Product Types
Get to the Setup window: Admin → Dashboard → TORO Configuration → Set Up System — need help finding it?
What this step is for: set up the categories your inventory falls into — Cigars, Pipe Tobacco, Accessories, Beverages. Each one carries pricing rules, age requirements, and reward settings that every new item inherits, so this is an important one.
Do this:
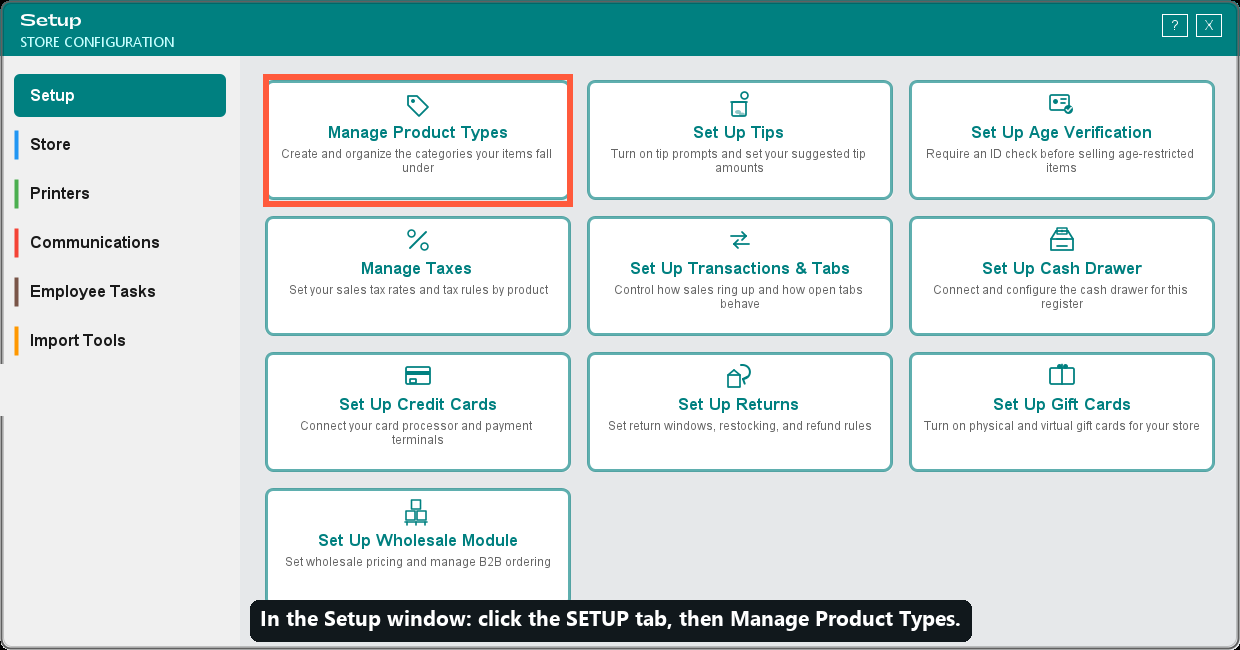
- Open the Setup window and click the Setup tab.
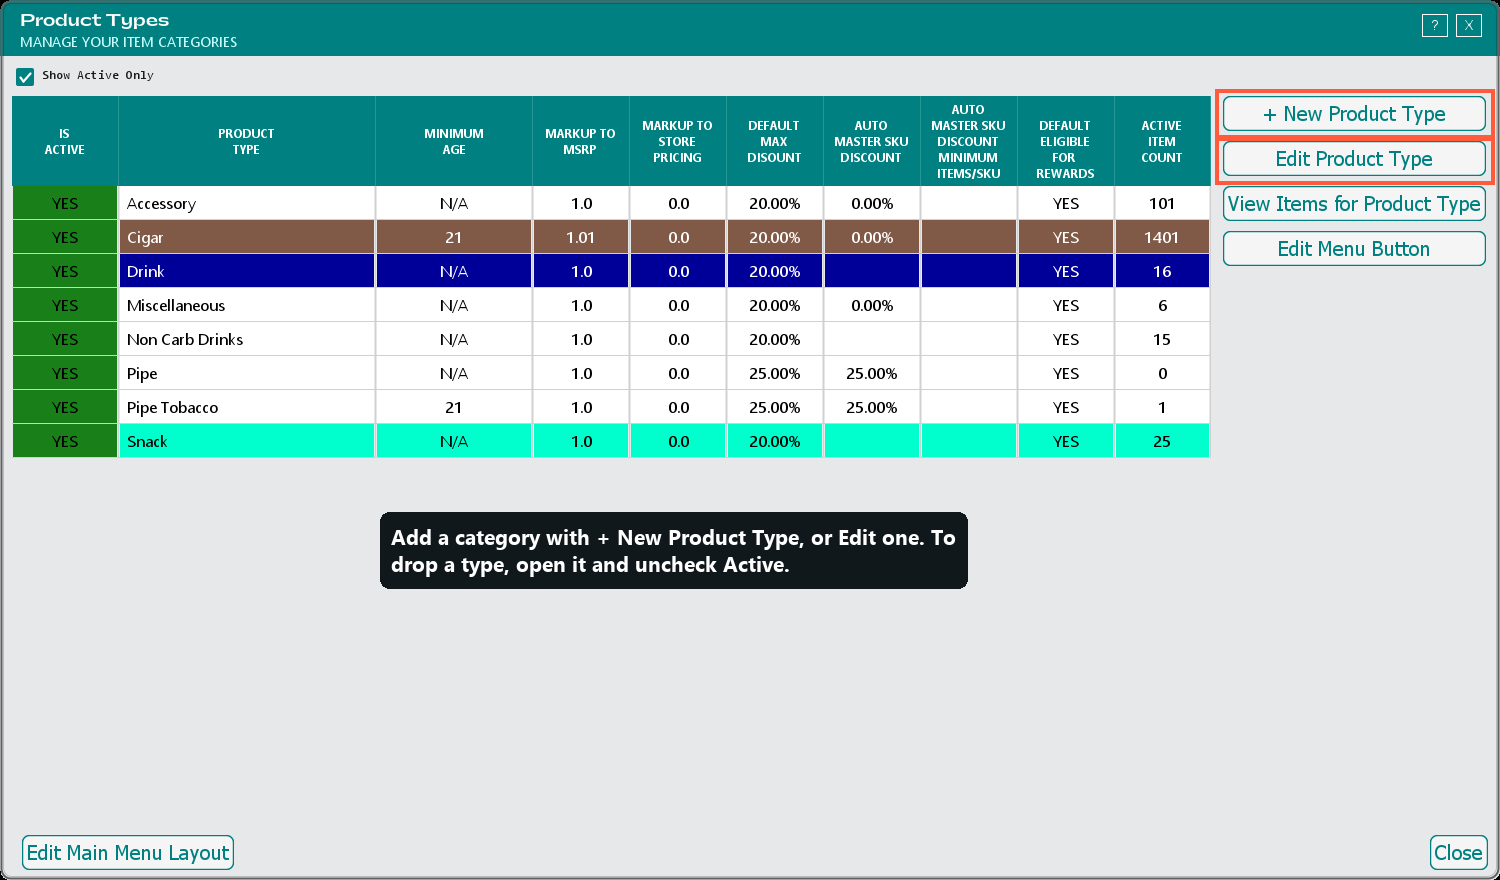
- Click the Manage Product Types tile. TORO comes with a set of defaults.
- Don't carry a certain type? Open it and uncheck Active. (If it still has active items, TORO won't deactivate it — but it shows you those items right there. Right-click an item to open it and set it inactive, then come back and uncheck Active on the type.)
- Missing a type? Click + New Product Type and add it. Some shops like to track accessories more finely (Cutter, Lighter, Ashtray) — you can create a type for each.
- Do you give an automatic box discount on cigars? Open the Cigar type and, in its Pricing & Discounts area, set Auto Discount Master Sku (entered as a fraction —
0.10means 10% off a full box), the minimum items-per-box for it to apply, and whether to apply it when printing labels. Save.
Other Features of This Window
A product type is a category — "Cigars," "Accessories" — and the settings here become the starting point for every new item you put in it.
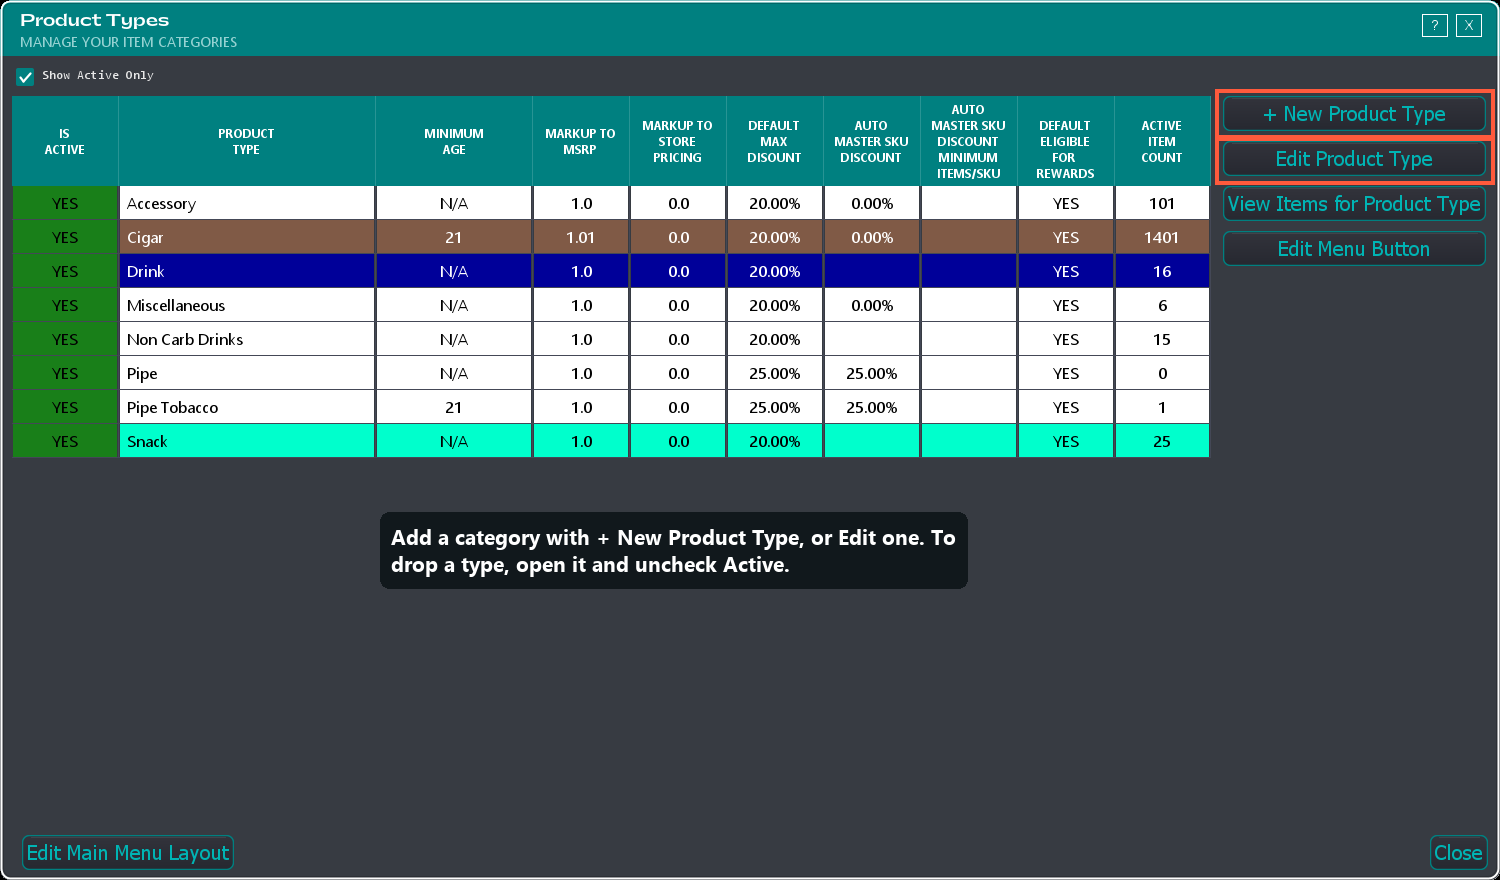
The list screen: Show Active Only (on) hides categories you've turned off; + New Product Type creates one; Edit Product Type opens the highlighted one; View Items for Product Type shows what's inside it (handy before making a type inactive); Edit Menu Button changes that category's color on the touchscreen sales menu; Edit Main Menu Layout sets the order of the buttons on the sales screen (per register — restart to see it).
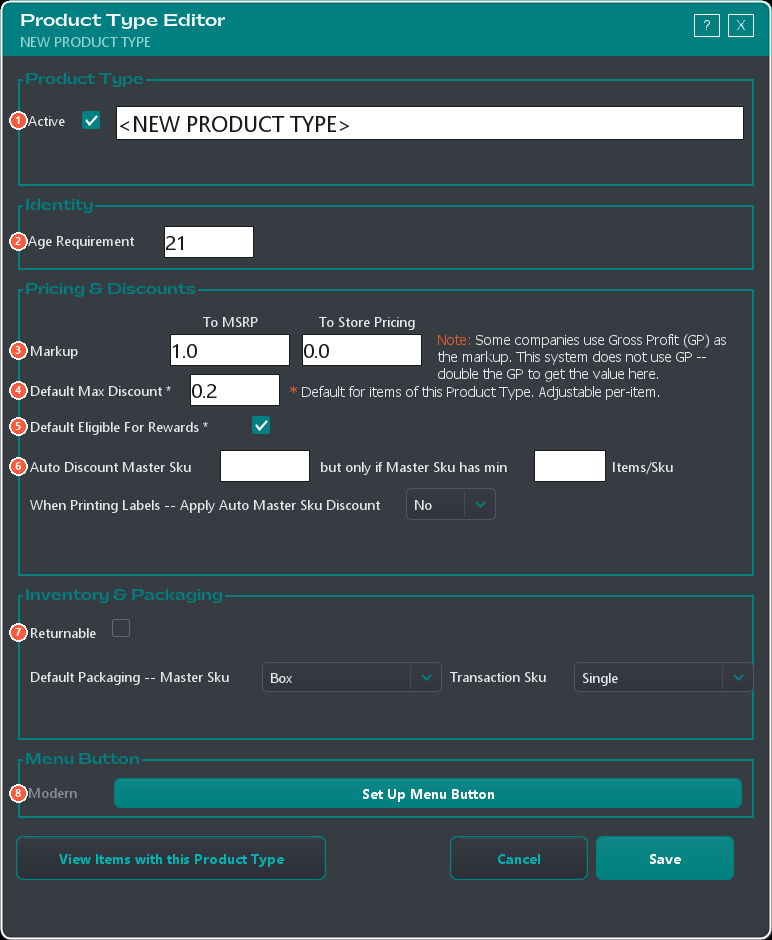
Inside the editor — matched to the numbers on the picture:
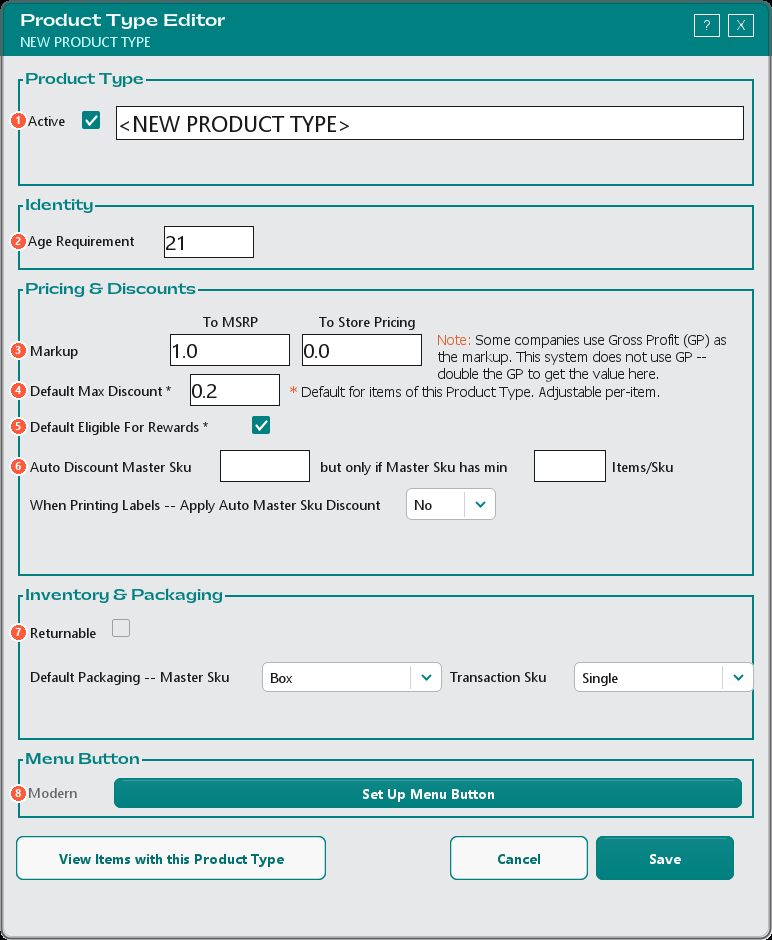
- Active + Name — what the category is called (TORO's built-in "system" categories can't be renamed — the box is greyed out; that's normal) and its Active checkbox. Uncheck Active to retire a category. Gotcha: TORO won't let you if it still has active items — it shows the count in red. Set those items inactive first (right-click an item to open it), then come back.
- Age Requirement — the minimum age for items here. Blank for anyone (a lighter, a hat); a number for age-restricted goods. (Works with Step 12's Age Verification.)
- Markup — To MSRP / To Store Pricing — let TORO price an item for you from its cost so you don't punch in a price each time. The number is what cost gets multiplied by; leave it alone to set each price yourself (the safe choice when starting out). Important, spelled out on screen: this is markup, not gross profit (GP) — if a rep quotes a GP number, double it before typing it here.
- Default Max Discount (marked
*) — the biggest discount a cashier may give on items here, as a decimal 0–1 (0.20= 20% off). Only a default — you can override per item. Blank = no preset limit. Pick a limit to stop staff over-discounting your best sellers. - Default Eligible For Rewards (on) — whether buying items here earns loyalty points. Leave on for normal merchandise; turn off for things like gift cards so people can't farm points buying store credit.
- Auto Discount Master Sku — the automatic box discount, as a decimal (
0.10= 10% off a full box). It only fires on a full box, not singles — set min Items/Sku to your real box count. When Printing Labels — Apply Auto Master Sku Discount (No/Yes) decides whether the discounted box price prints on shelf labels. - Inventory & Packaging — Returnable (whether items here can be returned — check for accessories, uncheck for things you never take back) and Default Packaging (Master Sku "Box," Transaction Sku "Single" — receive by the box, sell by the single; fits cigars, so most shops never touch these).
- Set Up Menu Button — the category's button on the touchscreen sales menu (its color and label).
Click Save. If you changed a markup, TORO asks whether to re-price all existing items in that category now — say Yes only if you want that.
First-timer gotcha — decimals, not whole numbers. For the discount boxes, 10% off is typed
0.10, not10. Typing10would mean 1,000% and wreck your pricing. The rule for these boxes: move the percent two places left — 10% →0.10, 5% →0.05, 15% →0.15.
10. Set Up Tips
Get to the Setup window: Admin → Dashboard → TORO Configuration → Set Up System — need help finding it?
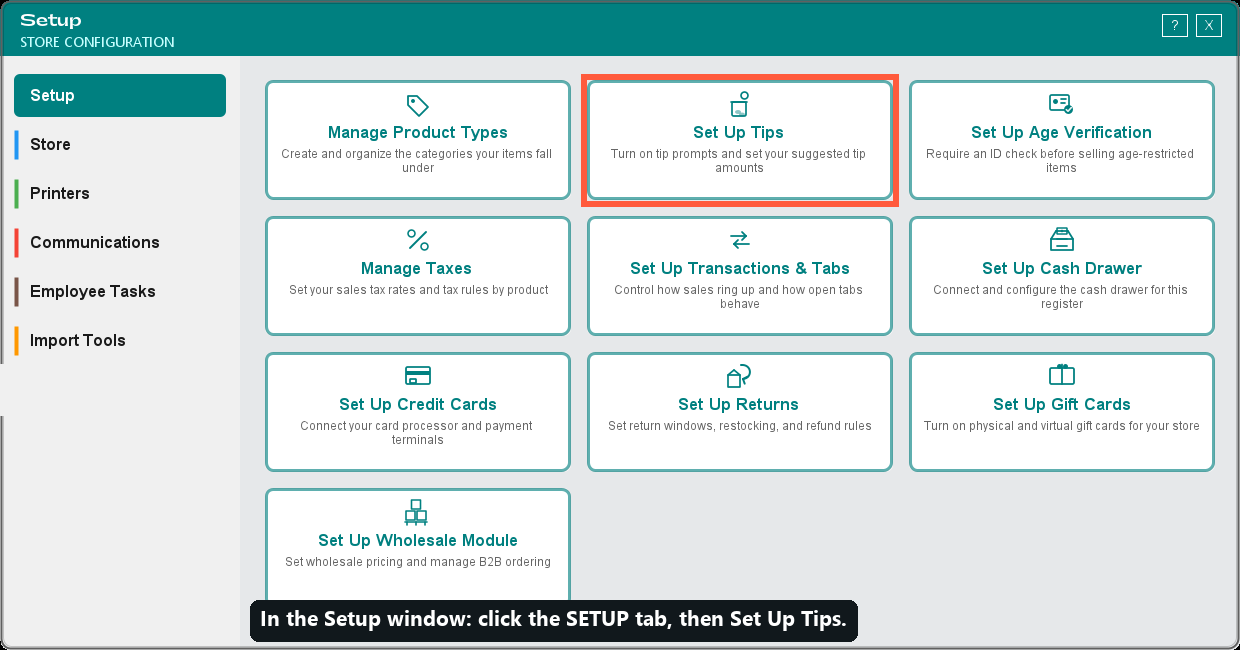
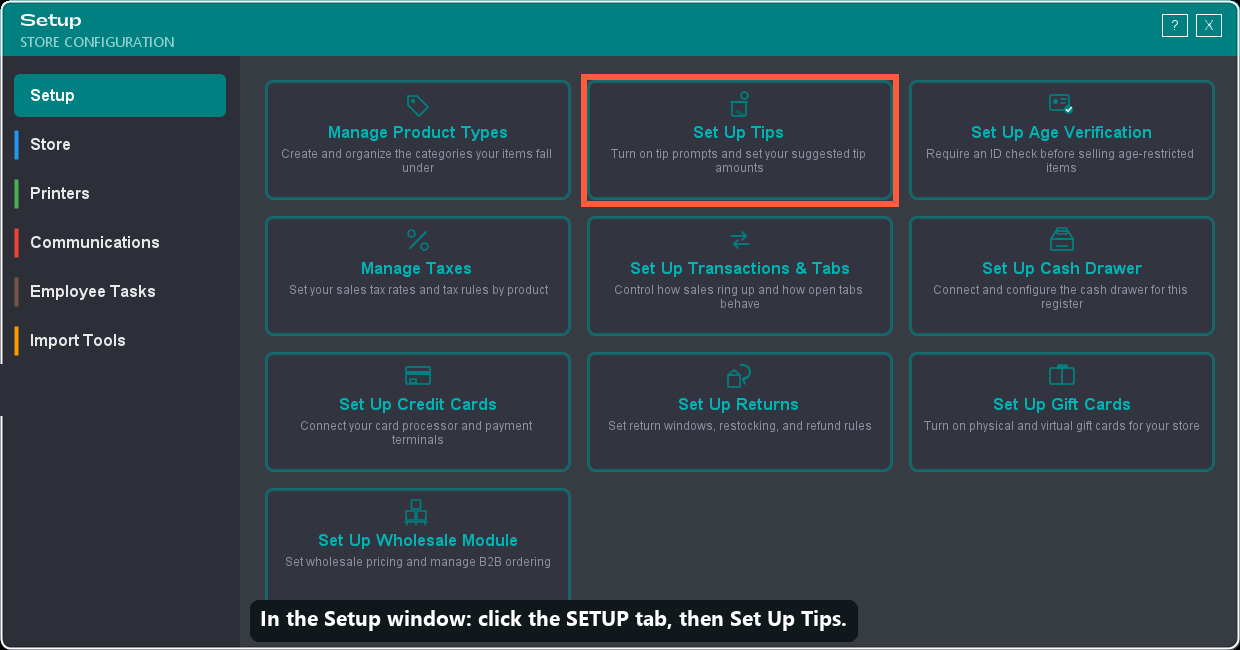
What this step is for: tell TORO whether your shop takes tips. That's really the whole question here.
Do this:
- Open the Setup window and click the Setup tab.
- Click the Set Up Tips tile.
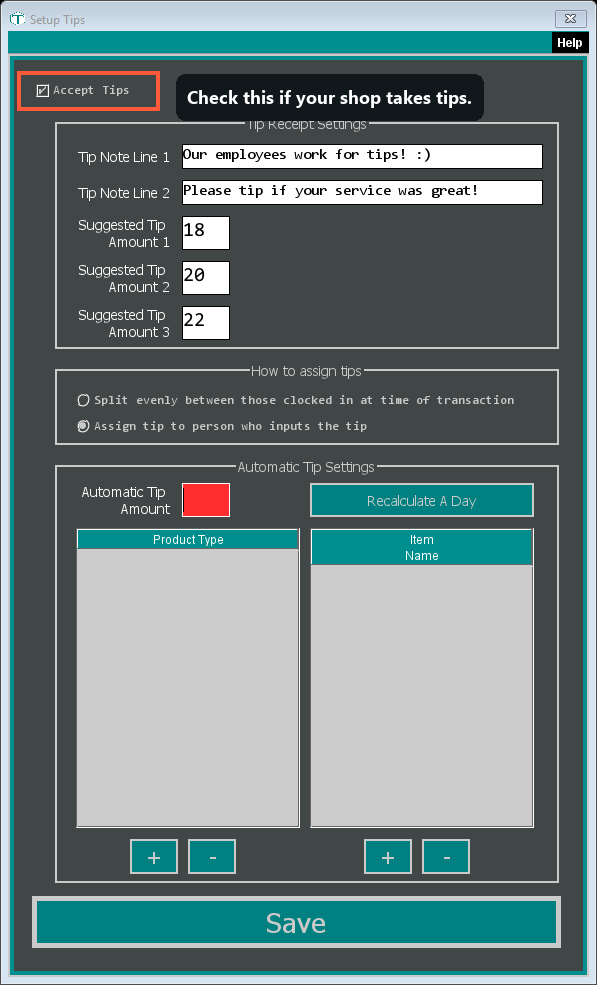
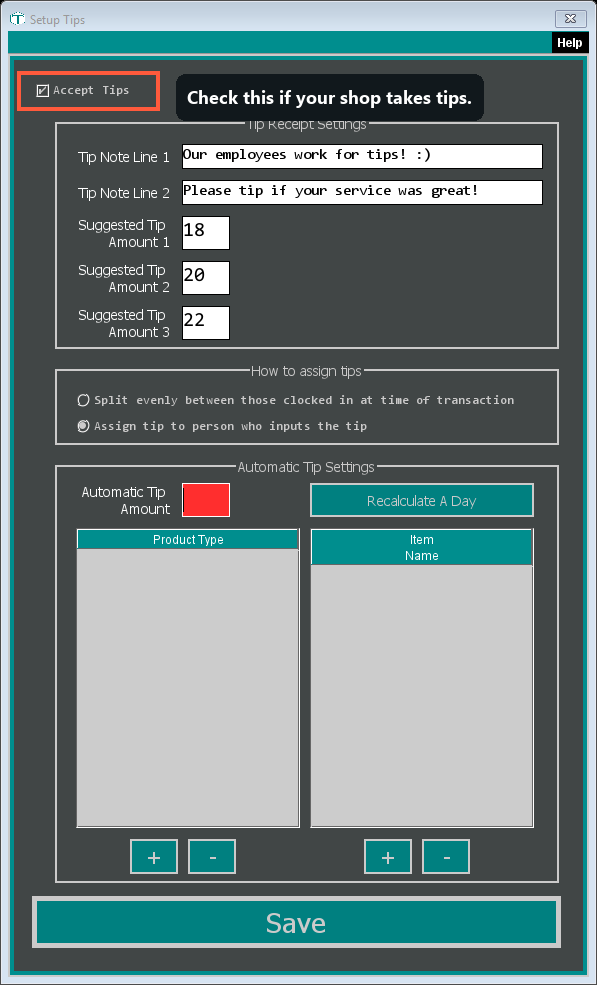
- Check Accept Tips. (Until you do, the rest of the screen stays greyed out — that's normal.)
- If you'd like, edit the two receipt note lines and set your three Suggested Tip Amount fields (percentages — they start at 18, 20, and 22), and choose whether a tip is split among everyone clocked in or given to the person who enters it. Click Save.
If your shop doesn't take tips, just leave Accept Tips unchecked and move on.
Other Features of This Window
The whole screen hangs on one switch at the top.
- Accept Tips (top checkbox) — the master switch. Check it if your shop takes tips; leave it unchecked and you're done with this step. The moment you check it, the sections below wake up.
Tip Receipt Settings (what the customer sees): Tip Note Line 1 (default "Our employees work for tips! :)") and Tip Note Line 2 (default "Please tip if your service was great!") are two friendly nudge lines on the receipt — up to 44 characters each. Suggested Tip Amount 1, 2, and 3 (defaults 18, 20, 22) are the three tip buttons the customer taps, as percentages — bump them up for a high-touch lounge, down for a quick counter. Tip Table Size (Normal / Large / Extra Large) sets how big that Tip % / Tip $ / Total block prints — go bigger if your lounge is dimly lit; TORO steps it down on its own if a row wouldn't fit the paper.
How to assign tips (who gets the money): Split evenly between those clocked in at time of transaction — shared among everyone on the clock (pick this for a team floor); or Assign tip to person who inputs the tip — the whole tip goes to whoever ran the sale (pick this when each person keeps their own).
Automatic Tip Settings (optional, most shops skip it) — automatically adds a set tip to certain sales (like a lounge service charge). Automatic Tip Amount is the percent; the two lists below choose which product types and items trigger it (use +/–). Leave the lists empty and nothing is auto-tipped. Recalculate A Day is a repair tool for re-figuring a past day — ignore it during setup.
First-timer gotcha: if the bottom sections look frozen, it's because Accept Tips isn't checked yet. Check it first, then click Save.
11. Manage Notifications
Get to the Setup window: Admin → Dashboard → TORO Configuration → Set Up System — need help finding it?
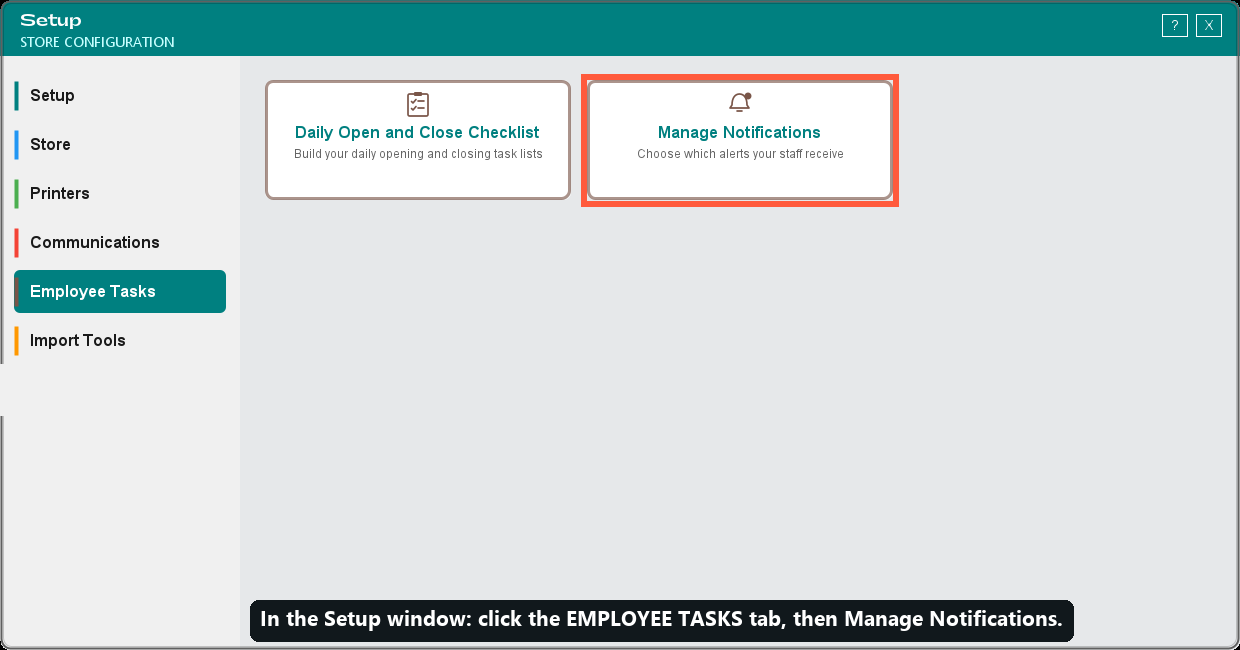
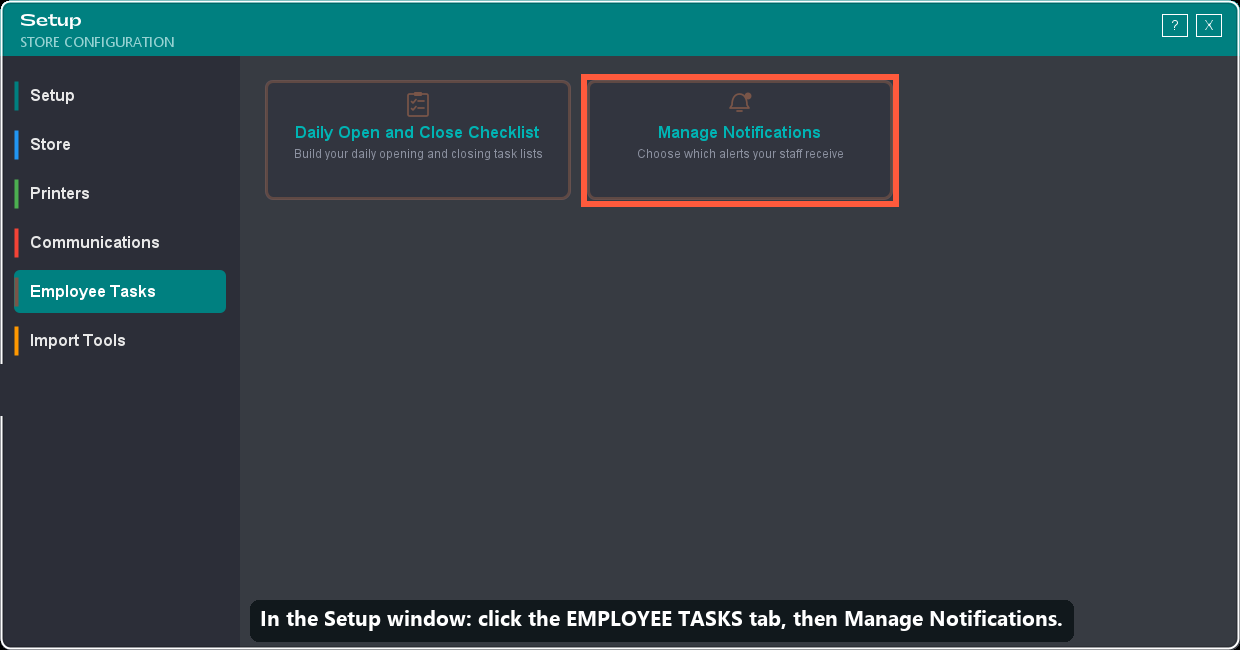
What this step is for: set up little pop-up reminders that appear on the register screen for your staff during the day — think "Check the bathrooms" or "Check the ashtrays." They're separate from the printed open/close checklist.
Do this:
- Open the Setup window and click the Employee Tasks tab.
- Click the Manage Notifications tile.
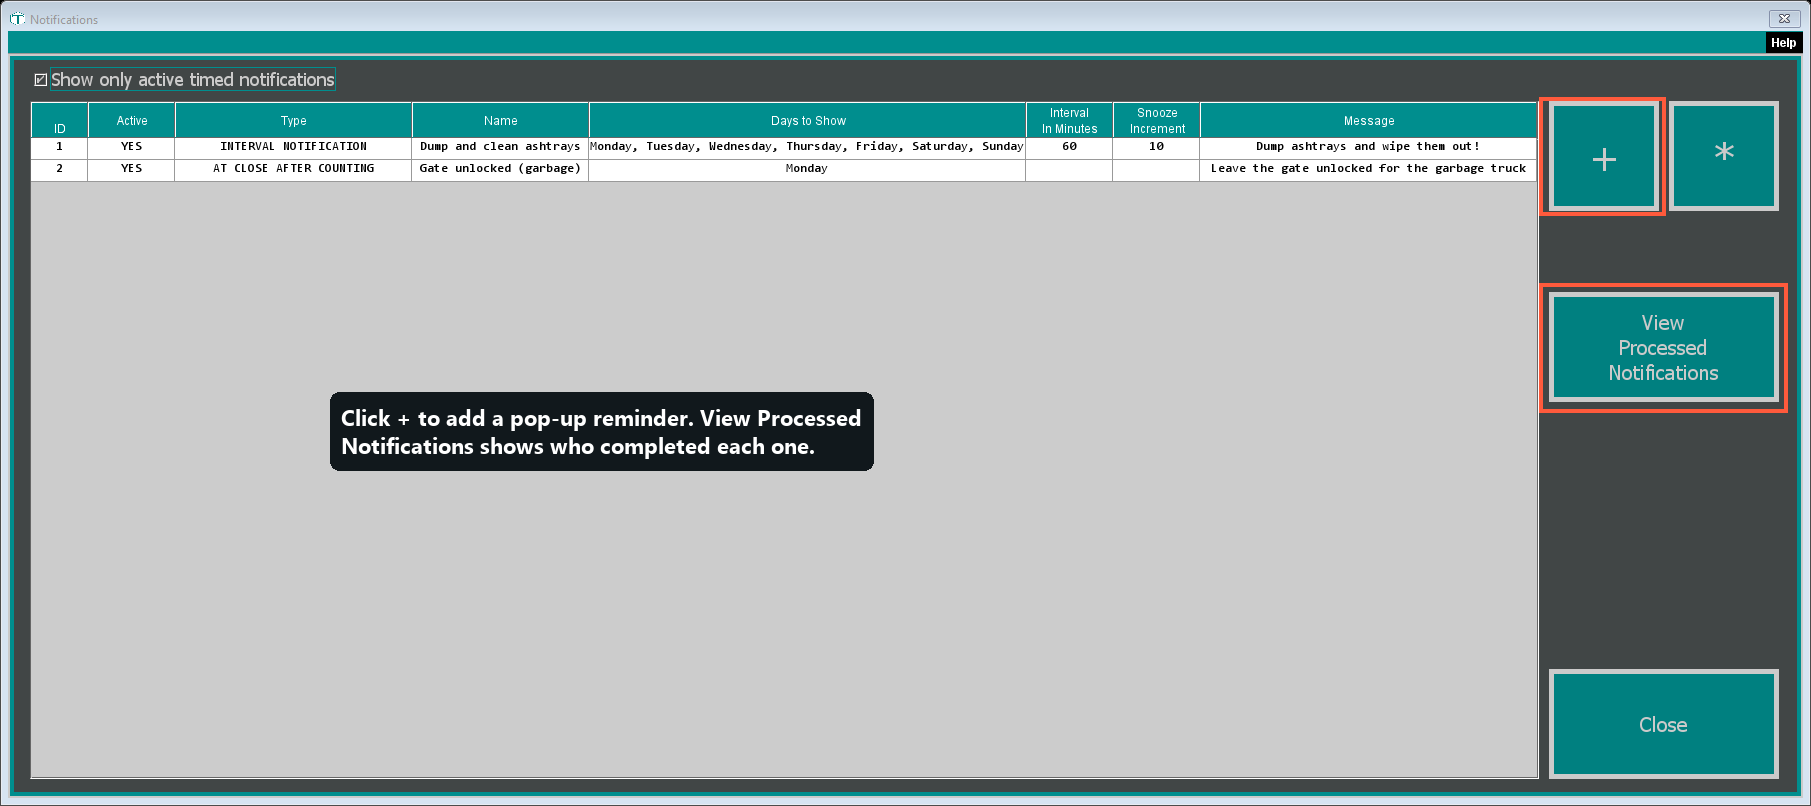
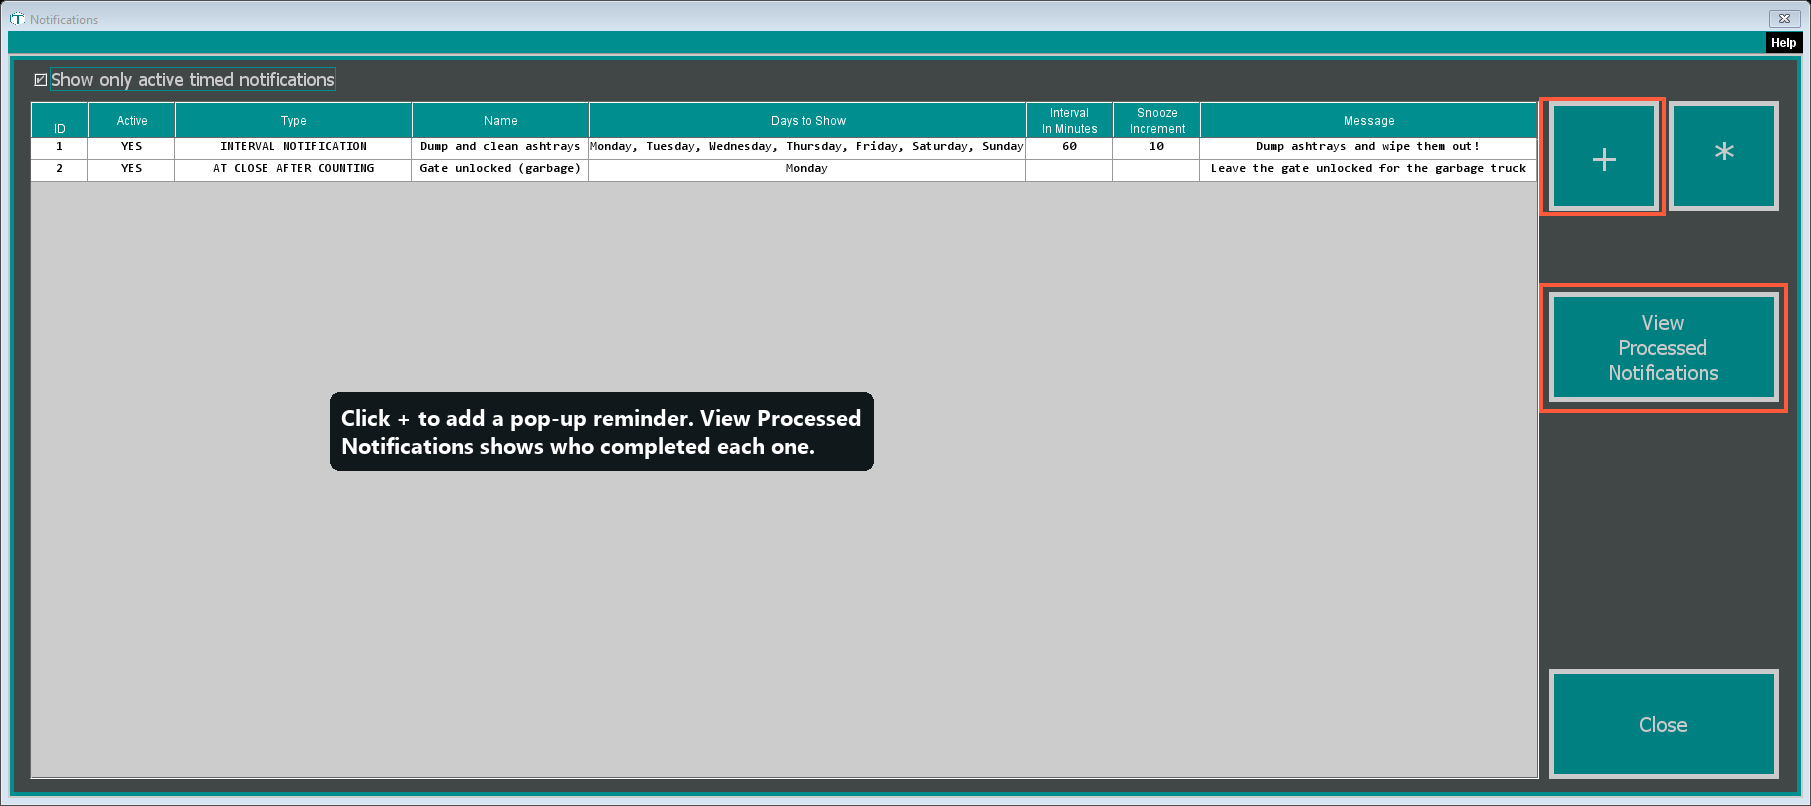
- Click the + button to add one. Give it a Name and a Message.
- Choose when it fires — on a timer through the day, or before/after the drawer is opened or closed — and pick which days it shows. (Trash goes out Thursday? Add a notification at close on Thursdays.)
- Click OK. Use Test Message first to see exactly how it'll look.
When staff respond to a notification, TORO records who responded, when, and what they chose. You can review it all under View Processed Notifications — and it also shows up on the Store tab of TORO Insight, our app for keeping an eye on the shop when you're away.
Other Features of This Window
Notifications are little reminders that pop up on the register for your staff. Two screens: the list, and the editor.
The list: Show only active timed notifications (on) keeps it tidy — if a reminder you set to inactive vanishes, that's why; uncheck to see it. + creates one; * edits the highlighted one; View Processed Notifications shows the history (who answered, when, what they tapped) — your paper trail; Close closes.
The editor — matched to the numbers on the picture:
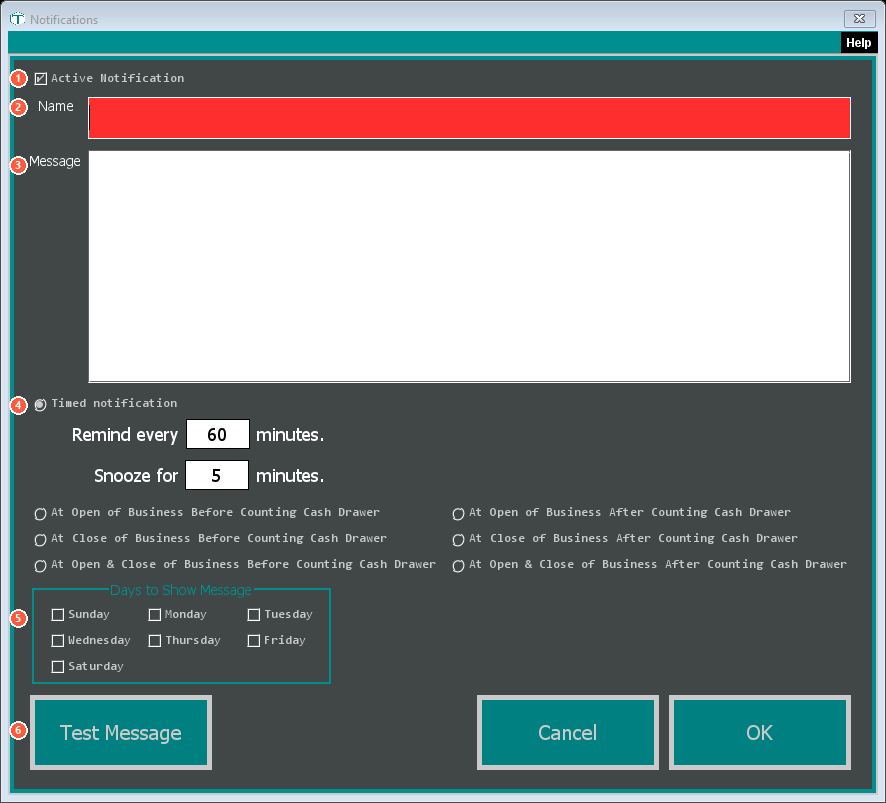
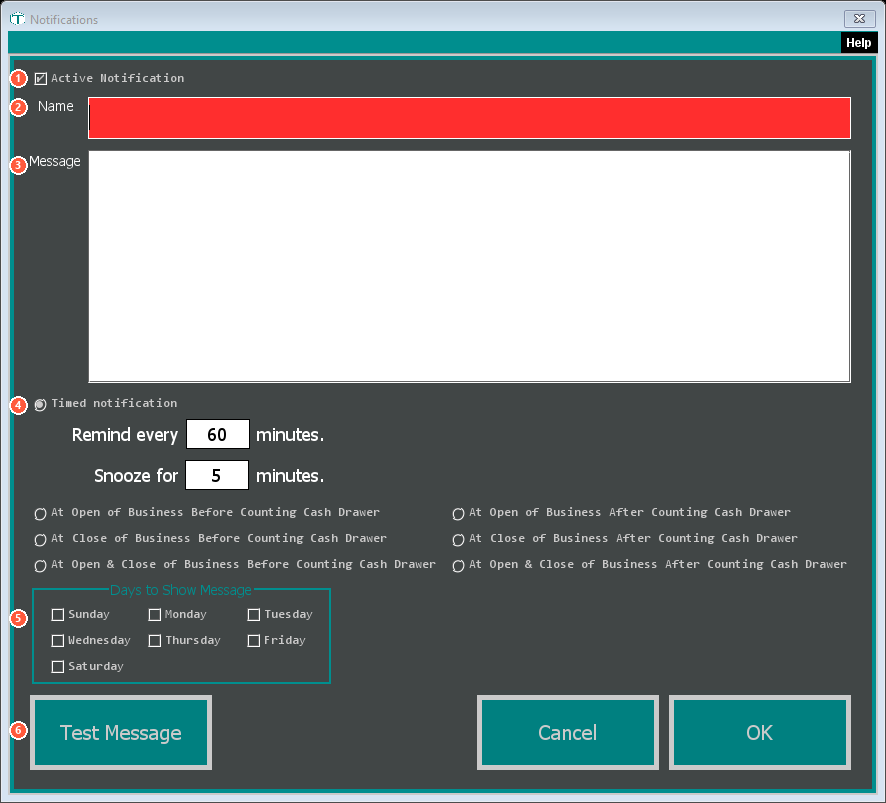
- Active Notification (on for a new one) — uncheck to park a reminder without deleting it.
- Name — a short label just for you ("Check bathrooms"). 5–100 characters.
- Message — the actual words staff see. Be specific ("Wipe the lounge tables and empty the ashtrays"). 5–400 characters.
- When it fires (pick one) — Timed notification pops up over and over on a timer (pick this for recurring tasks like "check ashtrays every hour"); its Remind every [ ] minutes (default 60) and Snooze for [ ] minutes (default 5) set the timer. Or pick one of the six open/close options — At Open / At Close / At Open & Close of Business, each in a Before and an After Counting Cash Drawer flavor (Remind/Snooze grey out for these — that's expected).
- Days to Show Message (seven day checkboxes) — which days it appears. Trash on Thursday? Check just Thursday. Everyday reminder? Check all seven.
- Test Message — shows the pop-up exactly as staff will see it, without waiting. Click it before you save to catch a typo. OK saves; Cancel discards.
Every response is recorded (who, when, what they chose), viewable under View Processed Notifications, and on the Store tab of TORO Insight.
12. Set Up Age Verification
Get to the Setup window: Admin → Dashboard → TORO Configuration → Set Up System — need help finding it?
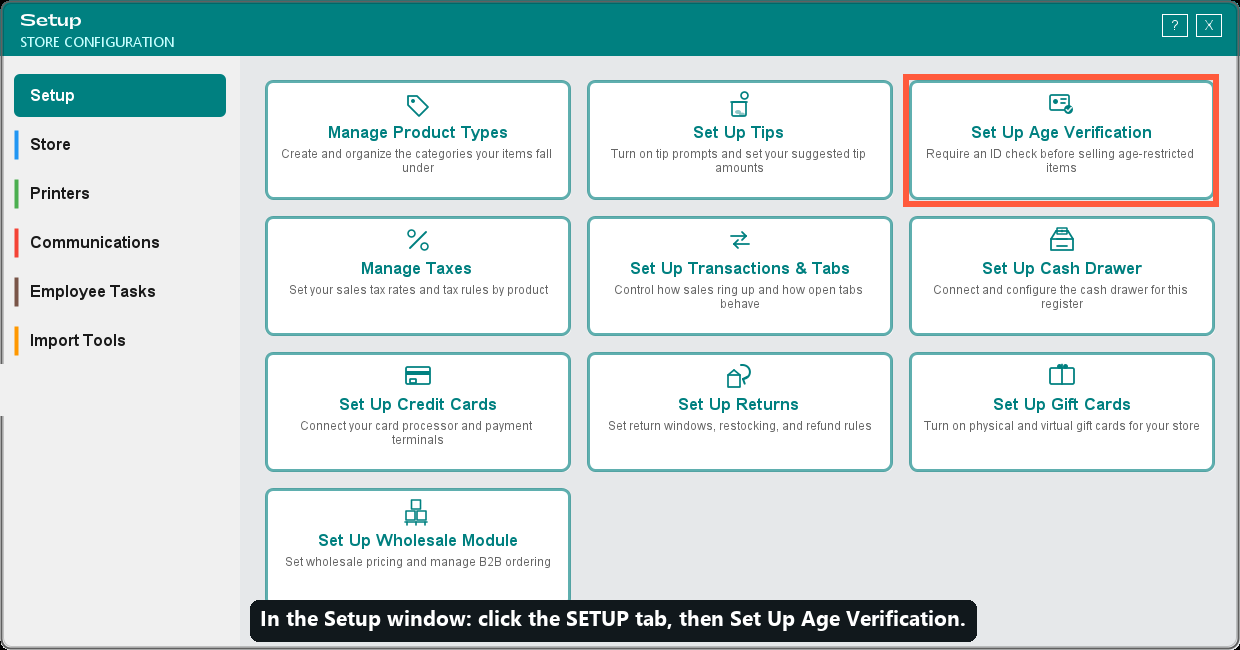
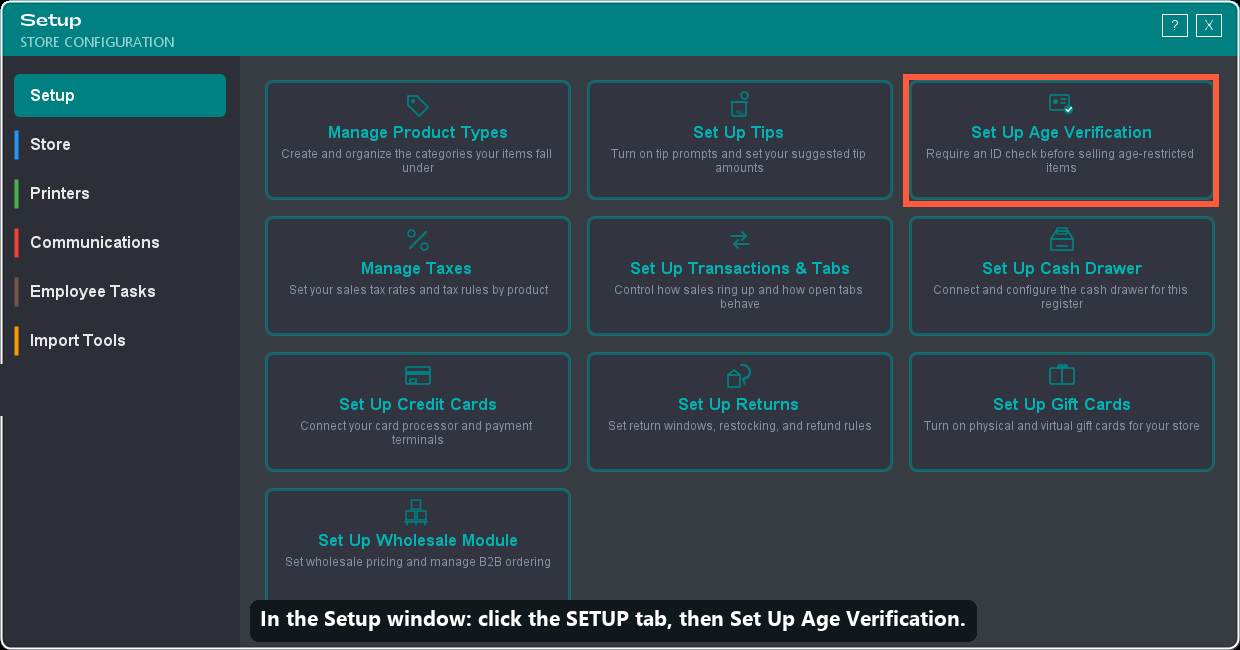
What this step is for: set the ages that make TORO card customers. For a tobacco shop this is the important one — it's how your staff stay compliant.
Do this:
- Open the Setup window and click the Setup tab.
- Click the Set Up Age Verification tile.
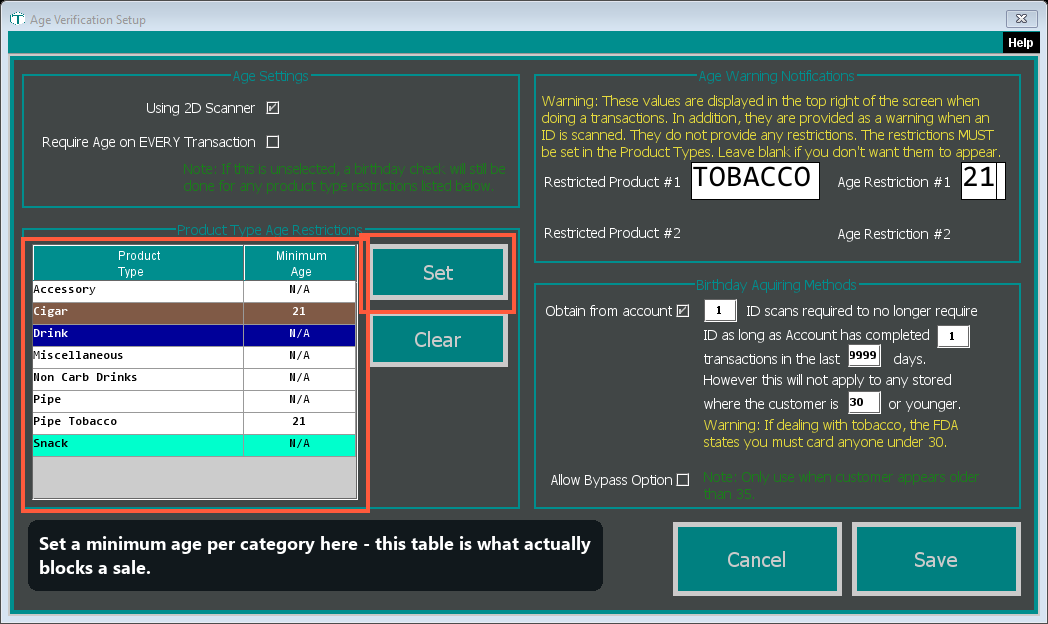
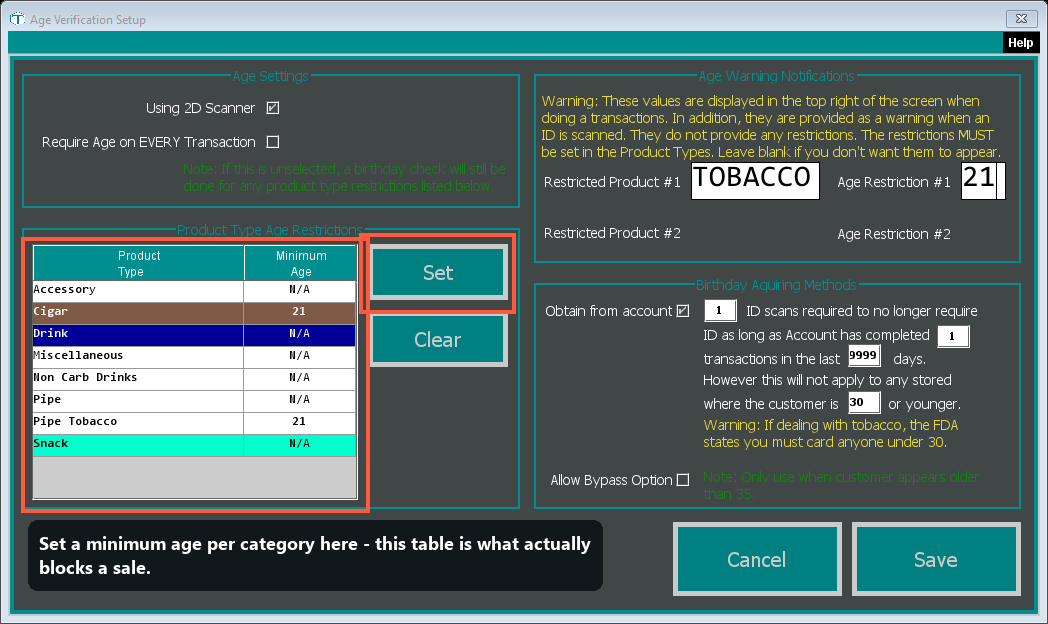
- Check Using 2D Scanner if you have the ID-scanning reader (it reads the barcode on the back of a driver's license), and Require Age on EVERY Transaction if you want a check on every sale.
- In the Product Type Age Restrictions table, click a category, click Set, and enter its minimum age. This table is what actually blocks or prompts a sale — the age badges in the corner of the sale screen are only a reminder.
- Turn on Obtain from account if you want TORO to remember a customer's birthday after you've scanned their ID once, so you don't have to re-scan every visit. Click Save.
Important — restart TORO after saving. Your age settings do not take effect until you restart, and there's no error message if you forget — a sale could go through under the old rules. TORO reminds you to restart when you save; after it comes back up, ring up a test age-restricted item to confirm the age prompt appears.
Other Features of This Window
Think of this screen as two jobs side by side. The left half actually stops sales when someone's too young. The right half is reminders — it never blocks anything on its own. Getting that difference straight is the whole game, so read the two gotchas at the end.
- Using 2D Scanner — On if you have the little reader that scans the barcode on the back of a license (TORO reads the birthday automatically — fast, no typos). Off if you don't have that reader. Pick on if you bought the scanner; off if you didn't.
- Require Age on EVERY Transaction — On means TORO asks for an age check on every sale, even a lighter or soda. Off means it only asks when the cart holds something you've marked age-restricted below (a green note on screen says a birthday check still happens for those restrictions). Pick on for the strictest no-exceptions habit (many tobacco shops do — nobody ever forgets); pick off to keep quick non-tobacco sales fast.
- Product Type Age Restrictions (the table, with Set / Clear) — This is the part that actually blocks or prompts a sale. Click a category, click Set, type the minimum age (e.g. 21); now TORO demands an age check whenever that category is in the cart. Clear removes an age. Set an age for every category your state restricts.
- Obtain from account — On means once you've scanned a regular's ID, TORO can remember their birthday so staff don't re-scan every visit. Pick on if you have lots of repeat regulars. Gotcha: the trust rule next to it ("__ ID scans required… __ transactions in the last __ days") starts at 999, which means "never trust a stored birthday" until you lower these to real numbers (say, scanned 2 times, 3 purchases, in the last 180 days). So turning this on does nothing useful until you set those.
- The carding-age field ("…where the customer is __ or younger") — your safety floor: no matter what birthday is on file, if the person is this age or younger, still card them for real. The yellow note explains why: the FDA says card anyone under 30 for tobacco. Set 27–30 here.
- Allow Bypass Option — On lets a manager override and push a sale through even when the age check would stop it ("only use when the customer appears older than 35"). Off = no overrides ever.
Two things first-timers get wrong here:
- The badge in the corner is not protection. The "Age Warning Notifications" box on the right only paints a reminder badge (like "TOB 21") on the sale screen — it does not block anything. Real blocking comes only from the Product Type Age Restrictions table, so always set your ages there.
- You must restart TORO after saving or your new age rules won't take effect — and there's no error if you forget, so a sale could slip through under the old rules. TORO reminds you when you Save.
13. Set Up Transactions & Tabs
Get to the Setup window: Admin → Dashboard → TORO Configuration → Set Up System — need help finding it?
What this step is for: turn on cash rounding so your drawer isn't buried in pennies. That's the only setting you need to touch here — everything else in this window is standard and safe at its defaults.
Do this:
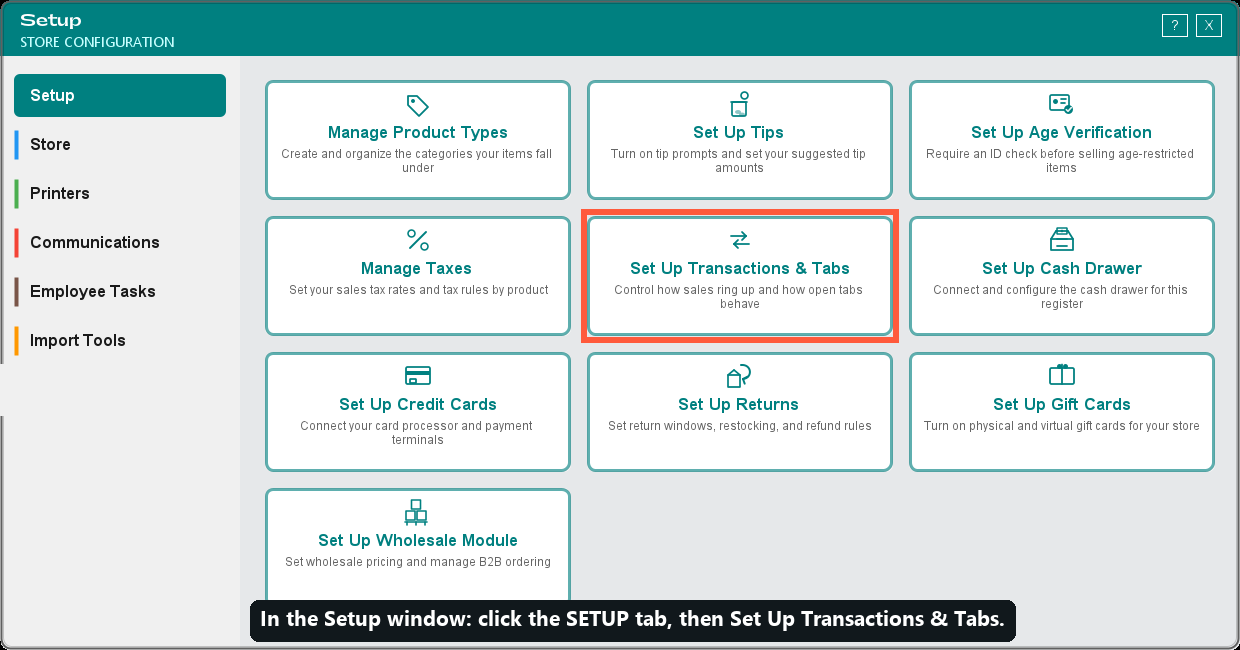
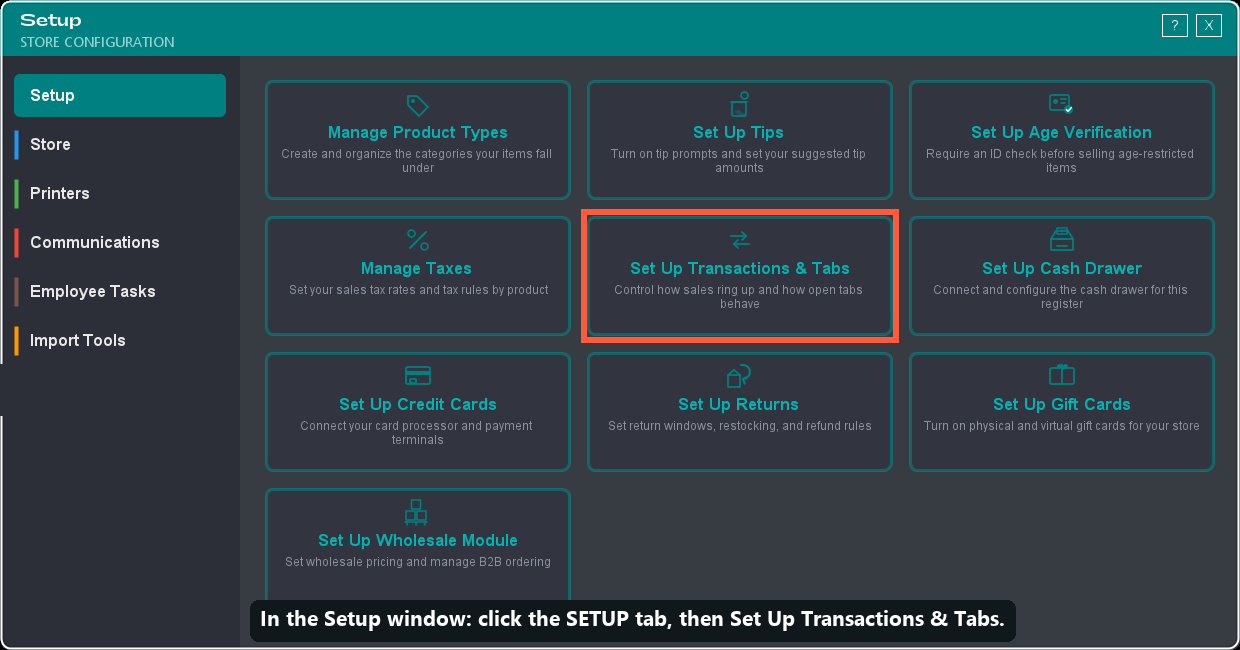
- Open the Setup window and click the Setup tab.
- Click the Set Up Transactions & Tabs tile.
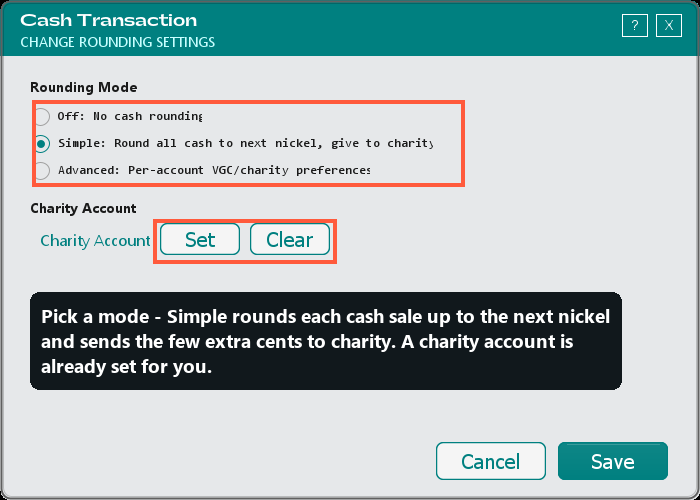
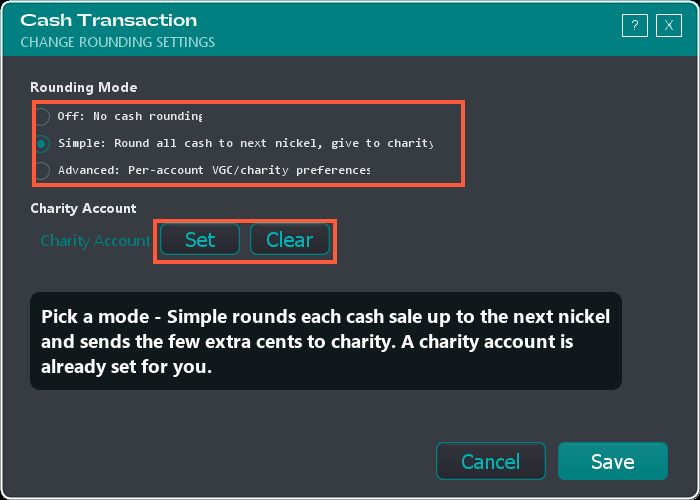
- Click the Set Up Cash Transaction Rounding button.
- Choose a Rounding Mode:
- Off — cash totals stay exact to the penny.
- Simple: Round all cash to next nickel, give to charity — the everyday choice, and TORO's default. It rounds each cash sale up to the next 5 cents (cards are never rounded), and the few extra cents go to a charity account. Pick this to just stop handling pennies.
- Advanced — round to the next quarter, dollar, or any amount you like, and optionally put the leftover change onto the customer's Virtual Gift Card (store credit for that customer) instead of charity.
- Pick the Charity Account the rounded cents go into. Your store already comes with a default one set up, so just make sure it's selected — then Save. (Rename it to your favorite charity anytime.) Heads-up: in Simple or Advanced mode you must have an account selected, or TORO won't save — it says "You must select a charity account for rounding."
Other Features of This Window
The window's full name is "Setup Transactions, Tabs, Tips & Items." You don't have to touch any of these to open your store — they're standard, and each checkbox saves itself the moment you click it (the Save button at the bottom just stores the Threshold box and closes the window). Here's what each one does, and when you'd want it, matched to the numbers on the picture:
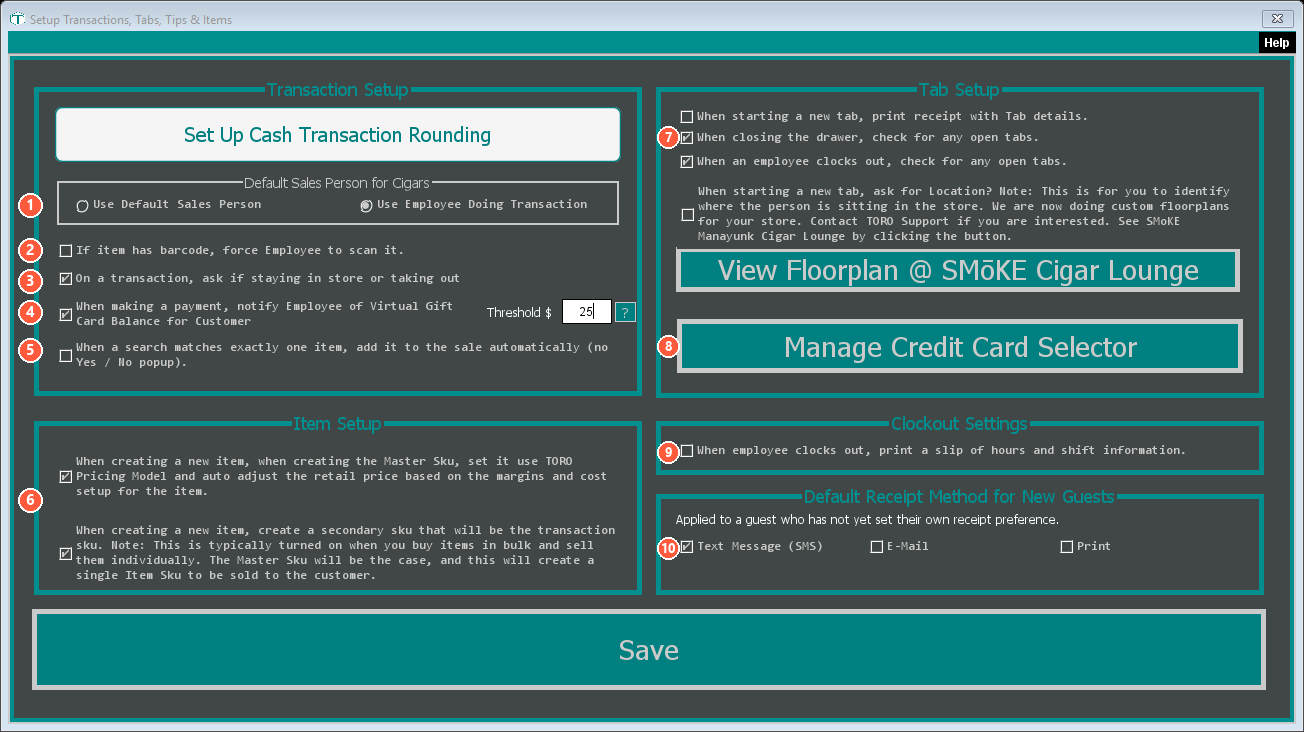
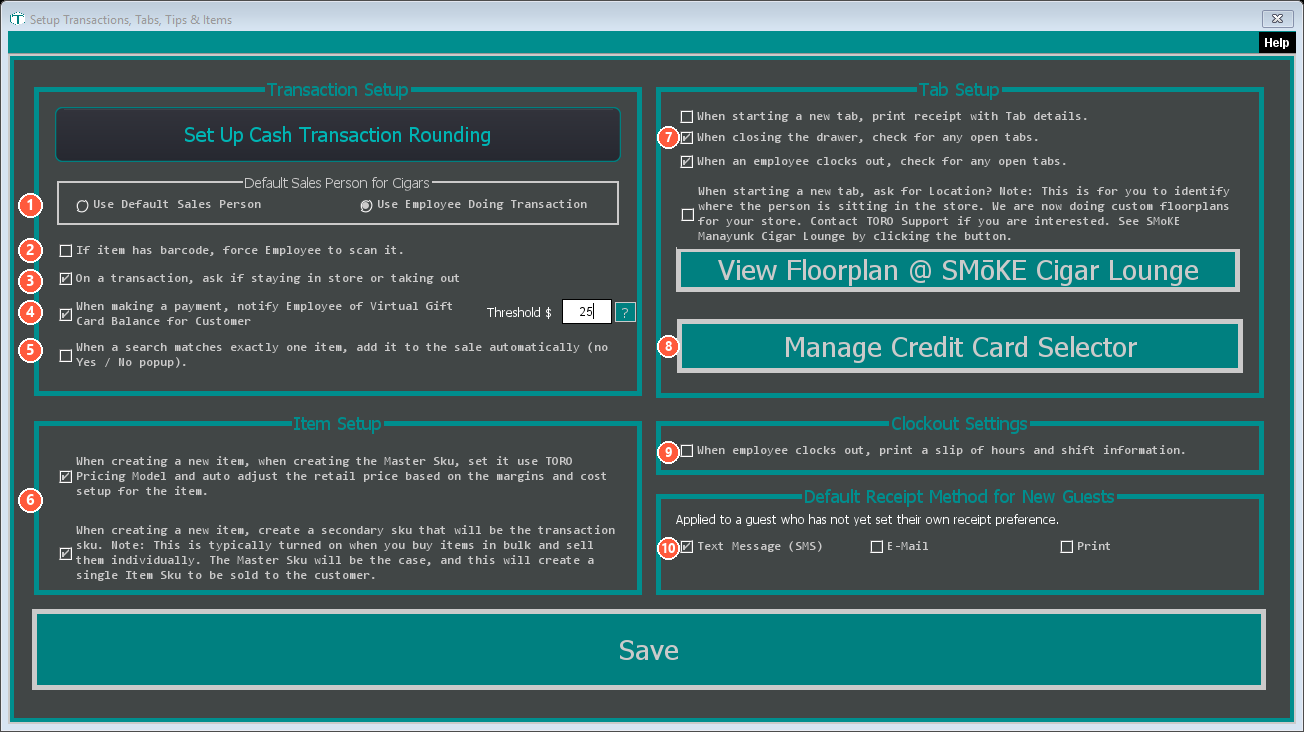
- Default Sales Person for Cigars — who gets credited for a sale. Use Employee Doing Transaction credits whoever rang it — turn this on if you track sales by staff or pay any commission (most shops). Use Default Sales Person credits one set name — pick it if you don't track sales by person.
- If item has barcode, force Employee to scan it — On: staff must scan a barcoded item instead of tapping it from a list, which prevents wrong-item rings. Off: better if you sell lots of loose, un-barcoded items.
- On a transaction, ask if staying in store or taking out (off by default) — pops a "here or to-go?" question on each sale. On: handy if you run a lounge and want to know what's consumed on-site. Off: skip the extra tap.
- When making a payment, notify Employee of Virtual Gift Card Balance (on by default) — reminds the cashier when a customer has store credit so it isn't forgotten. The Threshold $ box sets the trigger — blank = any balance pops up;
25= only $25 or more. Leave it on unless the reminders feel noisy. - When a search matches exactly one item, add it automatically (off by default) — drops a single match straight into the cart, no Yes/No. On: faster for experienced staff. Off: safer — the cashier always confirms.
- New Items (two checkboxes) — advanced behavior for how new items are created (auto-adjust the retail price from your margin; auto-create a "sell as a single" SKU for things you buy by the box). Most shops leave both as-is — your rep will guide you if your inventory needs something different.
- Tabs — Allow Tabs (on by default) is the master switch: turn it off and the Start Tab button and Open Tabs list disappear from the main screen — a cleaner register for stores that never run tabs (TORO makes you close any open tabs first, and checking the box brings everything right back). Below it: print a slip when a tab opens (off); check for open tabs when closing the drawer (on) and when an employee clocks out (on) — both stop money walking out the door; ask for a seat/location on a new tab (off, unless you use a floorplan).
- Manage Credit Card Selector — opens the tool that controls which saved card terminal is offered first. Leave it alone unless TORO support asks you to change it.
- Sale Item List — how the cart behaves on screen: highlight an item when it's added (on), tap to select more than one without holding Ctrl (on), and show short item names on the sale list (off). All fine at their defaults.
(Looking for the clock-out hours slip? It moved to Payroll Settings. The Receipt Method for New Guests checkboxes moved to Set Up Receipts — see step 6.)
14. Set Up Credit Cards
Get to the Setup window: Admin → Dashboard → TORO Configuration → Set Up System — need help finding it?
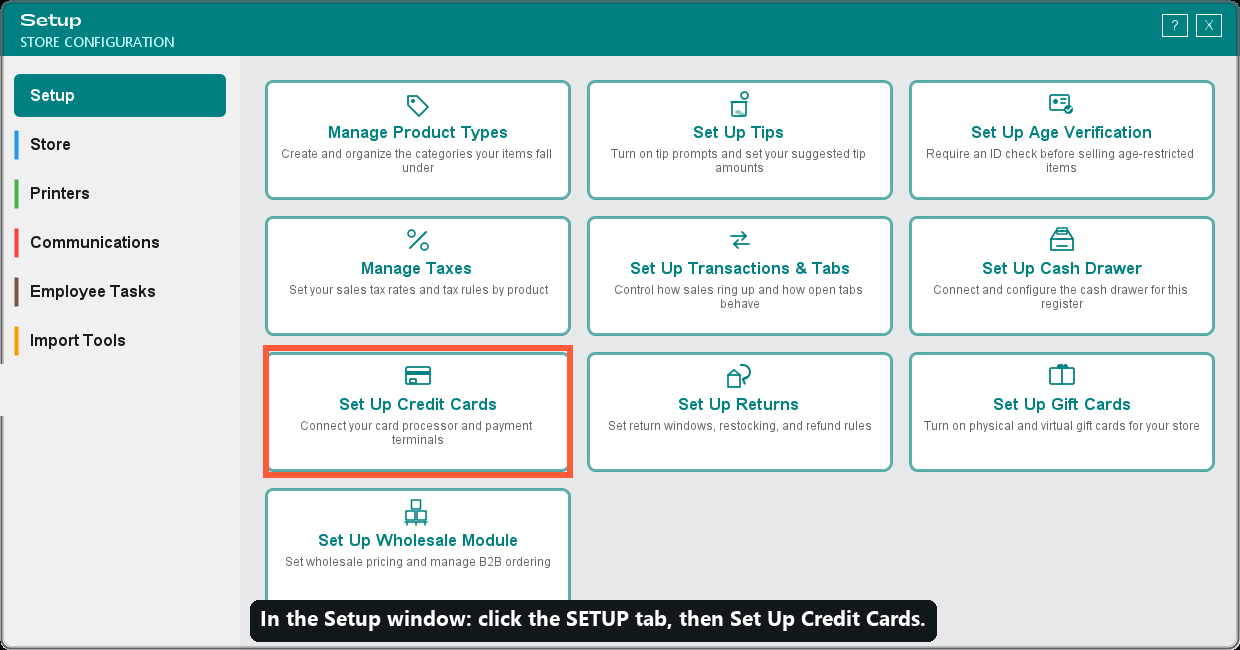
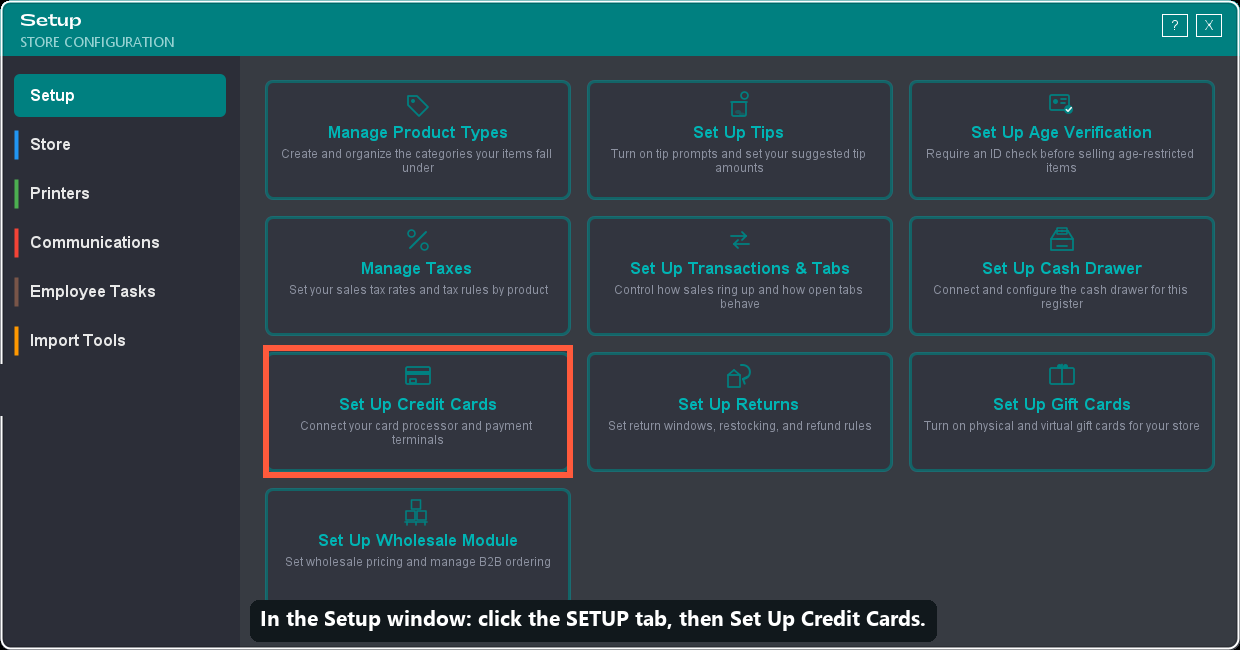
What this step is for: decide whether you want a credit-card minimum — the smallest amount a customer can put on a card.
Do this:
- Open the Setup window and click the Setup tab.
- Click the Set Up Credit Cards tile.
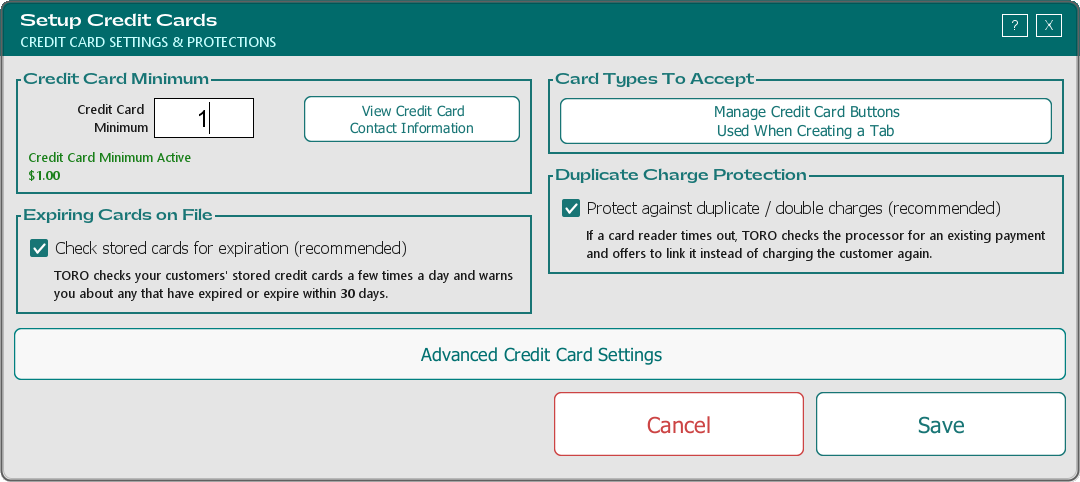
- In the Credit Card Minimum box, type your minimum as a whole dollar amount (for example,
10— not10.00), or leave it blank for no minimum. The label turns green to confirm it's set. - Leave Duplicate Charge Protection turned on (it's on by default and guards against accidental double charges).
That's all you need here. Connecting your actual card terminal is a separate step your TORO rep handles. (Want to pass card fees on to customers? Message Mitch in your store's Credit Card thread on WhatsApp and complete the application with him — once you're approved, the fee pass-through options appear on this screen.)
Other Features of This Window
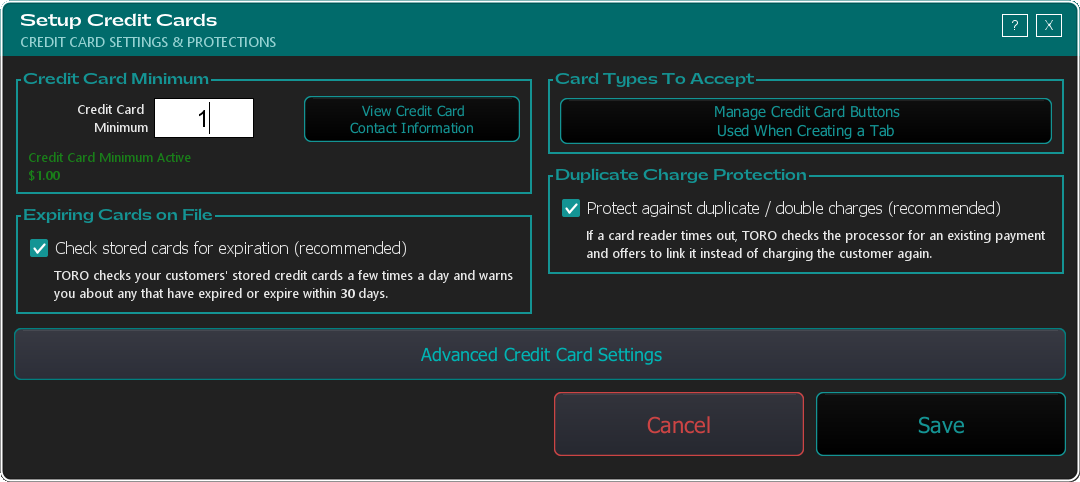
This screen is short on purpose. Its full title is "Setup Credit Cards — Credit card settings & protections," and for a new store there's really one thing to decide plus two safety switches to leave alone. Connecting the actual terminal is done by your TORO rep, not here.
- Credit Card Minimum — the smallest amount a customer may put on a card. Type a whole-dollar number (for example 10, not 10.00) and TORO shows a green "Credit Card Minimum Active — $10.00"; leave it blank and it shows red "No Credit Card Minimum Applied" (any amount can go on a card). Pick a minimum if small card swipes cost you in fees and you'd rather steer tiny sales to cash (a $5 or $10 floor is common); leave it blank if you're happy taking a card for any amount.
- Protect against duplicate / double charges (recommended) — leave this on. If your reader hangs mid-payment, TORO checks the processor for a charge that already went through and offers to link it instead of charging the customer twice. On by default; almost never a reason to turn it off.
- Check stored cards for expiration (recommended) — in the Expiring Cards on File box, leave this on. TORO checks your customers' saved credit cards a few times a day and warns you about any that have already expired or expire within 30 days, so a card on file doesn't fail the first time you try to run it.
- View Credit Card Contact Information / Advanced Credit Card Settings — looking up your processor's details and the deeper terminal settings. Advanced is locked to Admins/TORO support — your rep handles the terminal connection.
First-timer gotchas:
- Connecting your card terminal is a separate step your TORO rep does — it isn't on this screen.
- Want to pass card fees on to customers? Those controls are hidden until the feature is switched on for your store. Message Mitch in your store's Credit Card thread on WhatsApp and finish the short application with him; once approved, a Credit Card Fee Pass-Through section appears right here. Until then you won't see it — that's normal.
15. Set Up Gift Cards
Get to the Setup window: Admin → Dashboard → TORO Configuration → Set Up System — need help finding it?
What this step is for: decide how long a gift card lasts before it expires — that's the one setting here.
Do this:
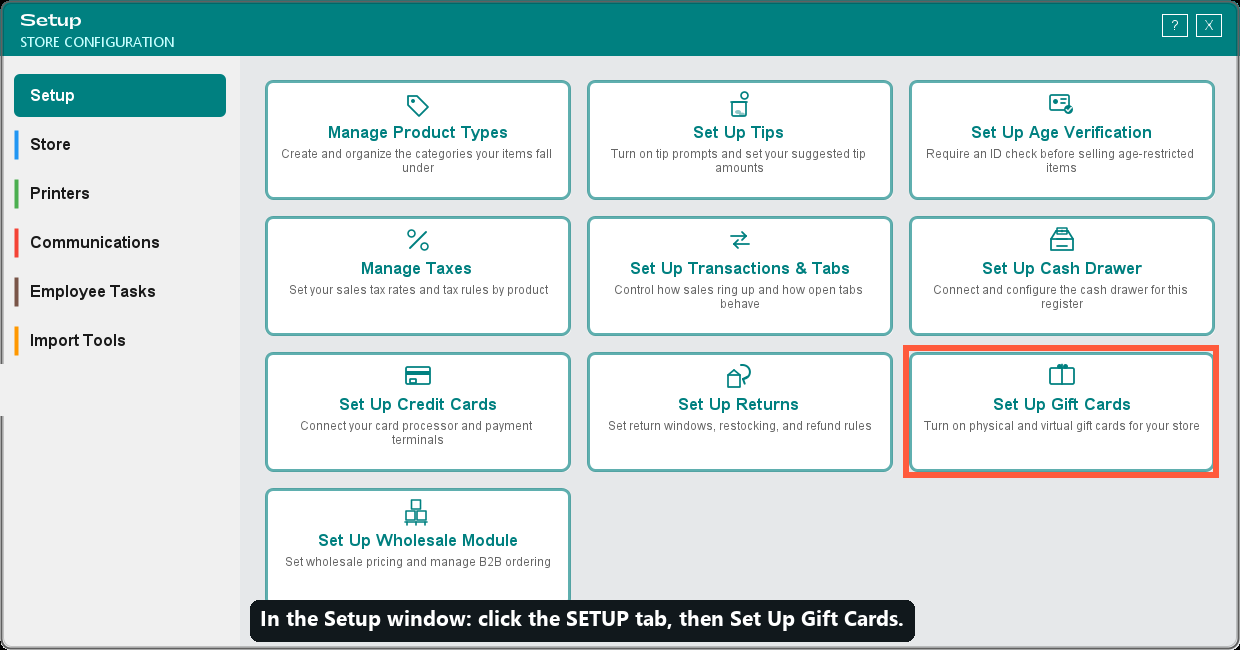
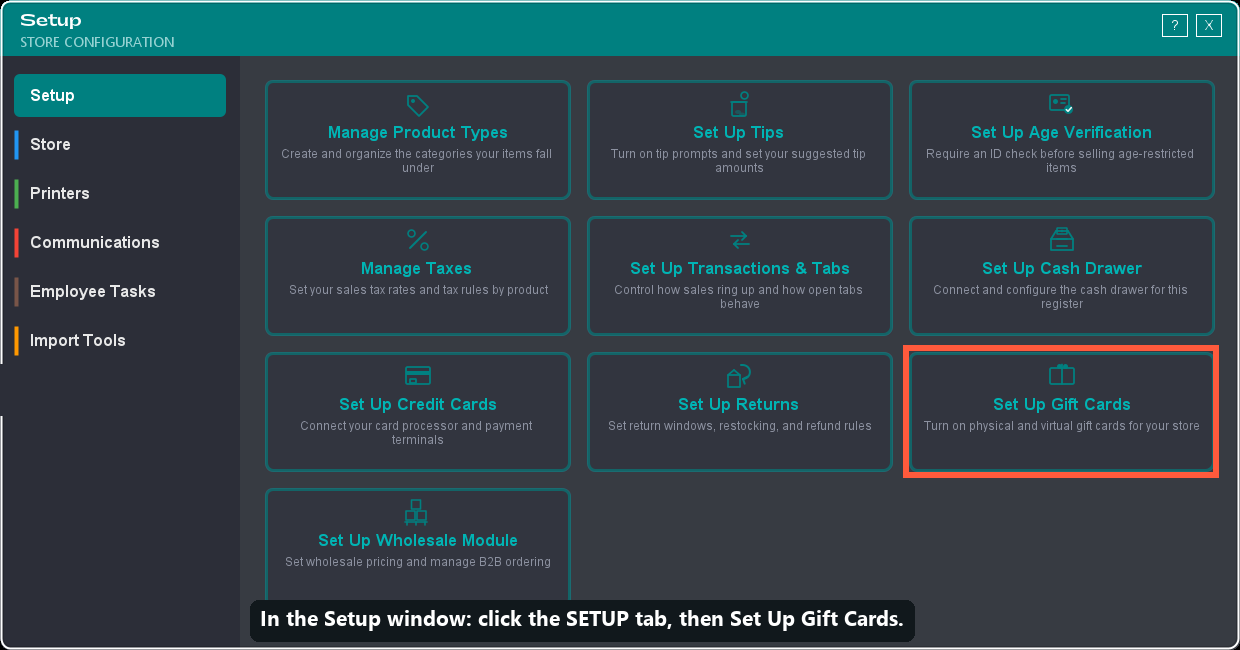
- Open the Setup window and click the Setup tab.
- Click the Set Up Gift Cards tile.
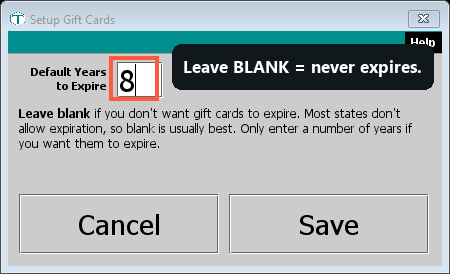
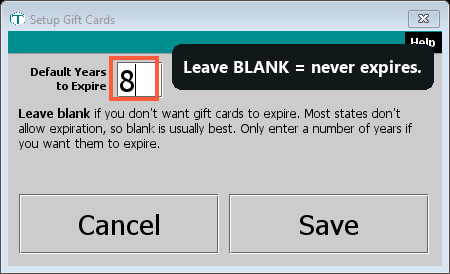
- In Default Years to Expire, leave the box blank if you don't want your gift cards to expire — most states don't allow it, so blank is usually the right choice. (Only enter a number of years if you do want them to expire.) Click Save.
Gift cards come in two kinds — physical barcode cards you scan and virtual cards (store credit tied to a customer's account). You don't turn those on here; you sell one by ringing up the Gift Card or Virtual Gift Card item during a sale.
Good to know
There is exactly one setting on this screen, and for most shops the right answer is to leave it empty.
- Default Years to Expire — how long a newly sold gift card stays good before it expires. Leave the box blank and gift cards never expire — and blank is what the screen itself recommends, because most states legally forbid gift cards from expiring. Only type a number of years if you're certain you want them to expire and your state allows it. Pick blank if you're not sure or you're in a typical U.S. state (almost everyone); type a number only if you've confirmed expiration is legal where you are.
First-timer gotchas:
- Blank is a real, valid choice — it means "these gift cards never expire," not "unfinished." That's the safe default.
- There's a quiet ceiling: TORO caps the years so a card can't expire past 2037. Type a bigger number and TORO silently trims it — one more reason blank is simplest.
- This screen only sets the expiration rule. You don't switch gift cards on here — you sell one by ringing up the Gift Card (physical) or Virtual Gift Card (store credit) item during a normal sale.
16. Set Up Mailchimp
Want a mass-marketing email list? The Mailchimp integration keeps your TORO customer list synced automatically so you can run real email campaigns.
- From the Dashboard, click the Modules & Integrations tab and find the Mailchimp card (it shows the Mailchimp logo).
- Click the card. If it isn't on yet, an Admin can activate it from the sign-up screen (it's $8.99/month, added to your TORO subscription).
- Once it's live, click the card again to open the setup screen and connect your Mailchimp account.
You design and send the emails in Mailchimp; TORO keeps your customer data flowing into it.
What these settings do
Mailchimp is a separate email-marketing service (the one with the chimp logo). This window is the bridge: it hands your TORO customer list to Mailchimp automatically, so the addresses you collect at the register show up there ready to email — no exporting spreadsheets by hand.
- Set API Key — an API key is a long secret password that lets two programs talk safely. You create it inside your Mailchimp account, then paste it here so TORO is allowed to send your list over. Until it's set, nothing syncs — so this button glows to tell you it's first.
- The Audiences list — in Mailchimp an "audience" is just a mailing list. Here you tell TORO which list to pour your customers into. + adds one (it only wakes up after a valid API key is saved), * edits, – stops syncing to it.
- Close — done.
What syncs: your customer contact info flows from TORO into the audience you chose. You design and send the actual emails inside Mailchimp — TORO just keeps the list fed.
The cost: the integration is an add-on to your TORO subscription ($8.99/month; an Admin confirms the current price on the sign-up screen). That's separate from any plan you pay Mailchimp directly.
First-timer gotchas: set the API key first, then add an audience (the + stays asleep until the key is in). You need your own Mailchimp account already created — TORO connects to it, it doesn't replace it.
17. Set Up Discount Levels
What this step is for: create standard, named discounts your staff can apply at the register — "Employee," "Wholesale," "VIP" — that you attach to a customer for automatic pricing.
Do this:
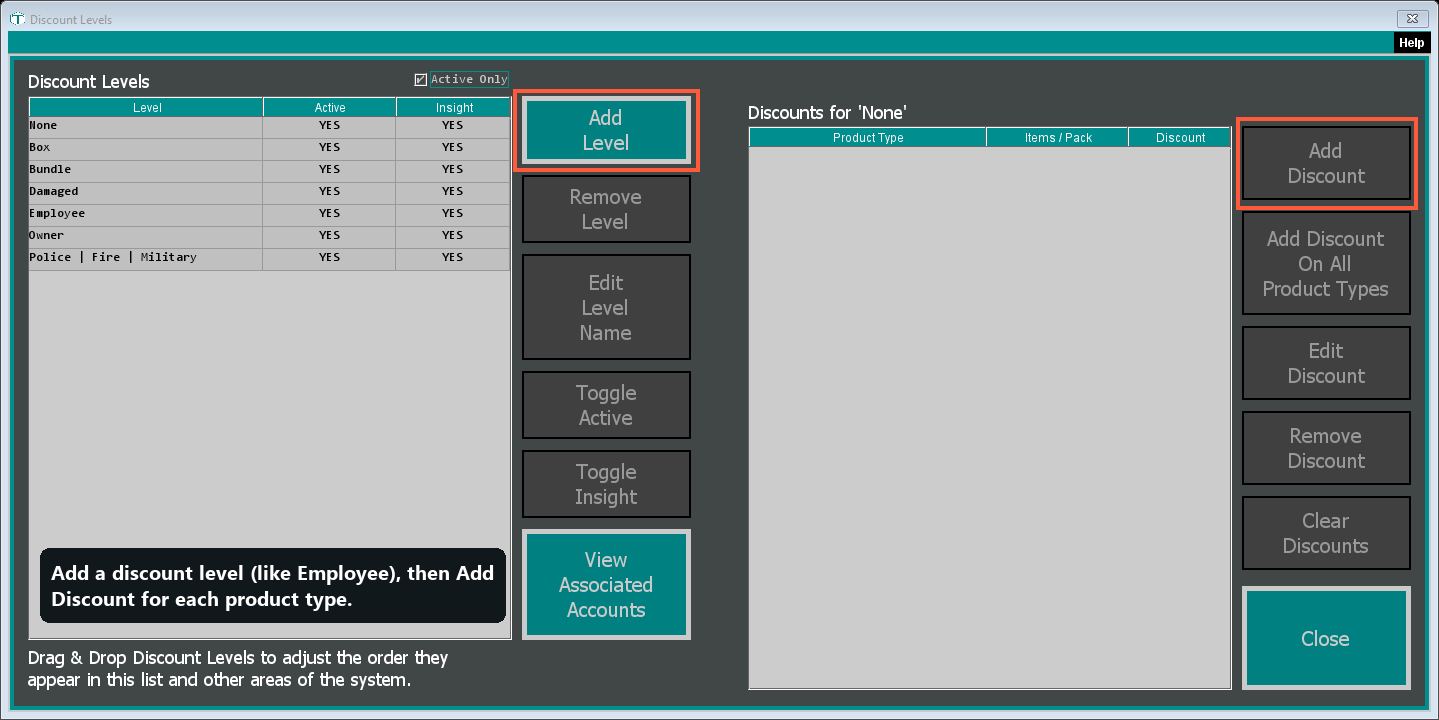
- From the Dashboard, click the Customers tab and open the Manage Discounts card (titled Discount Levels).
- Add a level and name it (for example, "Employee").
- With that level selected, add a discount for each product type it applies to.
- To give a customer a level, you assign it on their account — this screen just defines the levels.
Other Features of This Window
A Discount Level is a named, reusable discount you pin to a customer so their price adjusts automatically at the register — no mental math. The window has the list of levels on the left and the discounts inside the selected level on the right. Here's what else it does, matched to the numbers on the picture:
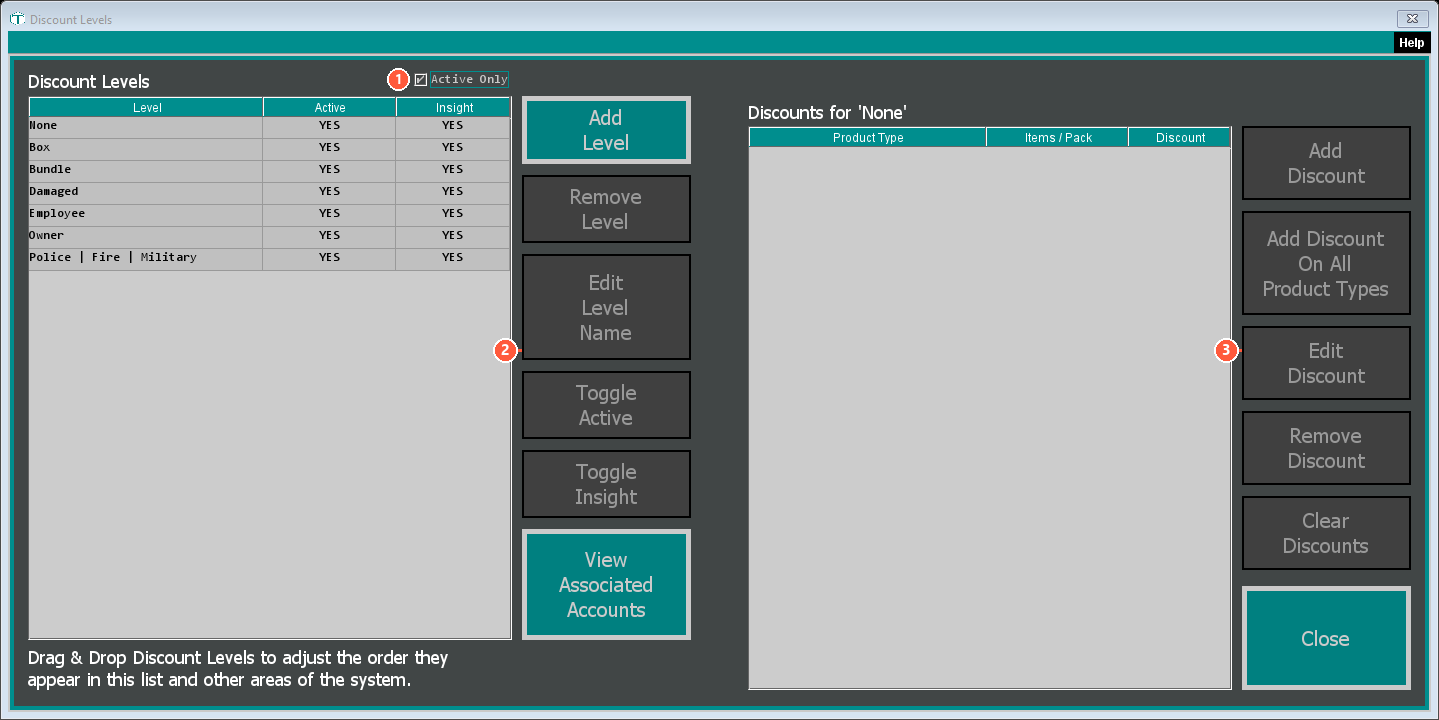
- Active Only (top-left, on) — hides levels you've turned off so the list stays tidy. Uncheck to see inactive ones.
- The level buttons (middle) — beyond Add Level (the one you start with): Edit Level Name; Remove Level (warns you, since customers on it move back to "none"); Toggle Active (turn a level off without deleting — good for a seasonal deal); Toggle Insight (whether it's available inside TORO Insight); View Associated Accounts (who's on it). You can also drag and drop levels to reorder them.
- The discount buttons (right) — a discount is set per product type, so one level can be 10% off Cigars but 5% off Accessories. Add Discount picks a product type and its amount (a percent — you can even vary it by box size); Add Discount On All Product Types applies one flat percent to every type at once; Edit / Remove Discount change one; Clear Discounts wipes them all.
Scenarios: Employee = 20% off everything → use Add Discount On All Product Types, enter 20. Wholesale = a buyer who only gets a break on cigars → add a single discount on the Cigar type. VIP = 10% cigars, 5% accessories → add each type separately.
First-timer gotchas: this screen only defines the levels — a customer doesn't get the discount until you attach a level to their account (from the customer's own screen). The built-in NONE level is a system level, greyed out — that's normal. Percent is a whole number here (20 = 20% off).
18. Set Up Your Rewards Program
What this step is for: give people a reason to come back to your shop — loyalty points, tiers, and redemption rules, all in one place.
Do this:
- From the Dashboard, click the Customers tab and open the Manage Rewards Program card. (Don't see it? The card only appears once Coupons & Rewards is enabled for your store — ask your TORO rep to turn it on.)
- Set how customers earn and redeem loyalty points (typically 1 point per dollar), choose your coupon code format, and layer on punchcards or birthday rewards whenever you're ready.
The one rule that makes it all work: the customer has to be attached to the transaction to earn anything. Train your team to look up every customer, every time.
Other Features of This Window
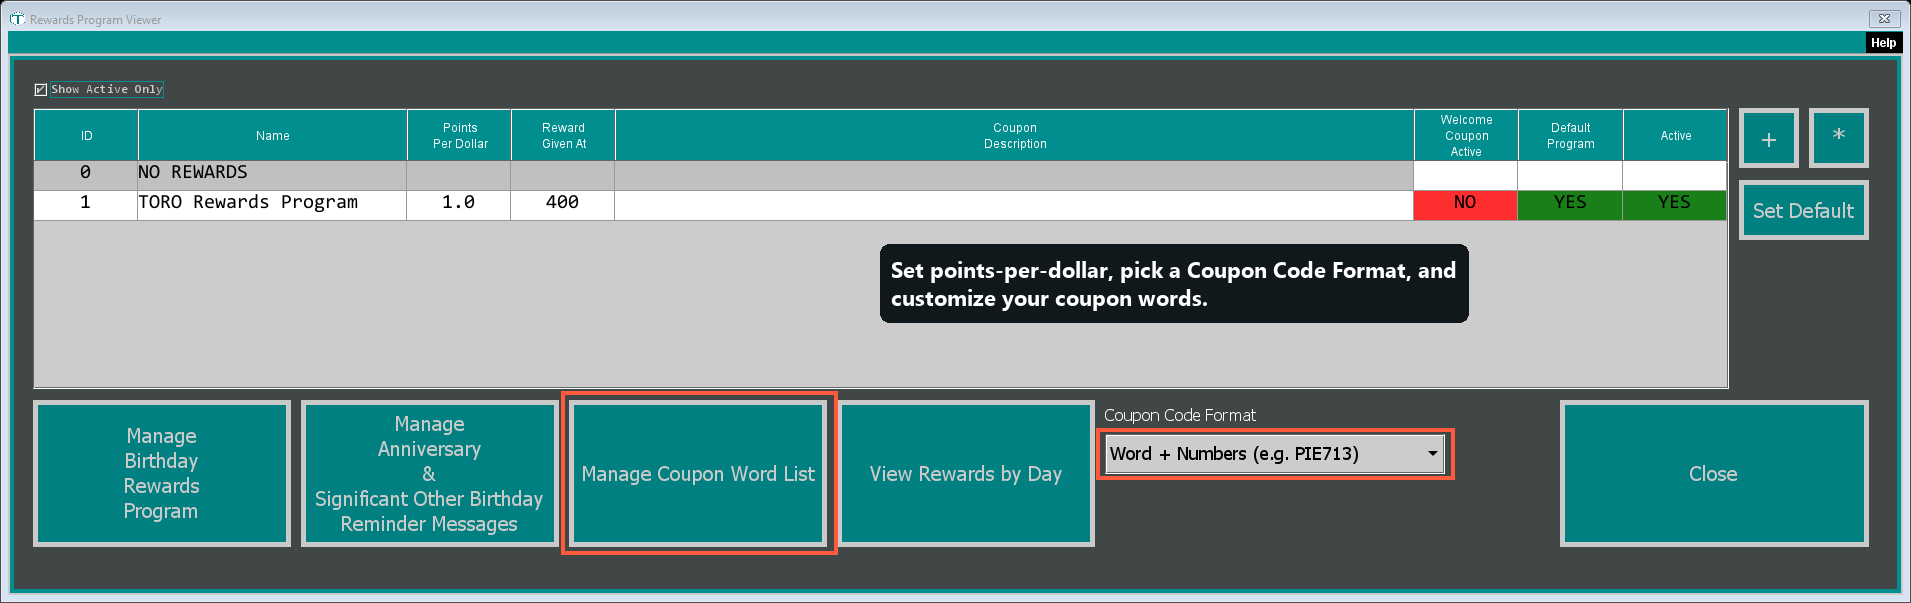
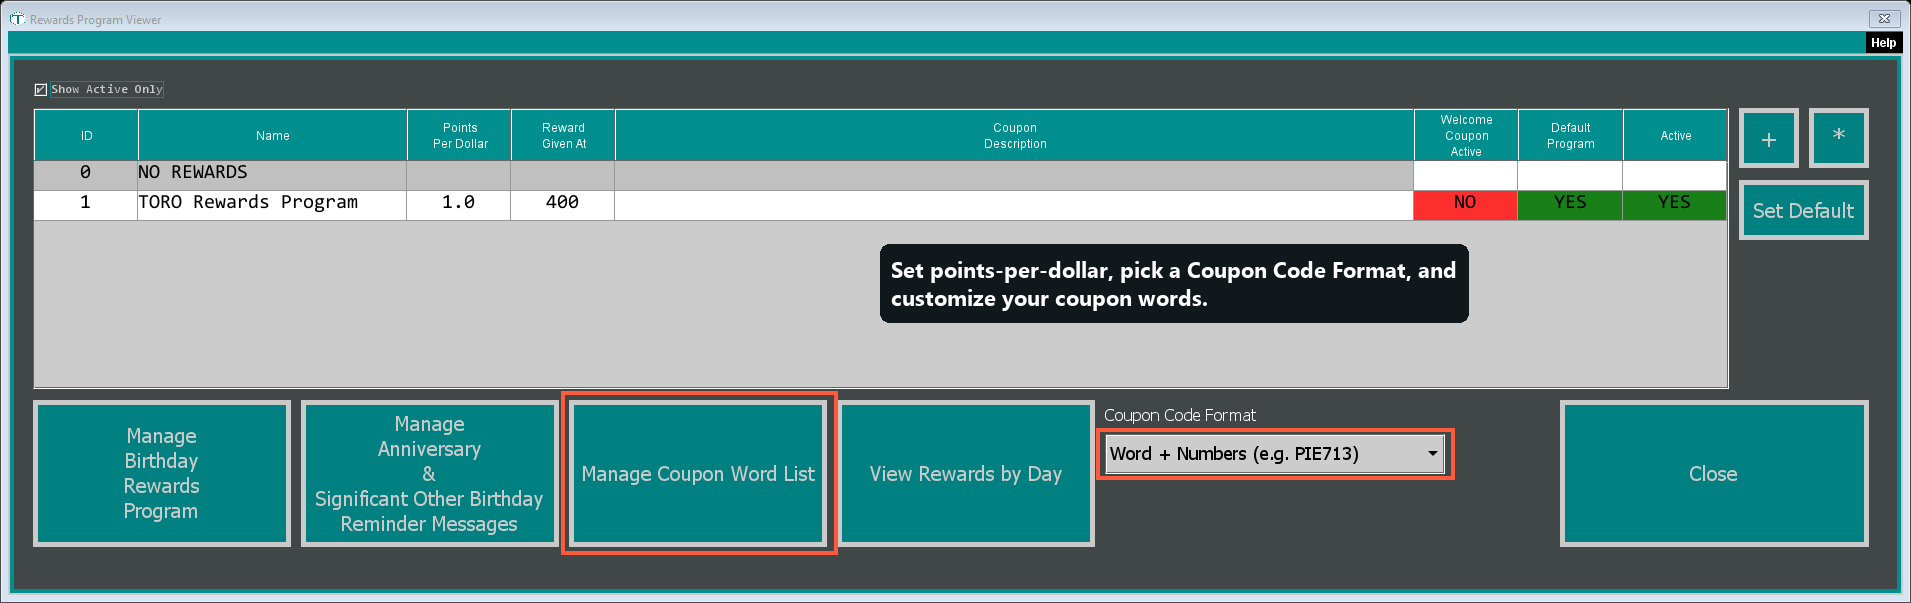
This is the control room for your loyalty program. The table lists your reward programs; the settings that make one run live one click deeper, in the editor you open with + (new) or * (edit). Here's what else the main viewer offers, matched to the numbers on the picture:
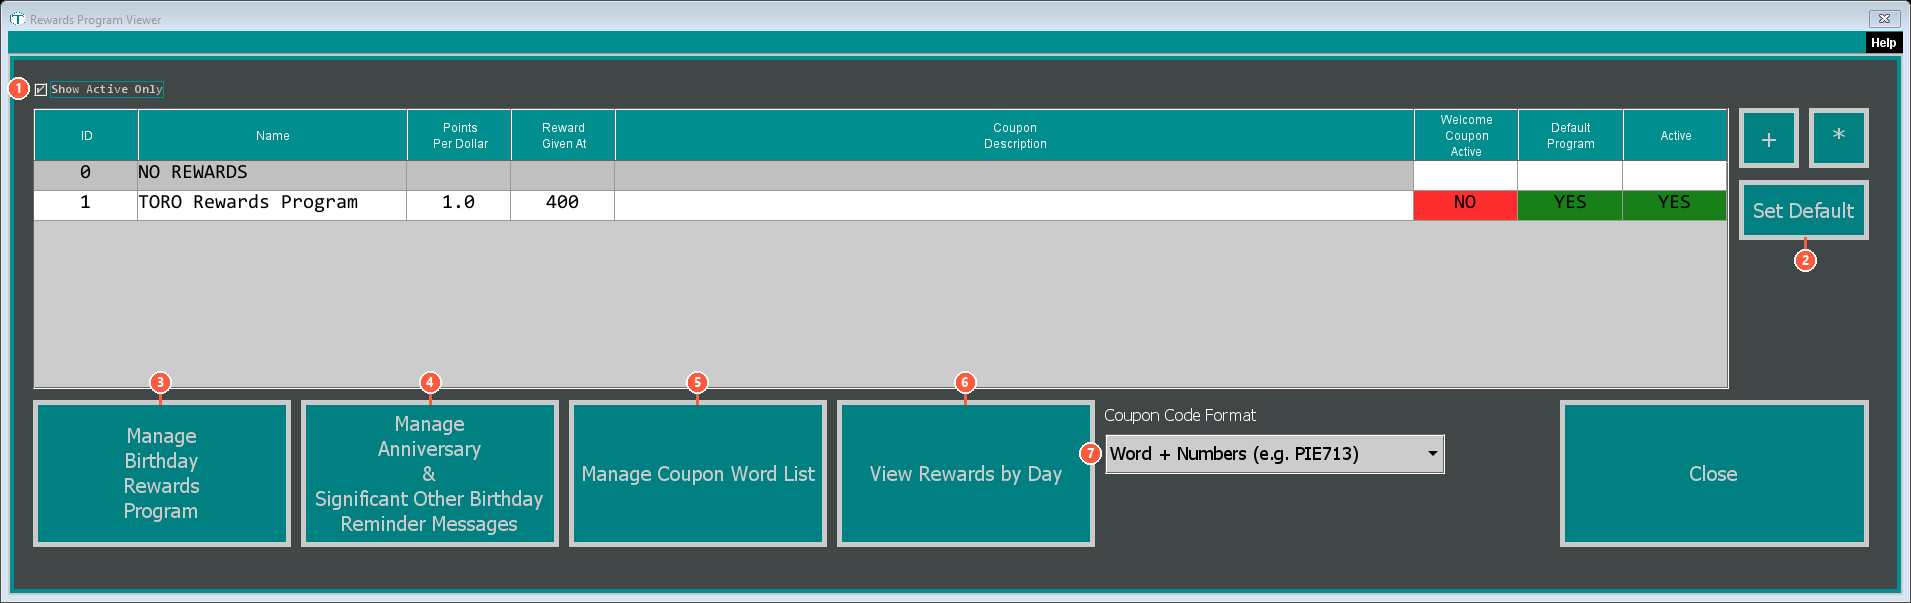
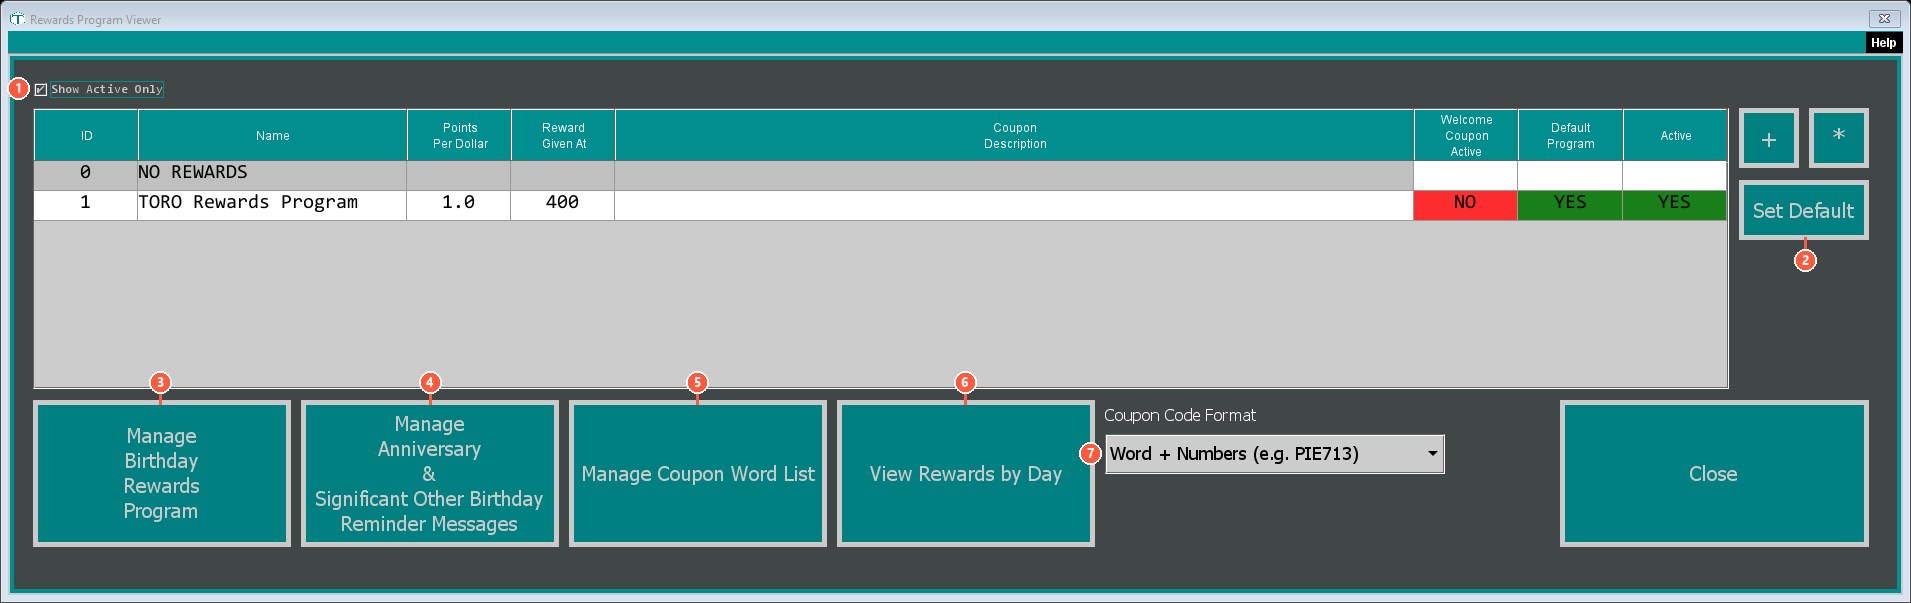
- Show Active Only (top-left, on) — hides retired programs.
- Set Default (top-right) — marks the program new customers join (it must be Active first).
- Manage Birthday Rewards Program — sets up an automatic reward on a customer's birthday.
- Manage Anniversary & Significant Other Birthday Reminder Messages — automatic anniversary and significant-other reminders.
- Manage Coupon Word List — edits the pool of words TORO uses to build coupon codes.
- View Rewards by Day — a report of rewards activity by day.
- Coupon Code Format (dropdown) — what reward codes look like: Word + Numbers (e.g. PIE713) (the default — easy to read aloud), All Numbers (e.g. 847-291), or Two Words (e.g. PIE-SKY).
Inside the editor (opened with + or *): Points Per $ — how many points a customer earns per dollar (1 is the typical start). Points Needed For Reward — how many points before a reward is earned. Points Expiration In Days — how long points last (blank = no expiration). The Reward Coupon panel is what the reward actually is (a percent off, a dollar amount, or an item) and how long it's valid. The Welcome Coupon panel is an optional one-time reward for new members.
Scenario — a solid starter program: Points Per $ = 1, Points Needed = 100, reward = $10 off. Spend $100 across visits, earn a $10 coupon.
The one rule that makes it all work: a customer only earns points when they're attached to the transaction. Train staff to look up every customer, every sale.
First-timer gotchas: changing Points Per $ or Points Needed on a program that already has customers changes their future earning (TORO warns you; earned points aren't touched). Set Default won't take an inactive program. The System Rewards Program row is locked — that's expected.
19. Set Up Your Employees
Get your team into TORO so they can clock in, ring sales, and be tracked individually.
- From the Dashboard, click the Employees tab and open the Manage Employees card (titled Employee Database).
- Click the + button. TORO first asks you to find or create a loyalty account for the employee. (Everyone in TORO — customers and staff — has one of these; it's just their profile. Every employee needs one.)
- Fill in their name and a unique 4-digit PIN — the field on screen is labeled Customer Interface PIN Number (that's just its internal name; it's the code your staff types to log in and clock in). Then click Save.
- Now click Change Access Level and pick the role that fits their job. (Access Level can only be set after you've saved the employee once.)
Never share PINs — every sale, clock-in, and override is tracked by PIN.
What these settings do
This is where your staff become real TORO users — able to clock in, ring sales, and be tracked individually. The Employee Database lists everyone; adding a person walks through two ideas: their profile, and their permissions.
On the list: + adds an employee; * edits the selected one; Active Only (on) hides former staff.
Adding an employee:
- Find their Loyalty Account first. TORO asks you to look up — or create — a loyalty account. Everybody in TORO, customers and staff, is built on one of these; it's simply their profile. An employee is a loyalty account that's also been given the keys to work the register. Already a customer? Find that account; if not, make one.
- Fill in their details: Name (shows on sales and time records) and Customer Interface PIN Number — despite the long label, this is just the 4-digit code the employee types to log in and clock in (exactly four digits). Then Save.
- Change Access Level — now pick the role that matches the job. It decides what they're allowed to do. Your store comes with these roles:
- ADMIN — owner/top managers; can do anything.
- GENERAL MANAGER / SHIFT MANAGER — managers (discounts up to 50%).
- OPENER CLOSER — trusted to open and close (up to 10%).
- STANDARD — everyday staff trusted with the drawer (up to 10%).
- BASIC — minimal: clock in/out and tabs only, no discounting.
- BUSINESS PARTNER — for a business partner (up to 50%).
Scenarios: a weekend clerk still training → BASIC or STANDARD; a reliable keyholder → OPENER CLOSER; your right-hand manager → GENERAL MANAGER; a co-owner → BUSINESS PARTNER or ADMIN.
First-timer gotchas: Access Level can only be set after you Save the employee once (click it too early and TORO tells you to save first — just save and click again). Never share PINs — every sale, clock-in, and override is tracked by PIN, so a shared code makes the records meaningless. Pick the lowest role that lets someone do their job; you can always raise it later.
20. Order Gift Cards
What this step is for: order branded physical gift cards for your shop. This one isn't done inside TORO.
Do this: head to torocigarpos.com/giftcards to place your order, or ask your TORO rep to set you up. Once your cards arrive, you'll load and sell them using the gift-card settings from Step 15.
21. Order Shelf & Barcode Labels
What this step is for: order the two preconfigured label sizes, right inside TORO — for when you have a label printer or need labels.
Do this:
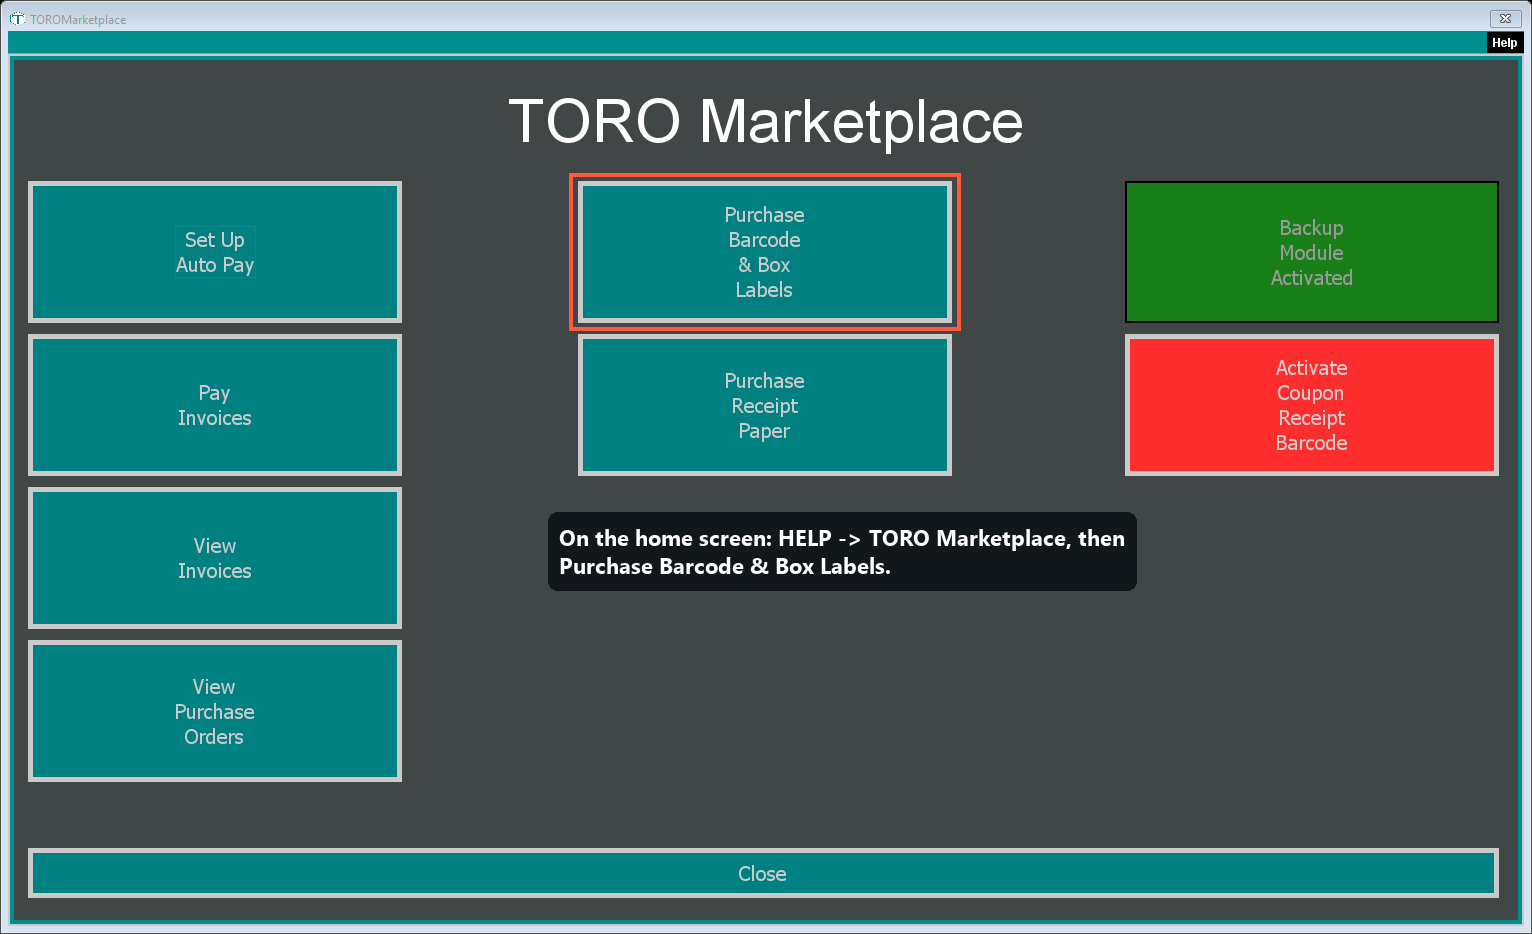
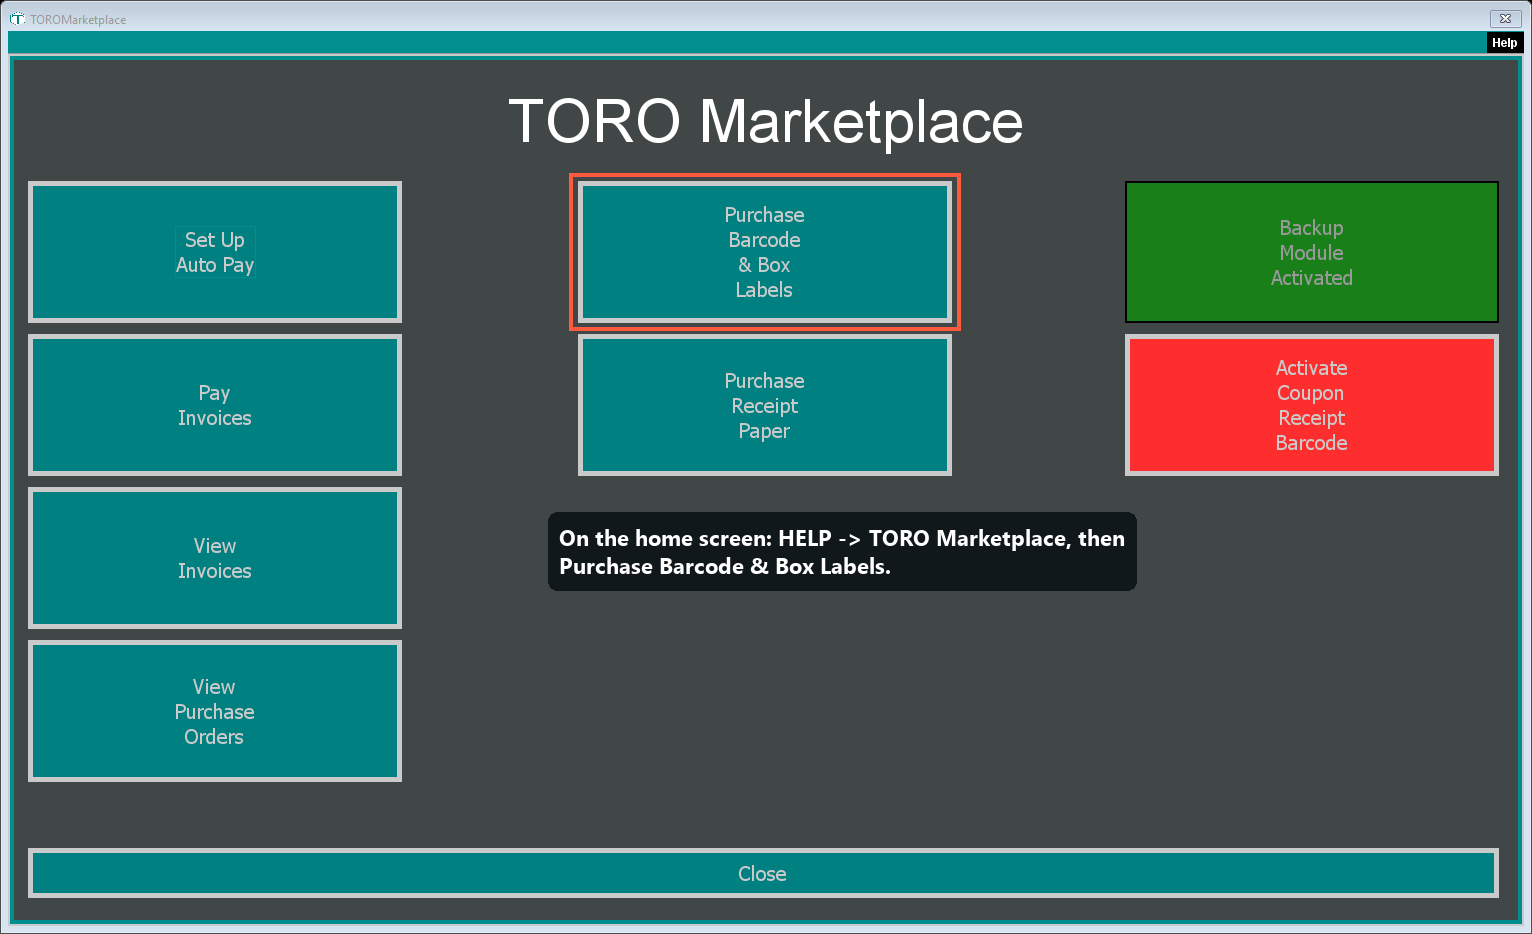
- On the home screen, tap HELP in the left sidebar, then choose TORO Marketplace.
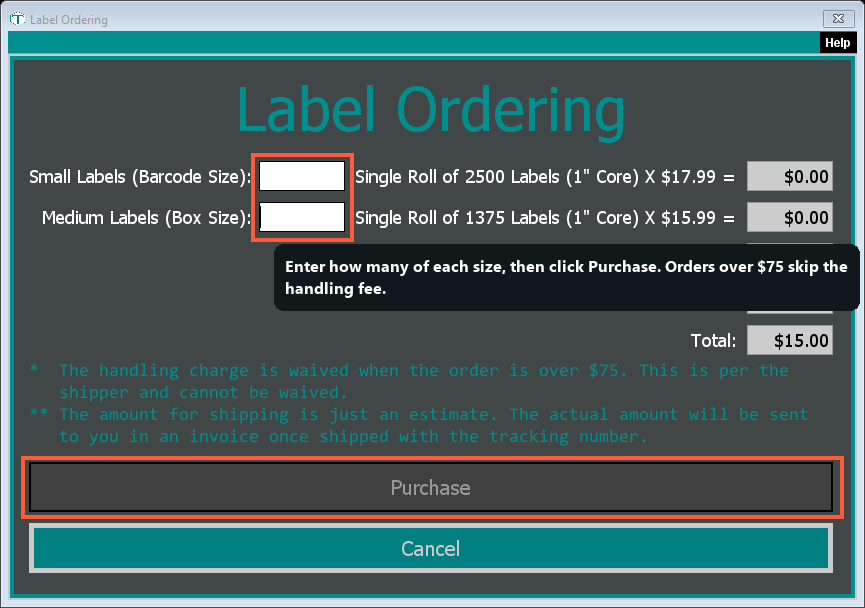
- Click Purchase Barcode & Box Labels. The Label Ordering window opens.
- Enter how many you want of Small Labels (Barcode Size) and Medium Labels (Box Size) — TORO shows the price, handling, and estimated shipping as you go.
- Click Purchase to place the order with TORO.
Two tips: order over $75 and the handling fee is waived, and the shipping figure is an estimate — the exact amount comes on your invoice once it ships, with a tracking number.
What you're choosing
Two label sizes — just enter how many of each you want:
- Small Labels (Barcode Size) — the little price/barcode stickers for individual items.
- Medium Labels (Box Size) — larger labels for boxes.
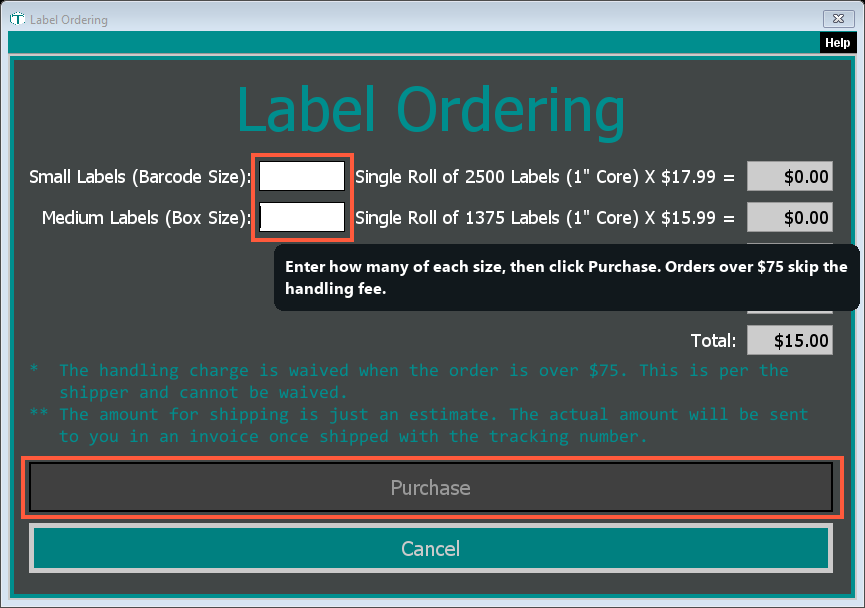
As you type quantities, TORO fills in the running totals live: each line's cost, a Handling Charge, a Shipping Estimate, and a grand Total. Purchase places the order with TORO.
Good to know: handling is waived on orders over $75 (it's the shipper's fee, not TORO's, so it can't be waived any other way — worth ordering enough to cross $75). Shipping is an estimate — the exact amount is billed later on your invoice, with a tracking number, once it ships.
22. Order Receipt Paper
What this step is for: order receipt paper, right inside TORO.
Do this:
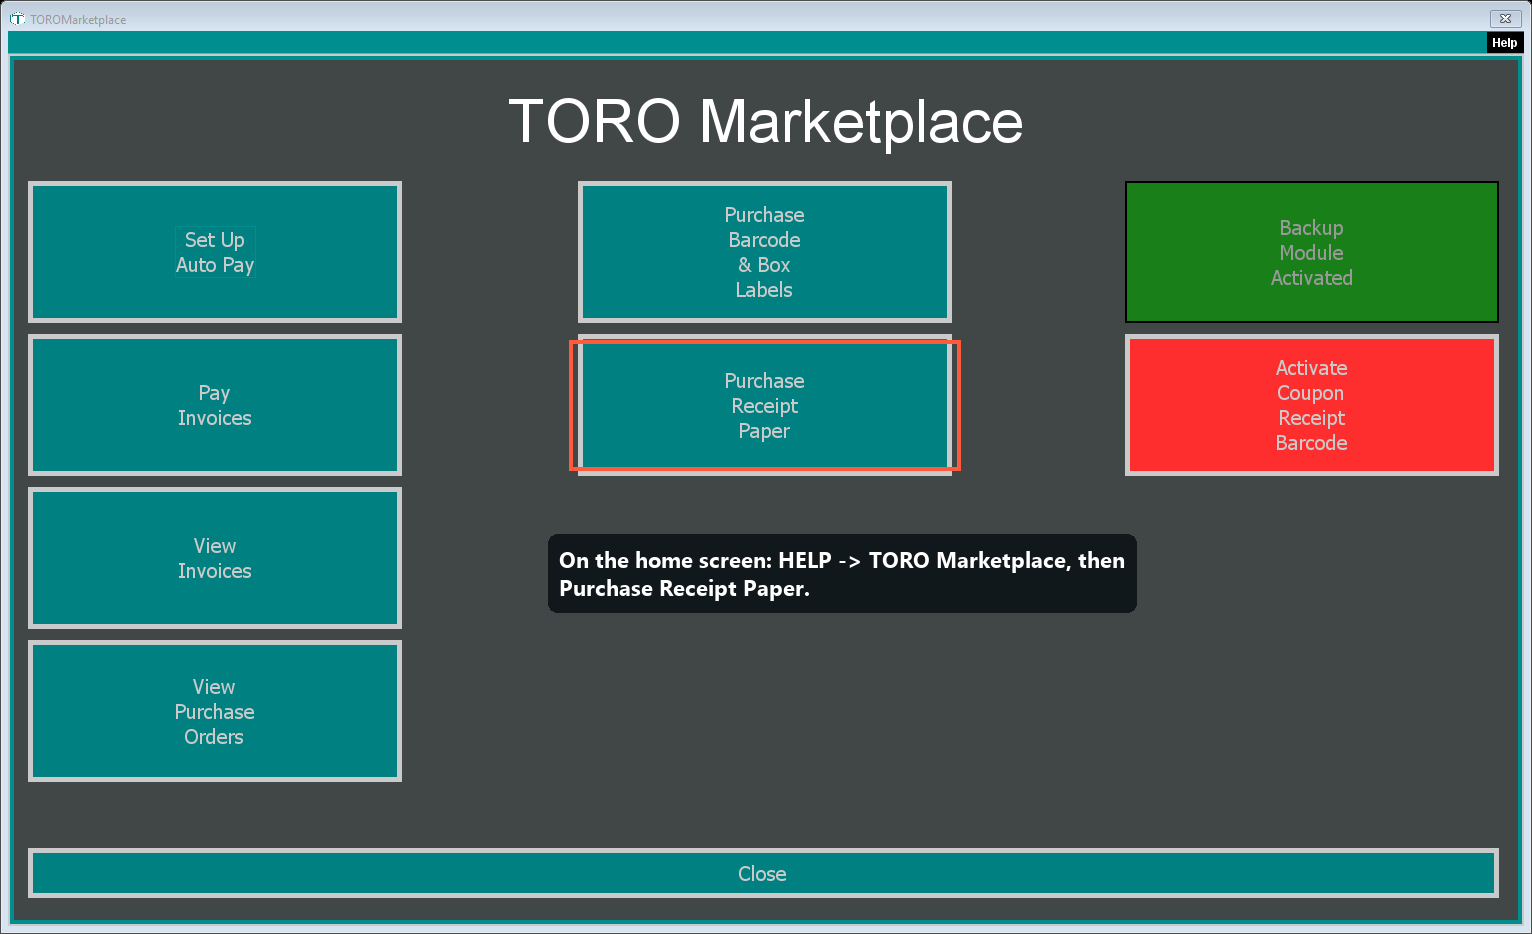
- On the home screen, tap HELP in the left sidebar, then choose TORO Marketplace.
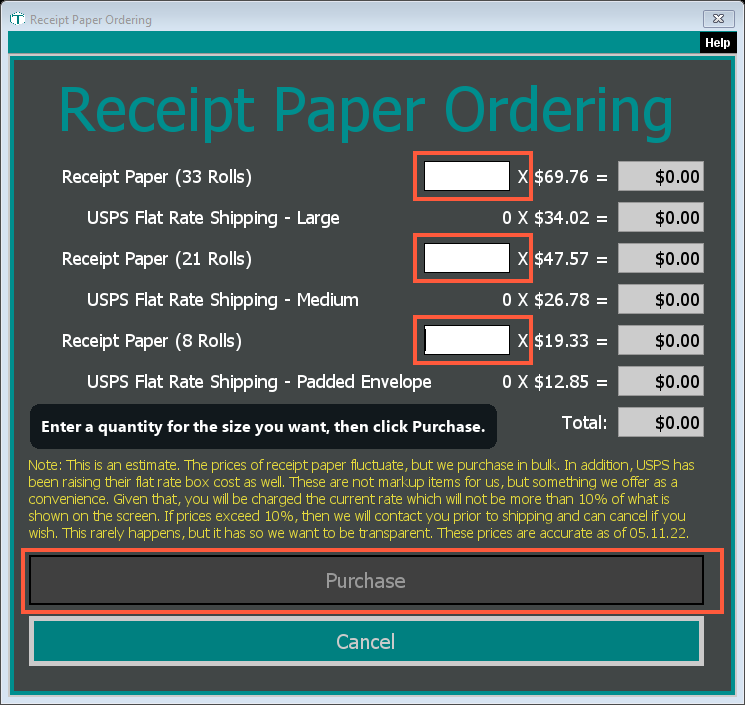
- Click Purchase Receipt Paper. The Receipt Paper Ordering window opens.
- Enter how many cases you want. A case is 33 rolls, and TORO shows the price plus USPS flat-rate shipping.
- Click Purchase, and write down the Purchase Order number it gives you.
A note on price: receipt-paper and shipping costs move around, so you're charged the current rate. It won't be more than 10% above what's on screen — and if it ever would be, TORO contacts you first so you can cancel. This rarely happens; we just want to be upfront.
What you're choosing
One decision — how many cases. A case is 33 rolls, and it is the only size TORO sells: it works out cheapest per roll, and the smaller cases cost nearly as much to ship as the big one. Enter a quantity, and TORO shows the case price, its USPS flat-rate shipping and a Total. Purchase places the order, and gives you a Purchase Order number — write it down.
Good to know: receipt-paper and postage prices drift, so you're billed the current rate — but TORO promises it won't be more than 10% above what's on screen, and if it ever would be, they contact you first so you can cancel.
23. Build Your Humidor — Load Your Cigars
Get to it: TORO offers this to you by itself when a brand-new store starts up — or open it any time from Admin → Dashboard → Items → Set Up My Humidor.
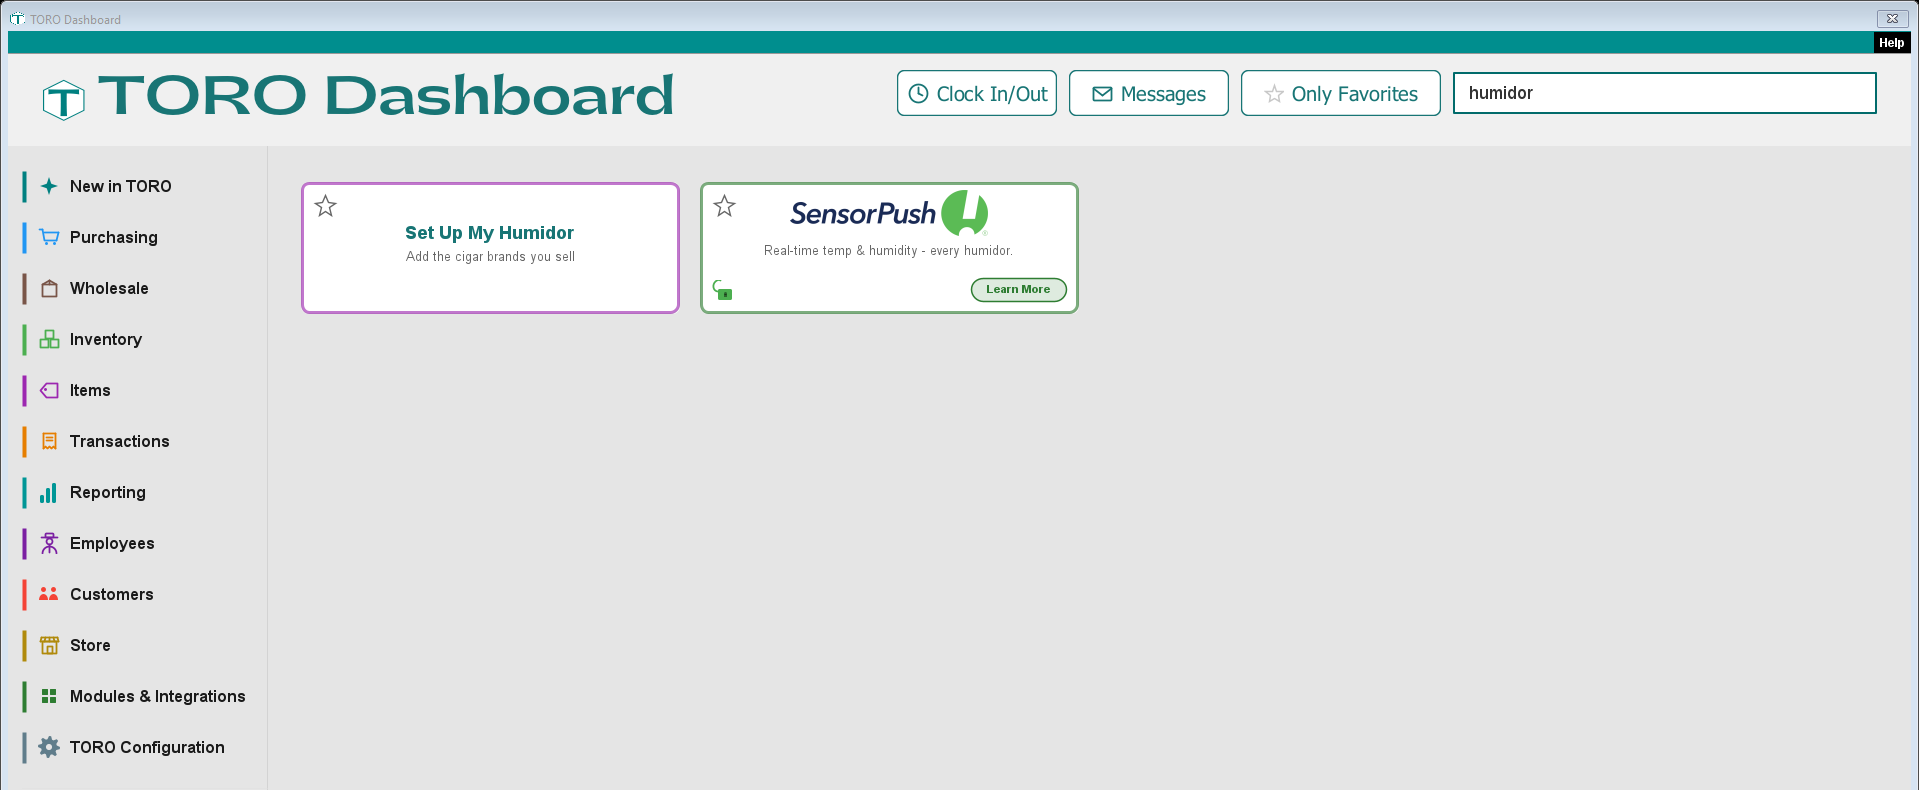
What this step is for: put the actual cigars you sell into your register. You tap the brands you carry off a wall of buttons, and TORO pulls every cigar in those brands — names, sizes, cost and barcodes — out of its master cigar database and into your catalog. No typing, no spreadsheet.
This is free. You are not ordering cigars and nothing gets shipped — you're only putting the names into the register so you can ring them up. The screen says so twice for exactly that reason.
Do this:
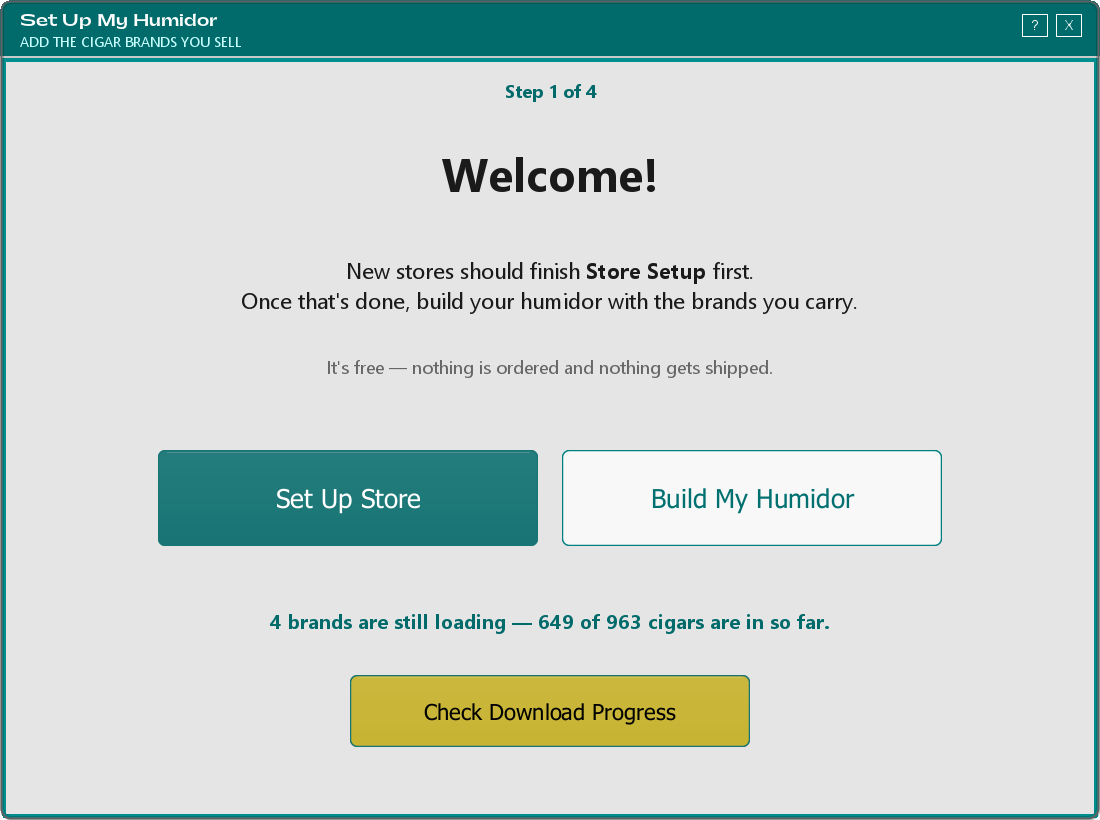
- Open Set Up My Humidor. Two ways in: tap Build My Humidor on the Welcome screen that appears when TORO starts, or go to Admin → Dashboard → Items → Set Up My Humidor. (Brand-new store that hasn't finished setup? Tap Set Up Store on that Welcome screen first, work through steps 3–19 above, then come back here.)
- Tap every brand you carry. The wall lists every brand in the master database. Tap one and it turns green and says ADDED; tap it again to take it back off. There are a lot of them, so use the or type a name to jump to it box — type a few letters and the wall narrows down as you go.
- Click Review My Brands. You get a plain list of what you picked, with a Remove button beside each one. Read it over — this is your last look before anything downloads.
- Click Add These Brands to My Store.
- Watch it load. Each brand gets its own line with a running count — "Rocky Patel — loading… 118 of 192 cigars" — and a green tick when it's finished. Big brands take a while. You don't have to sit there: click Close (keeps working) and the downloading carries on in the background while you use the register.
- When the headline turns to All done!, click Set Prices Now.
The one thing that surprises people: cigars come down from the master database switched off and without a retail price — and TORO won't ring up an item that hasn't got one. So downloading them is only half the job — Set Prices Now is the other half. It opens the Brand Selector; you pick a brand, and Quick Add New Items opens for that brand, where you type a retail price (and a quantity on hand, if you're counting stock as you go). Do that brand by brand. Picked I'll do this later? No harm done — the cigars are safely in your catalog, and you can price them any time from Dashboard → Items → Quick Add New Items.
Other Features of This Window
Four screens, in order, and the step number is always printed at the top so you know where you are.
Step 1 — Welcome. Two big buttons: Set Up Store (closes this and opens the Setup window — the same one steps 3–19 live in) and Build My Humidor (straight to the brand wall). Neither is a commitment; you can come back to the other whenever you like. If a previous download was interrupted, a teal line appears underneath — "4 brands are still loading — 649 of 963 cigars are in so far" — with a yellow Check Download Progress button that picks those brands back up exactly where they stopped. When there's nothing outstanding, both stay hidden.
Step 2 — the brand wall. Every brand in the master database, three across.
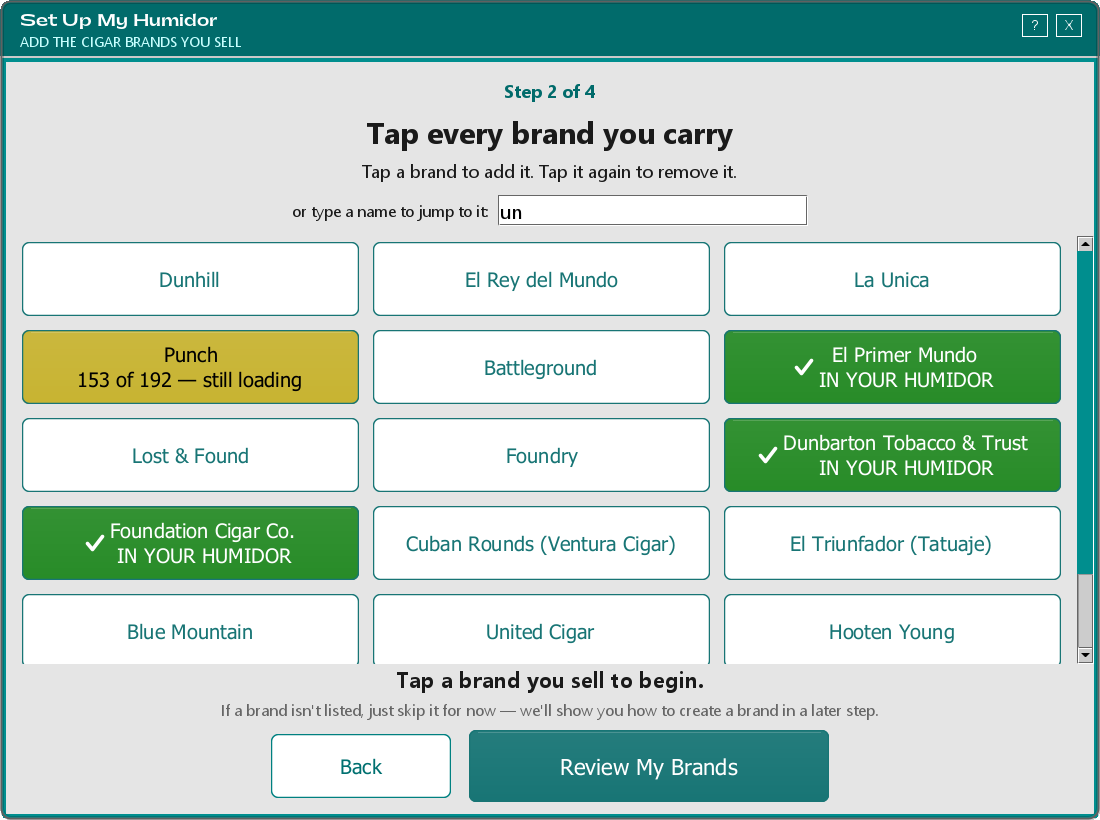
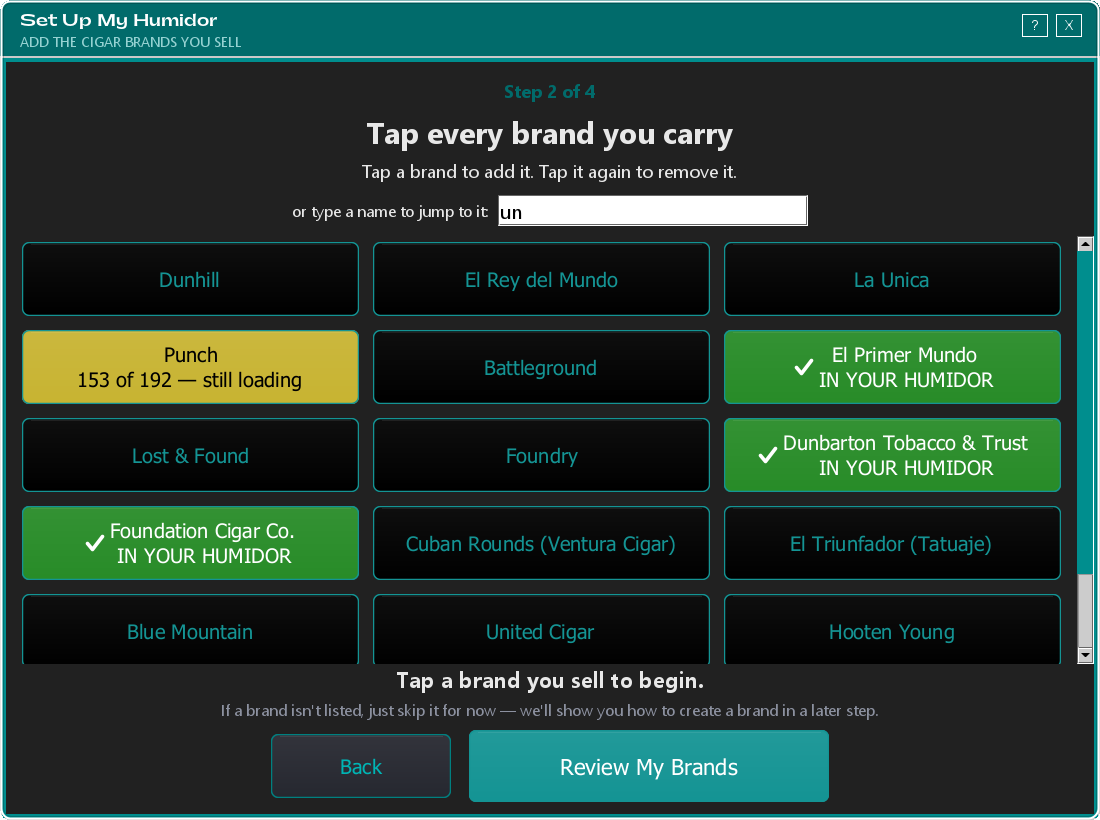
The colour of a brand button tells you where it stands:
- Plain — you don't carry it, as far as TORO knows. Tap to add it.
- Green, "ADDED" — you just tapped it in this session. Tap again to change your mind.
- Green, "IN YOUR HUMIDOR" — already fully loaded into your store. It can't be tapped, because there's nothing left to do.
- Yellow, "153 of 192 — still loading" — you picked it before and its cigars haven't all landed yet. It stays tappable on purpose — tapping it simply resumes the download from where it stopped; it never starts over and never makes duplicates. A yellow brand reading "not loaded yet — tap to load" was picked at a moment when TORO couldn't reach the master database, so nothing ever came down.
Can't find a brand? Skip it for now — the screen says so at the bottom. You can create a brand of your own later under Dashboard → Items → Manage Brands and add its cigars by hand (see Adding a New Item). Try a different spelling first, though: house brands and sub-labels are often filed under the maker's name, like El Triunfador (Tatuaje).
Step 3 — Review. Just your picks and a Remove button each. Back returns to the wall; Add These Brands to My Store starts the downloads.
Step 4 — Loading. One line per brand, refreshed every couple of seconds:
- "loading… 118 of 192 cigars" — working normally.
- "done (192 cigars)" with a green tick — finished.
- "no cigars to add" — that brand has no cigars in the master database yet. Nothing is wrong; there's just nothing to fetch.
- "we'll keep trying" — TORO couldn't reach the master database for that brand at that moment. It retries on its own; you don't have to do anything.
Underneath the headline is a status line telling you what's actually going on: "Still working — your cigars are loading. You can leave this open," or, if the shop's internet has dropped, "Waiting for internet… we'll keep trying on our own." The buttons are Select More Brands (back to the wall — you can keep picking while the current ones load), Close (keeps working), and, once everything's in, Set Prices Now and I'll do this later.
If it says "This is taking longer than usual." That means nothing new has arrived for about a minute. Usually it's a slow connection — but a handful of cigars genuinely can't be matched into your catalog, most often because you already have that exact cigar filed under a different brand, so a brand can sit a few short of its full count for good. TORO says so plainly instead of spinning forever, tells you how many are in, and hands you Set Prices Now so you're not stuck watching it. It keeps working in the background either way.
It keeps going when you close it. The downloads run as background jobs, so closing the window — or closing TORO altogether — doesn't lose your picks. Your choices are saved, and the next time your main register starts up, TORO quietly picks that unfinished brand back up where it left off. That automatic restart happens on the main register only, so two tills can't end up fetching the same brand at once — on any other station, reopen Set Up My Humidor and tap the yellow brand yourself. And if a brand has sat unfinished for a couple of weeks, TORO stops retrying it on its own; tap it on the wall to kick it off again.
Nothing you already have is touched. The download only adds cigars you don't have yet; items already in your catalog keep their prices, their quantities and any changes you've made to them.
Good to know
- Internet required. The master database lives online. No connection means no brand list and no cigars — the screen tells you rather than sitting there blank.
- The popup is a new-store nudge, not a nag. TORO opens Set Up My Humidor by itself at startup only while your store has never rung up a sale. Once you've taken your first transaction it stops appearing, and the Dashboard is how you get back to it.
- Do this before you count stock, not after. Get the names in, price them, and then your inventory count has something to count against — see Taking Inventory.
- It's not once-and-done. Come back through Dashboard → Items → Set Up My Humidor whenever you take on a new brand. The wall shows what you already have in green, so you only ever tap what's new.
That's the whole set-up checklist. With these 23 steps done, your store is configured, your team is in, and your cigars are in the register. Your TORO rep will help you with the last pieces — like your sales tax — and then you're ready to open. Welcome aboard.