Store Events and Tagging Who Showed Up
A cigar event is a lot of work — the rep, the food, the raffle. The part most shops never get around to is the follow-up. TORO's Store Events screen holds your event calendar, prints it on receipts, and now does the follow-up part for you: every customer who buys something during the event can be tagged automatically, so a week later you can text exactly those people.
Permission note: Store Events is access-controlled. If you don't see the card on the Dashboard, ask an owner to grant you Store Events access.
Opening Store Events
- Open the Dashboard.
- Click the Store tab in the list down the left side.
- Click the Store Events card.
Or use the search tools... box at the top right of the Dashboard and type events, calendar, schedule, tag attendees, or promotion.
The Store Events Window
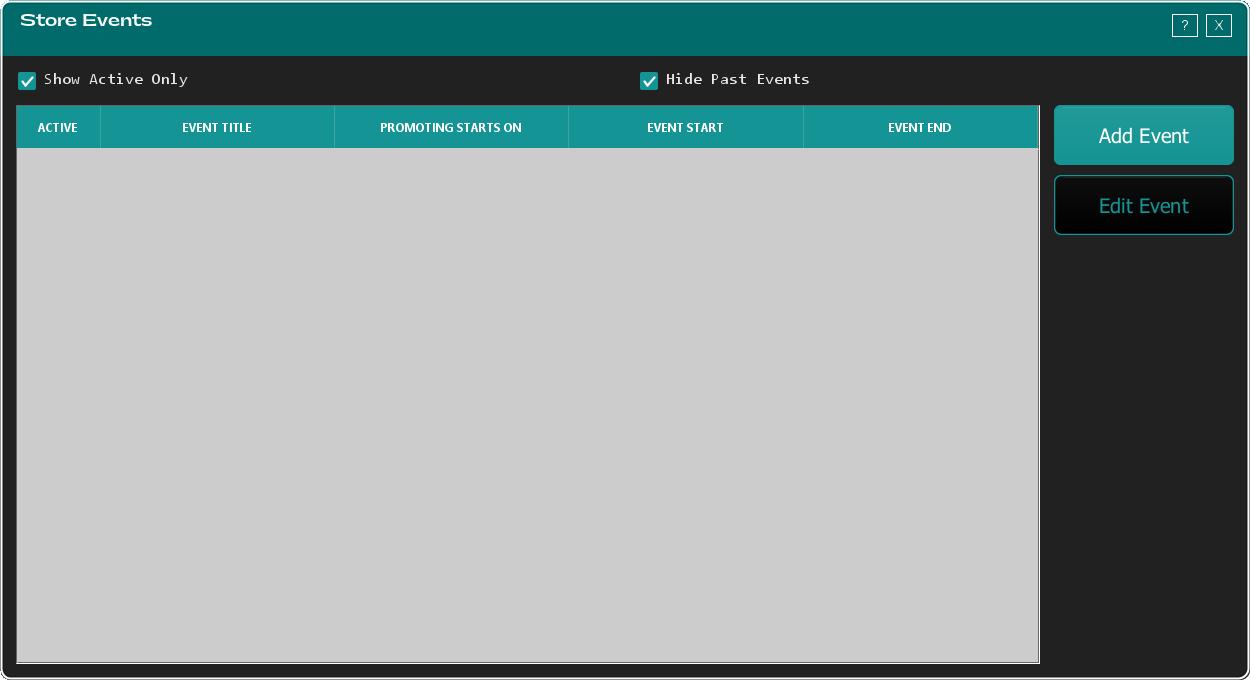
The window is titled Store Events and lists your events in a table with five columns — ACTIVE, EVENT TITLE, PROMOTING STARTS ON, EVENT START and EVENT END. Two checkboxes filter it:
- Show Active Only — hides events you've switched off.
- Hide Past Events — hides anything that's already finished.
Both take effect the moment you click them.
Down the side are two buttons:
- Add Event — creates a new one.
- Edit Event — opens whichever event you have highlighted. You can also just double-click the row.
If you click Edit Event without picking a row first, TORO tells you to select one.
Creating an Event
- On the Store Events window, click Add Event. The Event Editor opens.
- Type the event name in Title.
- Leave Is Active ticked. (Untick it later to retire the event without deleting it.)
- Set Event Start and Event End — these sit side by side, each with its own Adjust button. They include the time, not just the date. Get them right: the times are exactly what TORO uses to work out who attended.
- Set Begin Promoting (also with an Adjust button) — the date the event starts appearing on receipts. Set it a couple of weeks out to build anticipation.
- Tick Show on Website Banner Until Event Passes if you also want it on your website banner.
- Type the details into Description.
- Click Save.
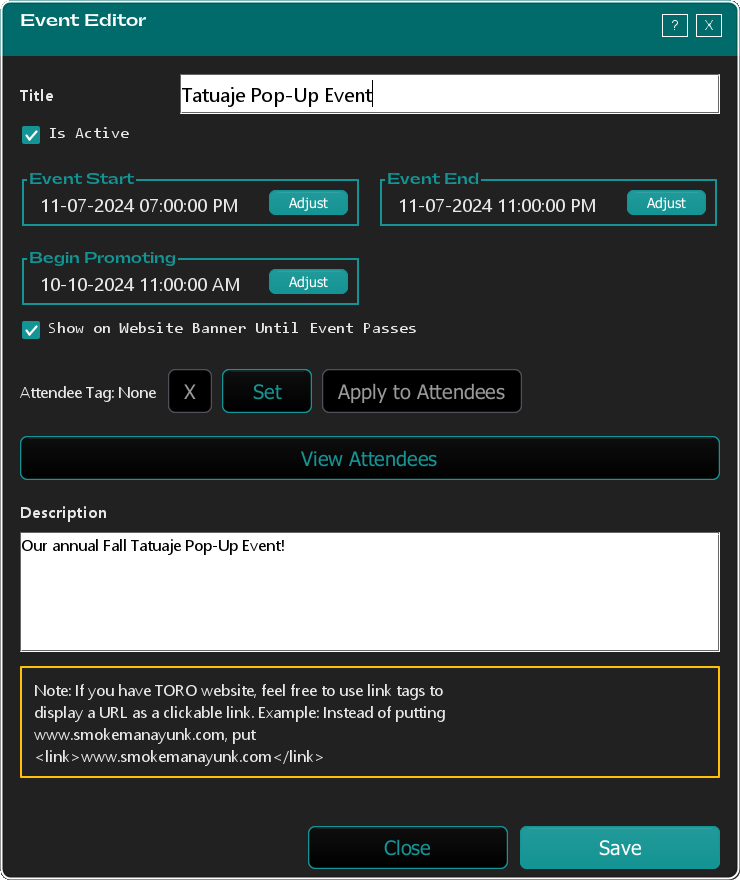
Adding a link: if you have a TORO website, wrap a web address in link tags to make it clickable. Instead of
www.smokemanayunk.com, type<link>www.smokemanayunk.com</link>. The note at the bottom of the Event Editor shows the same example.
Close discards anything you haven't saved.
What the event looks like on a receipt
Once Begin Promoting has passed, the event prints on your receipts with a countdown. On the day itself the receipt reads TODAY!; before that it counts down — Countdown: 5 Days! — and then prints the date and time.
Tagging the People Who Attend
This is the part that turns an event into a mailing list. You attach a tag to the event, and every customer who buys something between Event Start and Event End gets that tag on their account.
Setting the tag
- Open the event in the Event Editor.
- Find the row that reads Attendee Tag: None.
- Click Set and choose the tag you want to use (or create one).
The row updates to show the tag name. Click X to clear it again.
Until a tag is set, Apply to Attendees sits greyed out — that's your cue that the tag is the first step, not the last.
If the event has already started when you set the tag, TORO asks straight away — a window titled Apply Tag to Attendees? with the message "This event has already started. Apply "[your tag]" to everyone who purchased during it now?" Answer Yes and it takes you straight to the tagging screen; No just saves the tag for later.
Tagging everyone who came (now, or after the fact)
- Open the event in the Event Editor.
- Click Apply to Attendees. (The button only works once a tag is set. TORO saves the event first, so you don't lose anything.)
- The Apply Event Tag to Attendees window opens and shows you what's about to happen:
- Event: the event name
- When: the exact start and end times
- Tag applied: the tag name
- A line in colour telling you how many people qualify — "37 customers purchased during this event."
- Click Apply Tag to These Customers.
- A progress bar runs, then TORO confirms: "Tagged 37 customers with "October Herf"."
It is safe to run this more than once. Anyone who already has the tag is skipped, so nobody gets tagged twice. Run it during the event, run it again the next morning to catch the late crowd — no harm done.
Seeing the guest list
- Open a past event in the Event Editor.
- Click View Attendees.
The Event Attendees window opens with the event name, its start and end times, and the list of customer accounts that made a purchase during it.
View Attendees only works on an event that has been saved and has already ended. On a future or in-progress event the button does nothing — there's no final guest list yet.
Using the Tag Afterwards
Once your attendees are tagged, they're a list like any other:
- Open the Dashboard → Customers tab → Find Customers.
- Click Build my own search at the bottom of the left rail.
- In the Tags box, use the + button under Include if tagged and pick your event tag.
- Click Search.
- Click Add to SMS Campaign to text the group, or Export to CSV to hand the list off.
That's your "thanks for coming, here's 10% off this weekend" message — going only to people who actually showed up.