Find Customers
Your customer list is the most valuable thing you own — but only if you can slice it. Find Customers turns "who spent over $500 last year?" or "who hasn't been in since spring?" into a couple of clicks. Pick a plain-English card, get the people, then text them, tag them, or export them.
It replaces the old Account Query Tool everywhere, and it's built so you never have to think like a spreadsheet.
Opening Find Customers
The main way in:
- Open the Dashboard.
- Click the Customers tab in the list down the left side.
- Click the Find Customers card.
The fast way in:
- Open the Dashboard.
- Click the search tools... box at the top right.
- Type
find customersand click the Find Customers card when it appears.
Search also finds this tool if you type win back, lapsed, scenario, query, or account search — so you don't have to remember what we called it.
If you're used to the old screen: the Account Query Tool button on the Customer Management screen now opens Find Customers instead. Everything you could do before is still here.
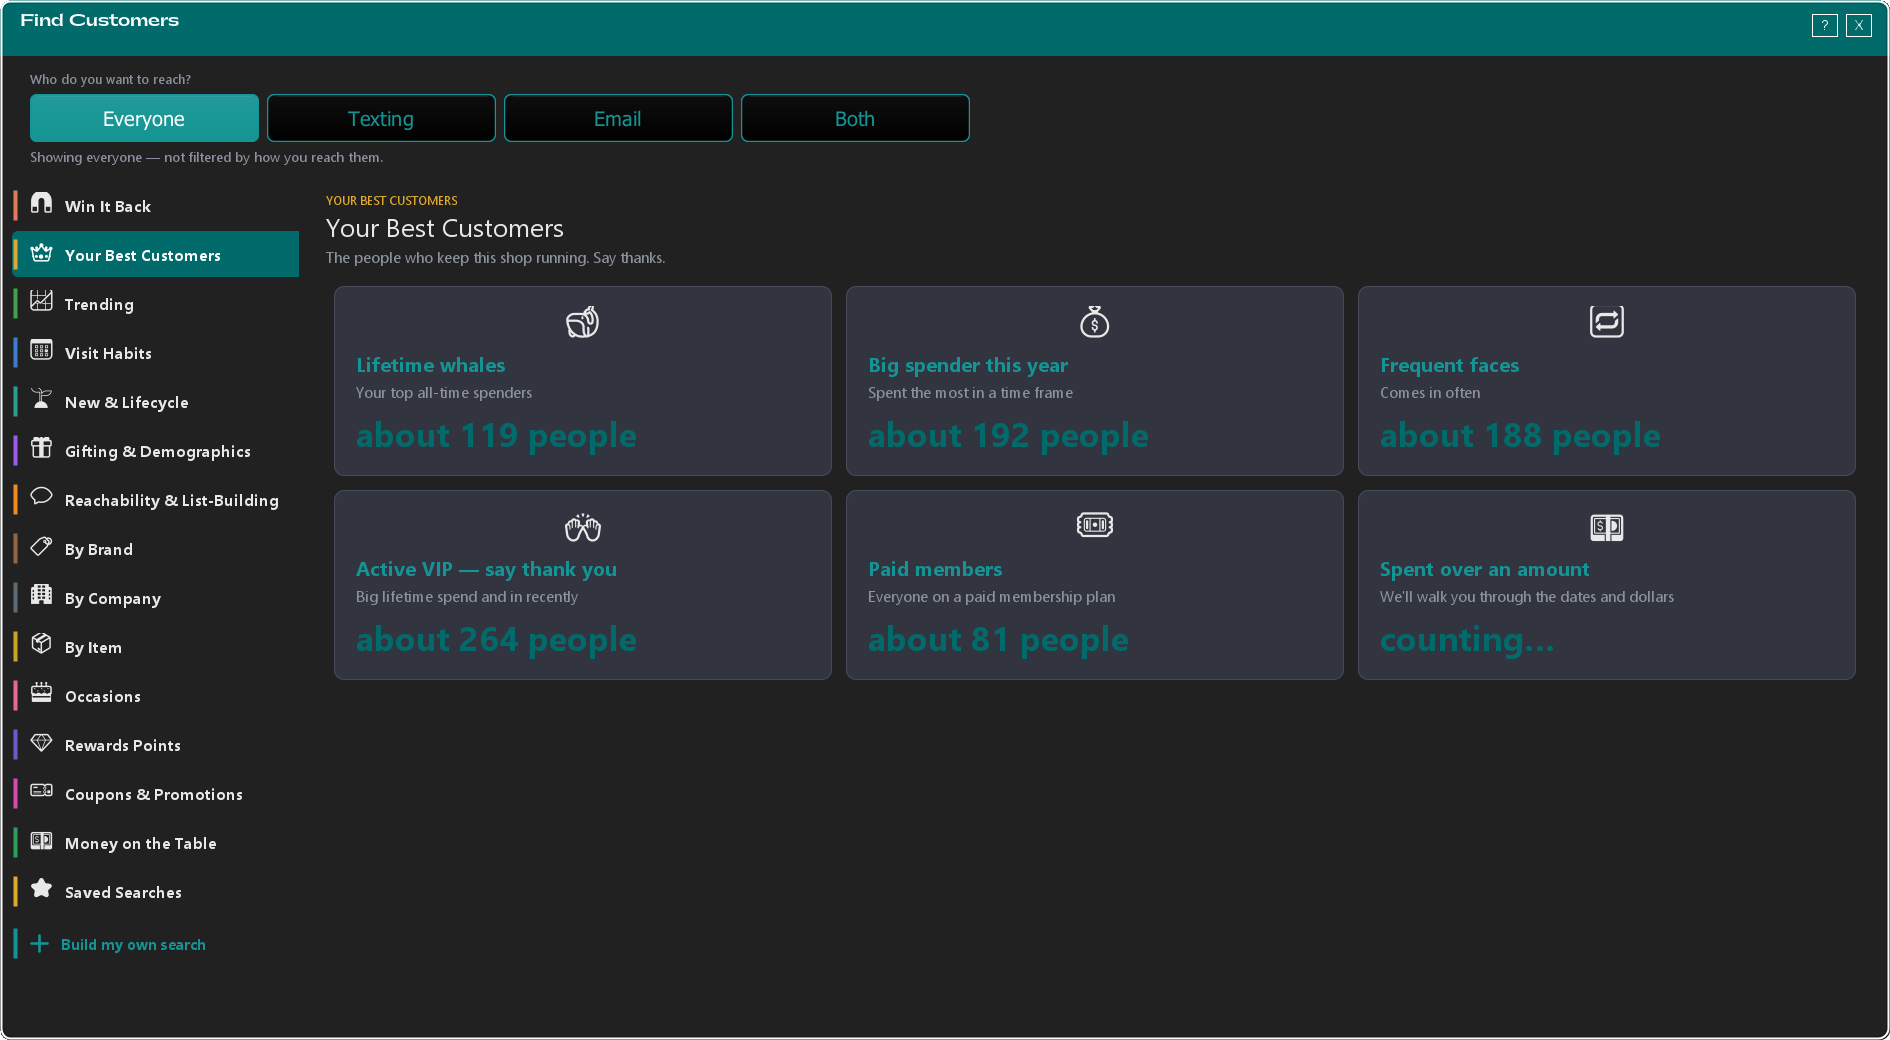
The window is titled Find Customers, and it opens on the Your Best Customers category — a useful first look rather than a blank form. You don't have to fill anything in to get started.
The Left Rail: Pick a Category
Down the left side is a rail of categories. Click one and its cards fill the middle of the screen:
| Category | What's in it |
|---|---|
| Win It Back | Customers worth a second look — a quick text could bring them right back |
| Your Best Customers | The people who keep this shop running |
| Trending | Who's buying more than usual lately |
| Visit Habits | How often people come in |
| New & Lifecycle | First-timers and where they went next |
| Gifting & Demographics | Fathers, mothers, gift buyers |
| Reachability & List-Building | Who you can actually contact |
| By Brand | Everyone who's bought a specific brand |
| By Company | Everyone who's bought from a specific company |
| By Item | Everyone who's bought one specific product |
| Occasions | The warmest, least-salesy reasons to reach out |
| Rewards Points | Points balances |
| Coupons & Promotions | Coupon activity |
| Money on the Table | Store credit nobody has spent |
Below those two more rows sit at the bottom of the rail: Saved Searches (covered below) and Build my own search.
Running a Scenario
- Click a category in the left rail.
- Read the cards. Each one is a plain-English question with roughly how many people match printed on it, so you know the size of the list before you open it.
- Click the card.
That's usually the whole job. Some cards ask you a question or two first — By Brand, for example, asks which brand and how much they spent. Every question comes with a sensible answer already filled in, and TORO remembers what you picked last time. Use Next › to move forward, ‹ Back to back up, and See the results › on the final question.
"Who Do You Want to Reach?"
Above every screen is a strip labelled Who do you want to reach? with four buttons:
- Everyone — no filtering by contact method. The line underneath reads "Showing everyone — not filtered by how you reach them."
- Texting — only customers you can text: people who are opted in right now (anyone who replied STOP is left out). "Now showing people you can text."
- Email — only customers you have an email address for. "Now showing people you have an email for."
- Both — only customers who have both.
Click one and every list and count on screen updates instantly. Set it before you build a campaign list so you're not looking at people you can't actually message.
Reading the Results
Once a scenario runs you get a Customers table with these columns: Name, Last Visit, Total Spent, Visits, Phone, Email. Underneath the table is a running count, like 142 people.
Customers who have an account but haven't bought anything yet are included wherever the search allows it. They show 0 visits, $0.00 spent and a blank Last Visit. Searches that depend on a purchase (a date range, a brand, company or item, a minimum spend or minimum visits) leave them out.
Above the table is a plain-English line describing exactly what you're looking at — for example, "Showing customers: spent over $500.00." Read that line before you act on the list; it's the fastest way to catch a filter you didn't mean to set.
To sort the list, click any column header. Click it again to reverse the order. Sorting by Total Spent puts your biggest spenders on top; sorting by Last Visit shows who's gone quiet.
Copy details (top right of the results) puts a text summary of the search on your clipboard — handy when you want to paste what you ran into an email or a message to us.
‹ Back (top left) returns you to the cards.
What You Can Do With a List
Four buttons sit along the bottom right of the results screen:
Export to CSV — saves the list as a spreadsheet file you can open in Excel or hand to a mail house.
Save Search — see the next section.
Tag Accounts — puts a label on every customer in the list so you can find them again later. This does not text or email anyone; it only labels them.
- Click Tag Accounts.
- Pick the tag you want to apply.
- Confirm.
Add to SMS Campaign — hands the whole list to a text campaign. This button only appears when your texting module is turned on. Anyone in the list who isn't currently opted in to texts is left off the campaign, and TORO tells you how many.
Build My Own Search
When none of the cards fit, click Build my own search at the bottom of the left rail. The window subtitle changes to Build my own search and you get four boxes:
Who They Are
- When they came in — a start date and an end date, side by side.
- Spending & visits — Min $ spent, Max $ spent, Min visits, Max visits. Leave a box empty to mean "no limit." Max visits counts people with 0 visits, so a max of 2 also finds customers who have never bought.
- Only include — the checkboxes Has email, Can receive texts, Is a father, Is a mother.
Tags — two lists: Include if tagged and Exclude if tagged. Each list has a + and a - button stacked to its right: + opens the tag picker, - removes whatever row you have highlighted.
Membership Level — highlight the levels you want. The hint on the box says it plainly: Select some, or leave none for all.
What They Bought — three lists: Bought this brand, Bought this company, and Bought this item, each with the same + / - buttons on its right.
As you set filters, a live count updates at the bottom left. Before you touch anything it reads "Set your filters — I'll count as you go."
Then:
- Search — run it and see the people.
- Clear filters — wipe everything and start over.
- Save search — save this filter set without running it first.
Saving a Search to Reuse
Built the perfect list? Save it once and it's a single click forever after.
To save:
- Click Save Search on the results screen (or Save search on the Build my own search screen).
- Type a name.
- Confirm.
To run a saved search:
- Click Saved Searches in the left rail.
- Click the tile for the search you want.
To delete one: click Delete on its tile.
Saved searches are shared across every station in your store — save one at the front counter and it's waiting for you in the back office. If you haven't saved anything yet the tab tells you so, and points you at the Save Search button.
Building a Text Campaign From a List
When you're putting together a text campaign, you don't need to leave and come back:
- Open your SMS campaign in the campaign editor.
- Click Filter & Find.
- Find Customers opens. Build your list any way you like — a scenario card, a saved search, or Build my own search.
- Click Use these customers.
The window closes and everyone you found is added to the campaign. If you click Use these customers before running a search, TORO stops you with "There's nobody in the list yet — run a search first."
A Note for Longtime Users
Find Customers replaces the old Account Query Tool. Anywhere that used to open the old wall-of-filters screen now opens this one — the Account Report, arrival-notification setup, and the SMS campaign tools all use it. Your existing permissions carry over unchanged; nobody has to be re-granted access.