Your Store and Station Information
TORO keeps two sets of basic facts: one about your store (name, address, phone, website) and one about each station, meaning each computer you run TORO on (its name, its cash drawer, and which card terminals it uses). You'll set these up once and come back when something changes, like a new phone number, a new register or a new card reader.
Finding Them
Open the Dashboard
Click the TORO Configuration tab on the left, then click the Set Up System card. (Can't find it? Type "setup" in the search box at the top right.)
Click the Store tab on the left side of that window
Click Set Up Store Information (the Store Management window) or Set Up Station Information (the Station Management window)
Store Management
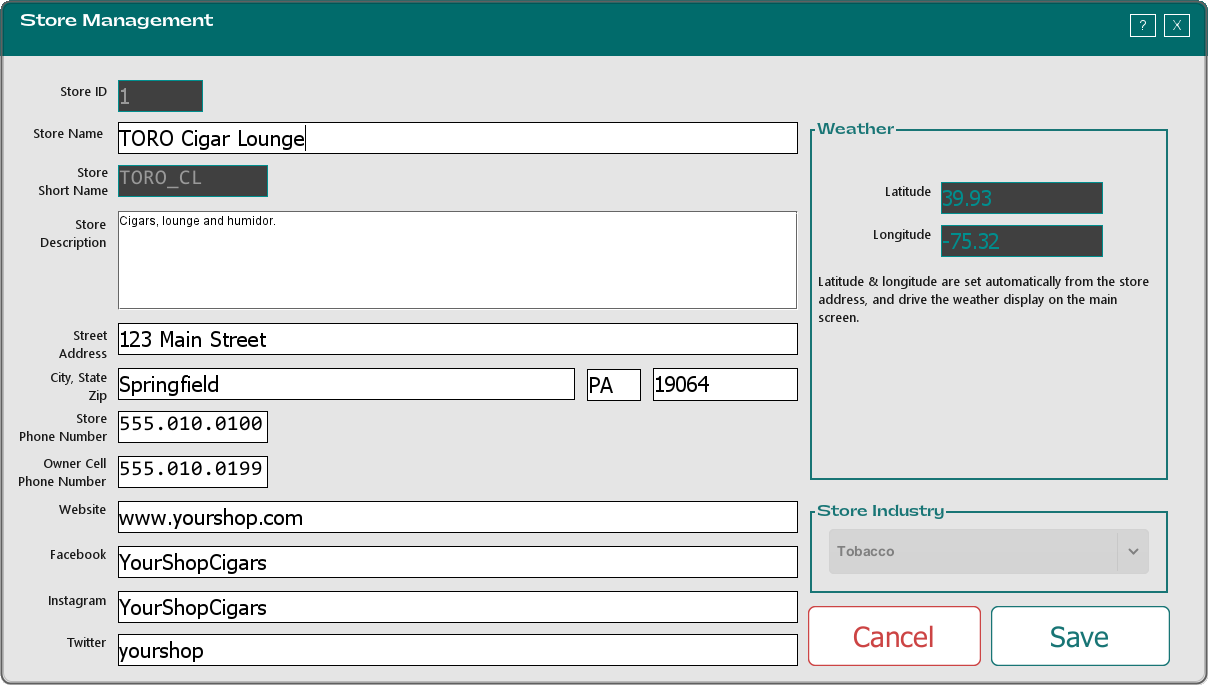
| Field | What to put there |
|---|---|
| Store ID | Your store's number in TORO. You can't change it. |
| Store Name | Your store's name, the way you want customers to see it. |
| Store Short Name | Grayed out. Only TORO Support can change it. |
| Store Description | A short description of your store. |
| Street Address, City, State, Zip | Your store's address. State is the two-letter abbreviation, and Zip must be exactly 5 digits. |
| Store Phone Number | Your store's main number, 10 digits, written like 555-123-4567 or 555.123.4567. |
| Owner Cell Phone Number | The owner's cell number. |
| Website, Facebook, Instagram, Twitter | Your store's web address and social media names. Leave any you don't use empty. |
Click Save when you're done.
Weather
The Latitude and Longitude in the Weather box are filled in for you from your store address, and they drive the weather shown on the main screen. When you change the address and click Save, TORO briefly shows Looking Up Location while it finds the new coordinates. You don't need to type anything there.
If Save doesn't work
TORO tells you what to fix:
- "Zip must be 5 digits." or "Zip must be an integer." Use a plain 5-digit zip, like 19064.
- "Your business phone number must be 10 digits and in this format ###-###-#### or ###.###.####" Fix the Store Phone Number.
Store Industry is grayed out. Like Store Short Name, only TORO Support can change it.
Station Management
Each computer running TORO is a station. Set Up Station Information always opens the station for the computer you're sitting at, so to change a register's settings, go to that register.
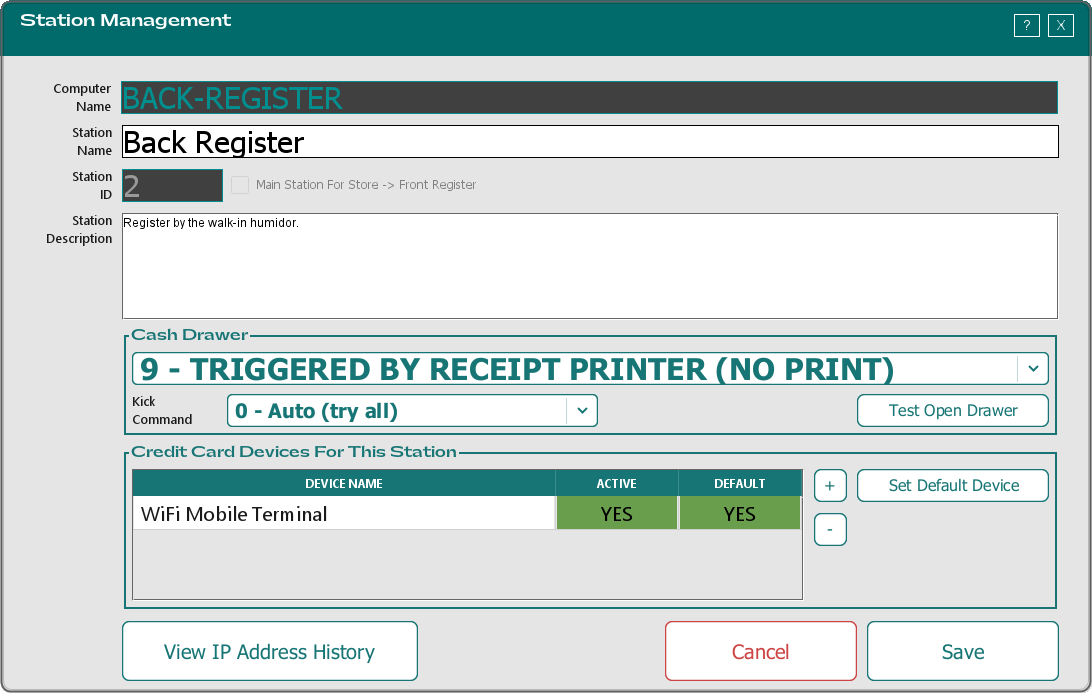 Front Register" checkbox, and Station Description. The Cash Drawer box is set to TRIGGERED BY RECEIPT PRINTER (NO PRINT) with a Kick Command dropdown and a Test Open Drawer button. The Credit Card Devices For This Station box lists WiFi Mobile Terminal as Active and Default, with + and - buttons and Set Default Device. View IP Address History, Cancel and Save are along the bottom.">
| Field | What it is |
|---|---|
| Computer Name | This computer's name in Windows. TORO fills it in and you can't change it here. |
| Station Name | The name TORO shows for this register, such as "Front Register" or "Bar". Pick something your staff will recognize. |
| Station ID | This register's number. You can't change it. |
| Main Station For Store | One computer in your store is the main station. On every other register this box is grayed out and shows which one is main, for example Main Station For Store -> Front Register. Talk to TORO Support before changing which computer is your main station. |
| Station Description | Notes about this register, such as where it sits. |
Cash Drawer
The Cash Drawer box tells TORO what kind of drawer is attached to this register and how to open it. It's covered step by step in Choosing Your Cash Drawer Type.
Credit Card Devices For This Station
This list is the card terminals this register can use. The Default column shows which one is this register's default.
- + opens your store's Credit Card Devices list. Pick one and click Select to add it to this register.
- - removes the selected terminal from this register.
- Set Default Device makes the selected terminal the default for this register. Select a row first, or TORO says "Must select a Credit Card Device to set as Default."
To connect a brand-new terminal, follow Setting Up a Credit Card Terminal on the register it plugs into.
Saving
Click Save. TORO reminds you, "Must restart TORO to pickup any changes." Close TORO and open it again on this register so the new settings take hold.
View IP Address History
Every time TORO starts, it notes the computer's network (IP) address, and adds a new line whenever that address has changed since last time. View IP Address History opens the Station IP Address Viewer, which lists those lines.
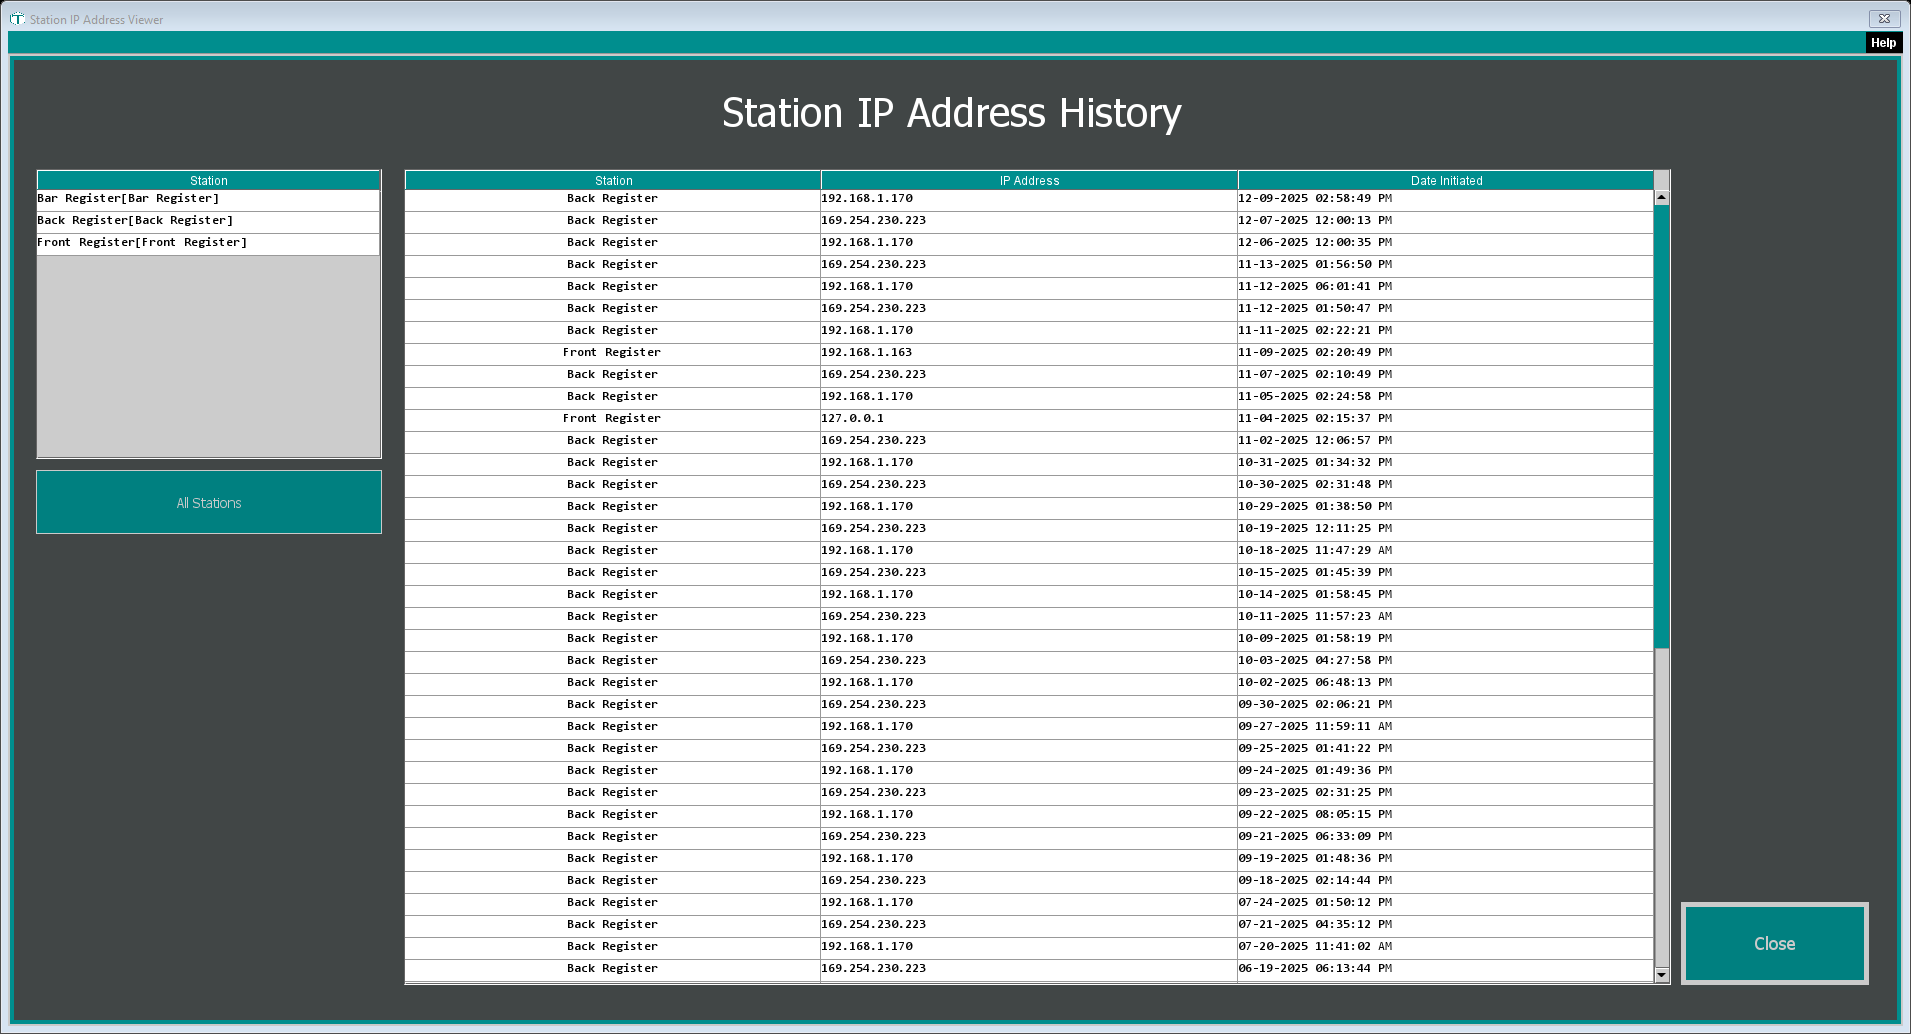
It opens on this register. Click another station on the left to see its history, or All Stations to see every register together. Click Close when you're done.