Signing Up a New Customer
A first-time customer just walked in, loved the shop, and wants to come back. This is the moment — get them in the system now and every future visit gets better for both of you. It takes about 30 seconds.
There's one thing to know up front, and it surprises almost everyone: there is no "new account" button. You create an account by searching for the customer's phone number. If nobody comes back, TORO offers you the blank fields right there. It's one screen for both jobs — finding people and adding them.
Opening the Account Finder
From the register:
- Open the Customer menu in the sidebar.
- Click Find Account.
That's the whole menu path. (The Customer menu also holds Scan ID, Find Gift Card, and Print labels... — nothing else creates an account.)
The window that opens is the Account Finder. If your store requires age verification, the title bar reads Account Finder - Age Verification Required.
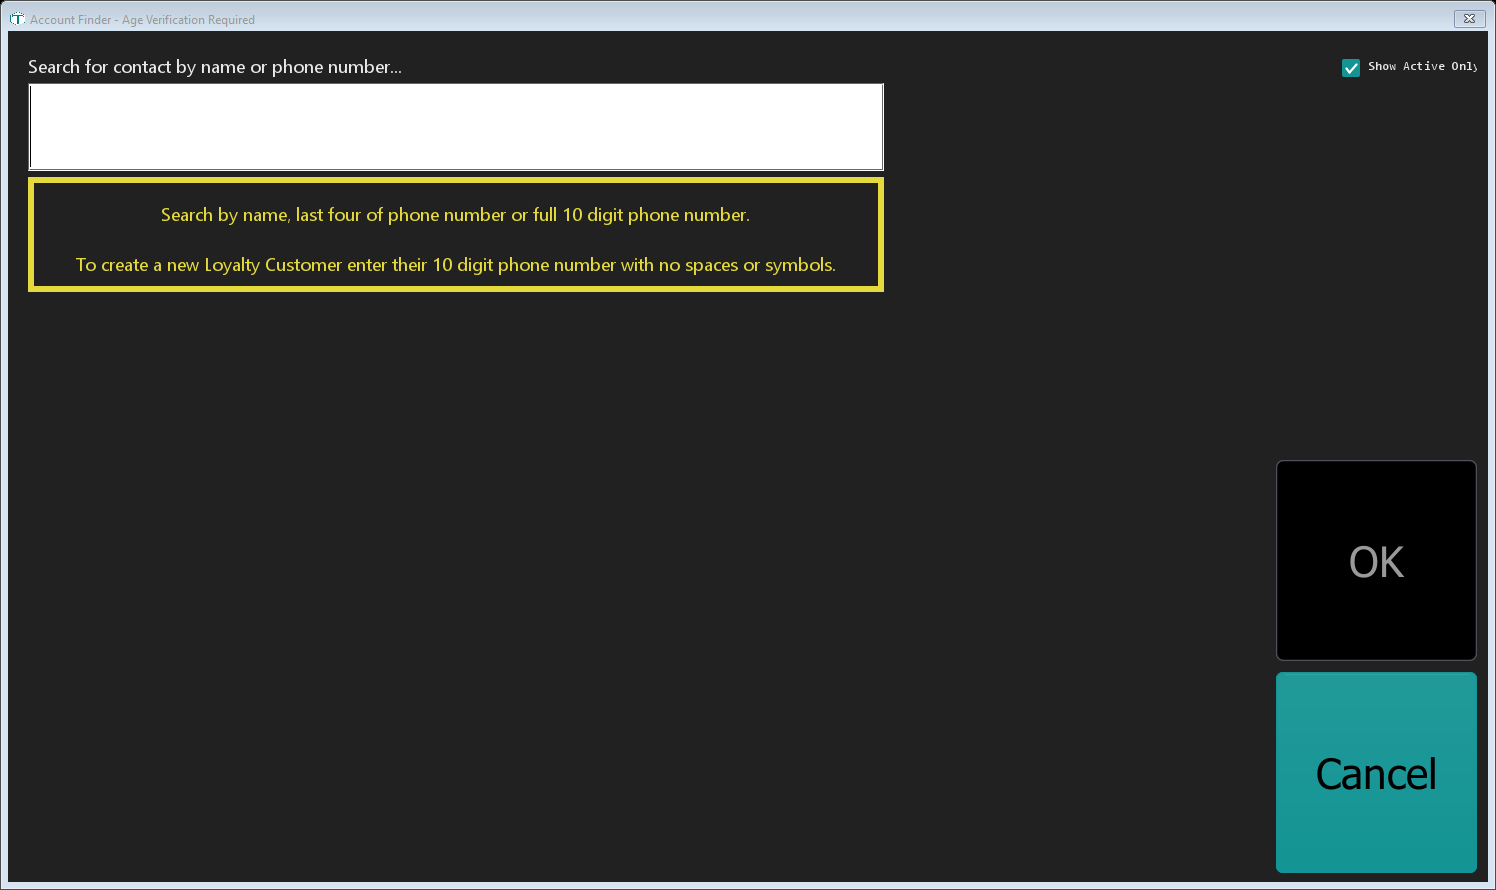
The yellow panel under the search box tells you exactly what the box accepts:
Search by name, last four of phone number or full 10 digit phone number.
To create a new Loyalty Customer enter their 10 digit phone number with no spaces or symbols.
Creating the Account
- Click into the box labelled Search for contact by name or phone number...
- Type the customer's full 10-digit phone number — digits only, no dashes, no spaces, no parentheses.
6105551234, not(610) 555-1234.
There's no Search button to press. TORO searches as you type, so the answer appears the moment you finish the tenth digit.
What happens next depends on what TORO finds:
- Nobody matches — the Customer Information fields appear, already filled in with the number you typed, and the message turns yellow: "New Loyalty Customer!" followed by which fields it needs. This is your new account. Carry on to the next section.
- One person matches — that account loads. They're already a customer; you're done.
- Several people match — they're listed in a Potential Loyalty Customers table. Click the right one.
This is the duplicate check. Because you always search before you create, you can't accidentally make a second profile for someone who's already in the system. That's exactly why there's no separate "create" button.
Filling in the fields
Only two things are genuinely required:
- First Name (required)
- Phone Number (required) — the 10 digits you already typed
Strongly recommended, and worth the extra ten seconds:
- Last Name — not required, but searching by name gets much easier with it
- Account Birthday — this powers birthday rewards. Use the Update Birthday button to scan their ID; a scanned birthday turns the box green, an unscanned one stays red
- Email — needed for emailed receipts and newsletters
When email is required: if your Rewards Program is set to require email consent, the label changes from Email to Email (required) and TORO won't let you save without a valid one. The yellow message tells you which rules apply before you start typing.
Then click OK.
If something's missing, TORO stops with Error with Account! and tells you what — for example "Phone Number must be 10 digits with no spaces or symbols." The offending box turns red so you can see it at a glance.
The Account ID
TORO builds the Account ID for you: first initial + last initial + last four digits of the phone number, in capitals. John Smith at 610-555-1234 becomes JS1234. You never type or remember this yourself.
If you leave a name blank, that initial becomes a Z — another good reason to grab the last name.
Getting Them on Text Messages
If your store texts customers, enroll them while they're standing there.
Once the account exists, an SMS Enrollment panel appears on the Account Finder with a COMPLETE SMS ENROLLMENT button. Click it and walk the customer through the consent screen. If they're already enrolled the button reads View SMS Enrollment instead.
You don't always have to remember: when you press OK on a brand-new account and the texting module is on, TORO opens enrollment for you.
You cannot opt someone in on their behalf. They have to consent. That isn't a TORO rule — it's the law. TORO also sends a welcome text automatically when the account is created.
Check first that the number is a mobile, not a landline. A landline can't receive your campaigns and it'll sit in your list looking like a live contact forever.
The Rest of the Details
The Account Finder covers the essentials. Everything else lives one click deeper — the View Account Details button opens the full account screen, organised into panels:
- Account Contact Information — name, phone, email, Instagram Handle, Locker Number, and Customer Interface PIN Number (exactly four digits, numbers only — TORO rejects anything else with "Account PIN must be a four digit number.")
- Important Dates — birthday, anniversary, and any other date worth remembering
- Account Priveleges — membership level and discount privileges (see below)
- General Account Notes — anything your team should know: "prefers mild blends," "VIP guest of the owner"
- Account Financial Information — cards on file and billing
- SMS Arrival Notification — whether they get a text when their order lands
None of it is needed to create the account. If there's a line behind them, take the name and phone, press OK, and fill the rest in later. A partial account beats no account every time.
Account vs. Membership — What's the Difference?
An account is free. Every customer should have one. It tracks purchases, earns rewards points, and lets you look them up by name or phone. No cost, no commitment.
A membership is a paid tier on top of that — members get discount privileges on their purchases, and the specifics are whatever your store set up.
Membership is not a separate sign-up. It's a setting on the account:
- Open the customer's account and click View Account Details.
- In the Account Priveleges panel, pick the level from the Membership Level dropdown.
- Click Save.
Their member discounts are live from that moment.
Members should have an email on file. If you set someone to a membership level without one, TORO reminds you that they won't be subscribed to your exclusive member email list.
A Few Things Worth Knowing
Phone number is king. It's how nearly every lookup happens at the register, and it's the only thing that creates an account. Name searches work fine — type at least two letters — but "last four of your phone?" is faster and far more reliable with common names.
Searching by last four won't create anything. Four digits only ever searches. If there's no match you'll get "No contact found using '1234' as the last four digits of the phone number." To create the customer you need the full ten.
Show Active Only in the top-right corner limits results to active accounts. Untick it if you're hunting for someone you archived.
Employees who are also customers need a mailing address and an email on file — TORO uses both for payroll and tax documents, and it won't let you save an active employee without them.
Customers Can Also Sign Themselves Up
If your store runs the customer-facing kiosk screen, you don't have to do any of the above — customers can join on their own. The kiosk's welcome screen has a New Here? card that walks them through it:
- They type their phone number on an on-screen keypad. If the number is already in your system, TORO tells them so and points them to Sign In instead — so the kiosk can't create a duplicate.
- They fill in their first name, last name, and pick a 4-digit PIN (entered twice so a typo can't lock them out of their own account). Email is optional.
- If your store has the SMS module, the screen tells them they're agreeing to receive loyalty texts, and TORO sends the welcome text right away — they just reply START to activate their reward points.
The account a customer creates this way is exactly the same as one you create at the register, and every kiosk edit shows up in the Account Change Log marked Customer.