Viewing Discounts
Your closing report tells you how much you gave away in discounts. The Discount Report tells you who gave it, on what, and why. Every discounted item is listed with the employee who rang it, the customer, the discount type and reason, and what the sale was worth.
Pull it when the Total Discounts line on a closing report looks high, when you want to see how an employee discount or account discount program is being used, or just to keep an eye on generous hands at the register.
Finding It
The same window opens from two cards on the Dashboard's Reporting tab:
- Open the Dashboard
- Click the Reporting tab on the left
- Click the Sales button across the top of the report area and click View Discounts, or click the Employee button and click View Discounts by Employee (Can't find it? Type "discount" in the search box at the top right.)
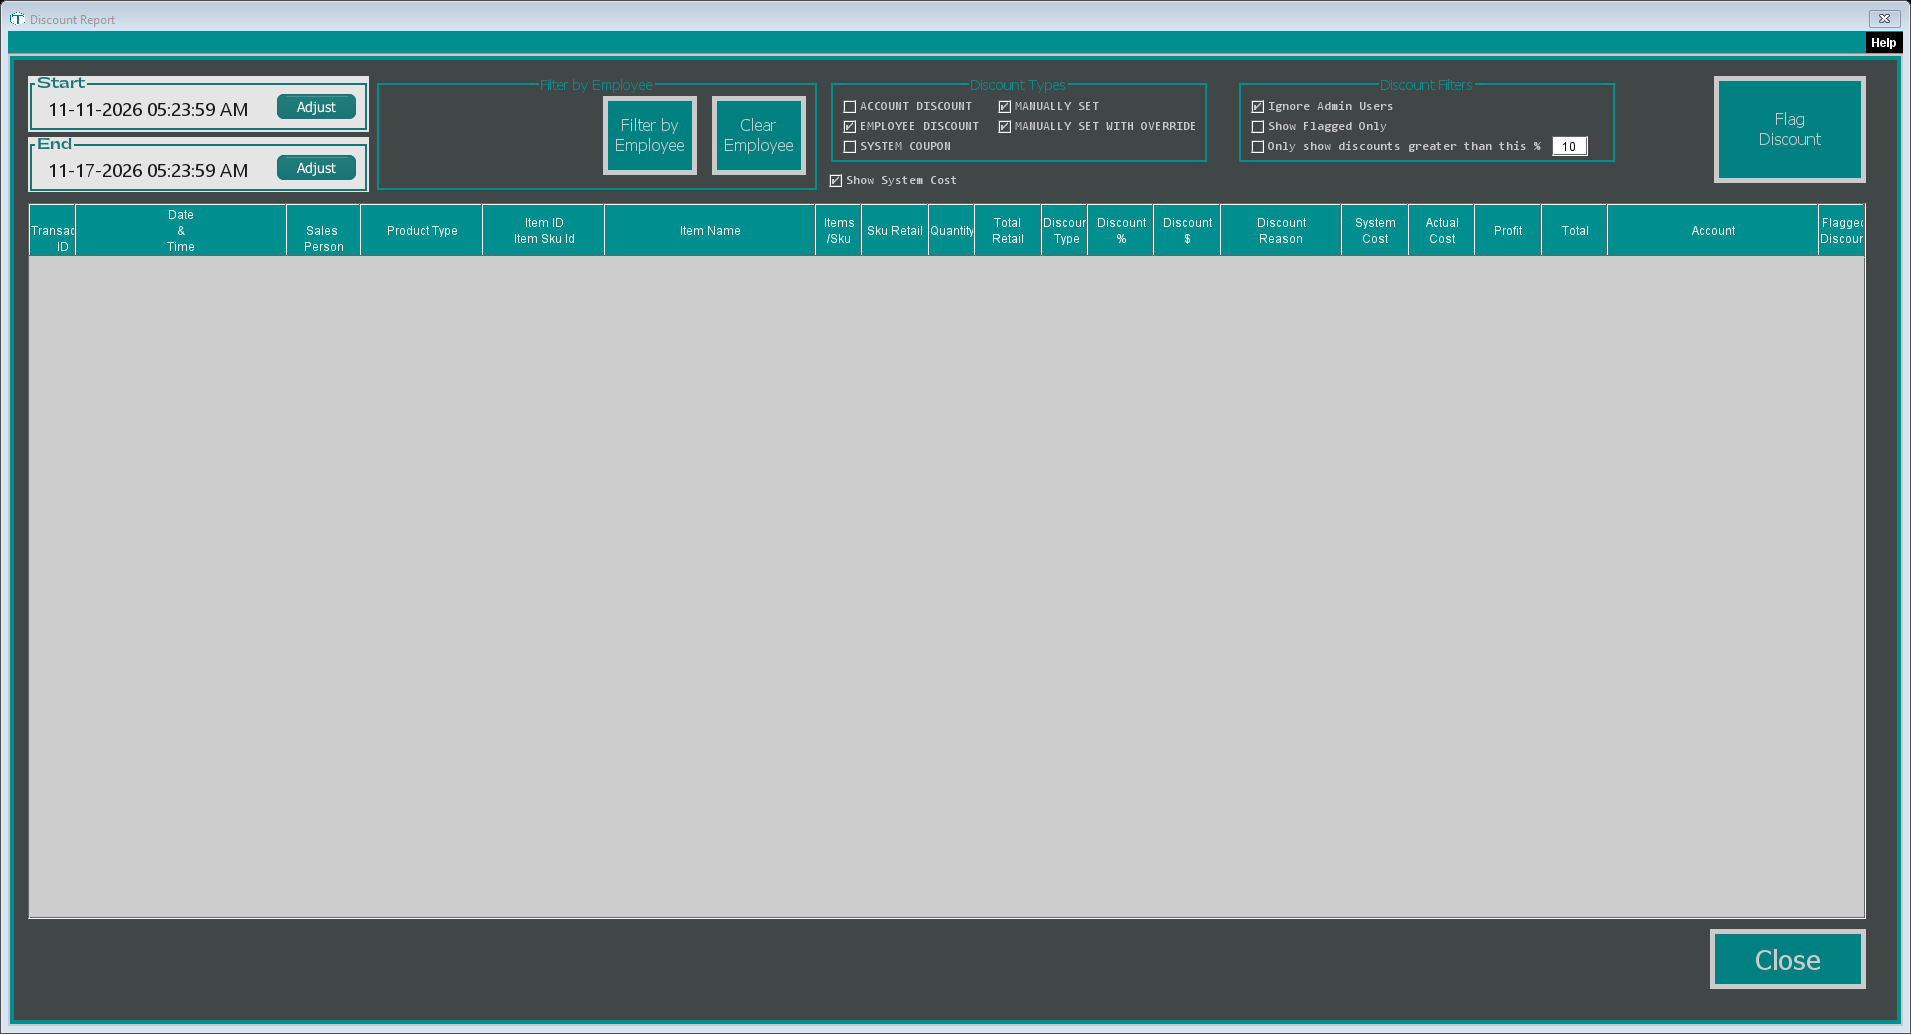
The window is titled Discount Report. It opens on the past week: today and the six days before it.
Choosing What to See
Everything across the top reloads the list as soon as you change it.
Start and End: click Adjust to change either date. If the start is after the end, TORO tells you "Start date is after end date."
Filter by Employee: click it to open the account finder, then pick the employee whose discounts you want to see. Their employee ID shows in the box. Clear Employee goes back to everyone.
Discount Types: which kinds of discount to list.
- ACCOUNT DISCOUNT: the customer's discount level gave the discount
- EMPLOYEE DISCOUNT: an employee discount
- SYSTEM COUPON: a coupon
- MANUALLY SET: a cashier typed in a discount
- MANUALLY SET WITH OVERRIDE: a typed-in discount that went past the item's maximum discount, so someone with permission had to approve it
With all five ticked, the report shows every line on every sale in the date range, whatever its discount (including none). Untick any box and only the ticked types are listed.
Discount Filters:
- Ignore Admin Users: leaves out sales rung by admin users, which usually means the owner. It's ticked every time the window opens, so untick it if you want to see your own discounts too.
- Show Flagged Only: lists only the discounts you've flagged (see below).
- Only show discounts greater than this %: lists only lines discounted by at least the percentage in the box (10 to start). Tick this to hide undiscounted lines when all five discount types are ticked.
Show System Cost: fills in the System Cost column with what the item costs you in TORO today, next to the Actual Cost recorded on the sale.
TORO remembers how you leave the Discount Types, Only show discounts greater than this % and Show System Cost boxes for the next time anyone opens the report. The percentage itself goes back to 10.
Reading the List
Each row is one line on a sale:
- Transaction ID and Date & Time of the sale
- Sales Person: who rang it
- Product Type, Item ID / Item Sku Id, Item Name and Items /Sku
- Sku Retail, Quantity and Total Retail: the price and quantity that rang up
- Discount Type, Discount % and Discount $: how big the discount was
- Discount Reason: the kind of discount and the reason given at the register
- System Cost, Actual Cost, Profit and Total: what the item cost you, what you made on it, and what the line actually sold for
- Account: the customer on the sale, if there was one
- Flagged Discount: whether you've flagged it
Click any column heading to sort by it. Double-click a row to open the whole sale.
Flagging a Discount
Spot one you want to ask about? Click the row, then click Flag Discount. The row turns yellow and Flagged Discount shows it. Click Flag Discount again on the same row to unflag it. Flagging is just a marker for you: it doesn't change the sale, and it stays on the line until you remove it.
Tick Show Flagged Only later to pull up everything you've flagged.