Printing Labels in Bulk
Re-tagging a humidor one item at a time gets old fast. TORO has two tools for printing barcode and price labels for lots of items at once:
- Bulk Barcode Printer keeps a running list of items that need new labels (new items, and items whose price TORO just recalculated) and prints labels for as many of them as you like in one go.
- Quick Print Tool is for printing as you go: scan or search for an item and its label comes straight out.
Both print using a print profile: a saved recipe that says which kind of label to print, whether it's for the box or the single, and how many.
Finding It
Open the Dashboard
Click the Items tab on the left, then click the Bulk Barcode Printer card (or the Quick Print Tool card). (Can't find it? Type "label" in the search box at the top right.)
You can also get to the Bulk Barcode Printer from Check Item Pricing: after you apply new prices, the button near the bottom right (for example, 37 Items Items Needing New Price Tags) opens it.
The Bulk Label Printer
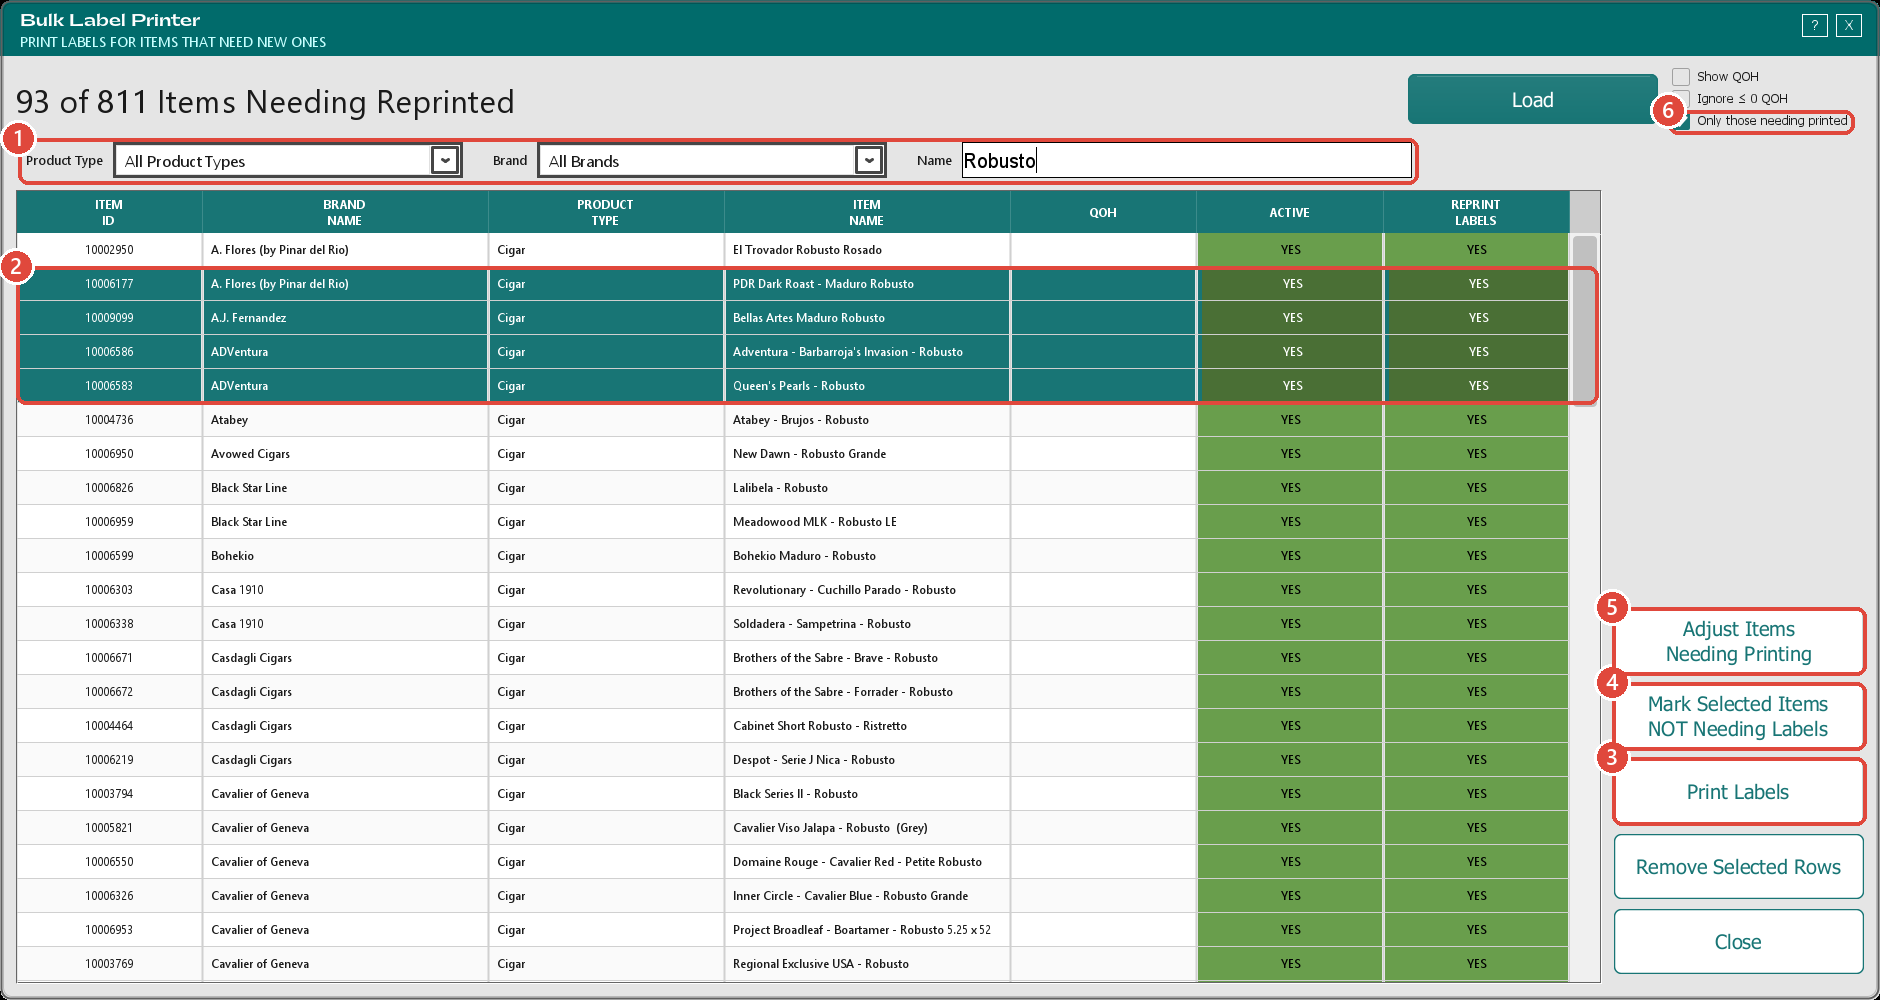
The Bulk Barcode Printer card opens the Bulk Label Printer window. It loads every active item that's waiting for a new label, and the big headline tells you how many, for example 811 Items Needing Reprinted.
How items get on the list
An item is put on the list when:
- It's a new item. New items start out needing a label.
- TORO recalculates and saves its prices, for example when you apply new prices with Check Item Pricing.
- Someone ticks the Reprint Labels box on the item in Item Details.
The Reprint Labels column shows YES for items on the list.
Printing
Narrow the list (optional). Use the Product Type, Brand and Name boxes above the list to show just what you're working on, say one brand or one shelf. The headline changes to show how many are showing out of the total, for example 93 of 811 Items Needing Reprinted. You can also click a column header to sort.
Highlight the rows you want labels for. Click a row, then hold Ctrl to add more, or Shift to take a whole run. Only highlighted rows print, so if nothing is highlighted, nothing prints.
Click Print Labels. TORO asks "How do you want to print?":
- Select an existing Print Profile? opens your list of saved profiles. Highlight one and click Select.
- Specify new Printing Parameters opens the Print Profile screen so you can set up the print right there (see Print Profiles below). Its button reads Print. When you click it, TORO asks "Do you want to save this Print Profile for future use?" A name is only needed if you say yes, so if you want to keep it, type a Name before you click Print.
The labels print on your label printer.
Clear the printed items off the list. Click Load to refresh. If the items you just printed are still on the list, highlight them and click Mark Selected Items NOT Needing Labels. TORO asks you to confirm (unless every row showing is highlighted), then takes them off.
No barcode yet? When a label needs a barcode and that package size doesn't have one TORO can print, TORO creates a store barcode for it as it prints. It's saved on the item, so it scans at the register from then on.
The other buttons
- Remove Selected Rows hides the highlighted rows from this list only. Nothing is saved, and they'll be back the next time you click Load.
- Only those needing printed (top right, on by default) limits the list to items waiting for a label. Untick it to see every active item, which is handy when you want a label for something that isn't on the list.
- Show QOH adds your quantity on hand to the QOH column, and Ignore ≤ 0 QOH leaves out items you have none of. Changing either reloads the list. TORO remembers how you left these boxes.
Adjust Items Needing Printing
To put items on the list (or take them off) without printing anything, click Adjust Items Needing Printing. This window lists all your active items, and the headline counts how many are set to reprint, for example 103 of 892 Items · 93 Set to Reprint.
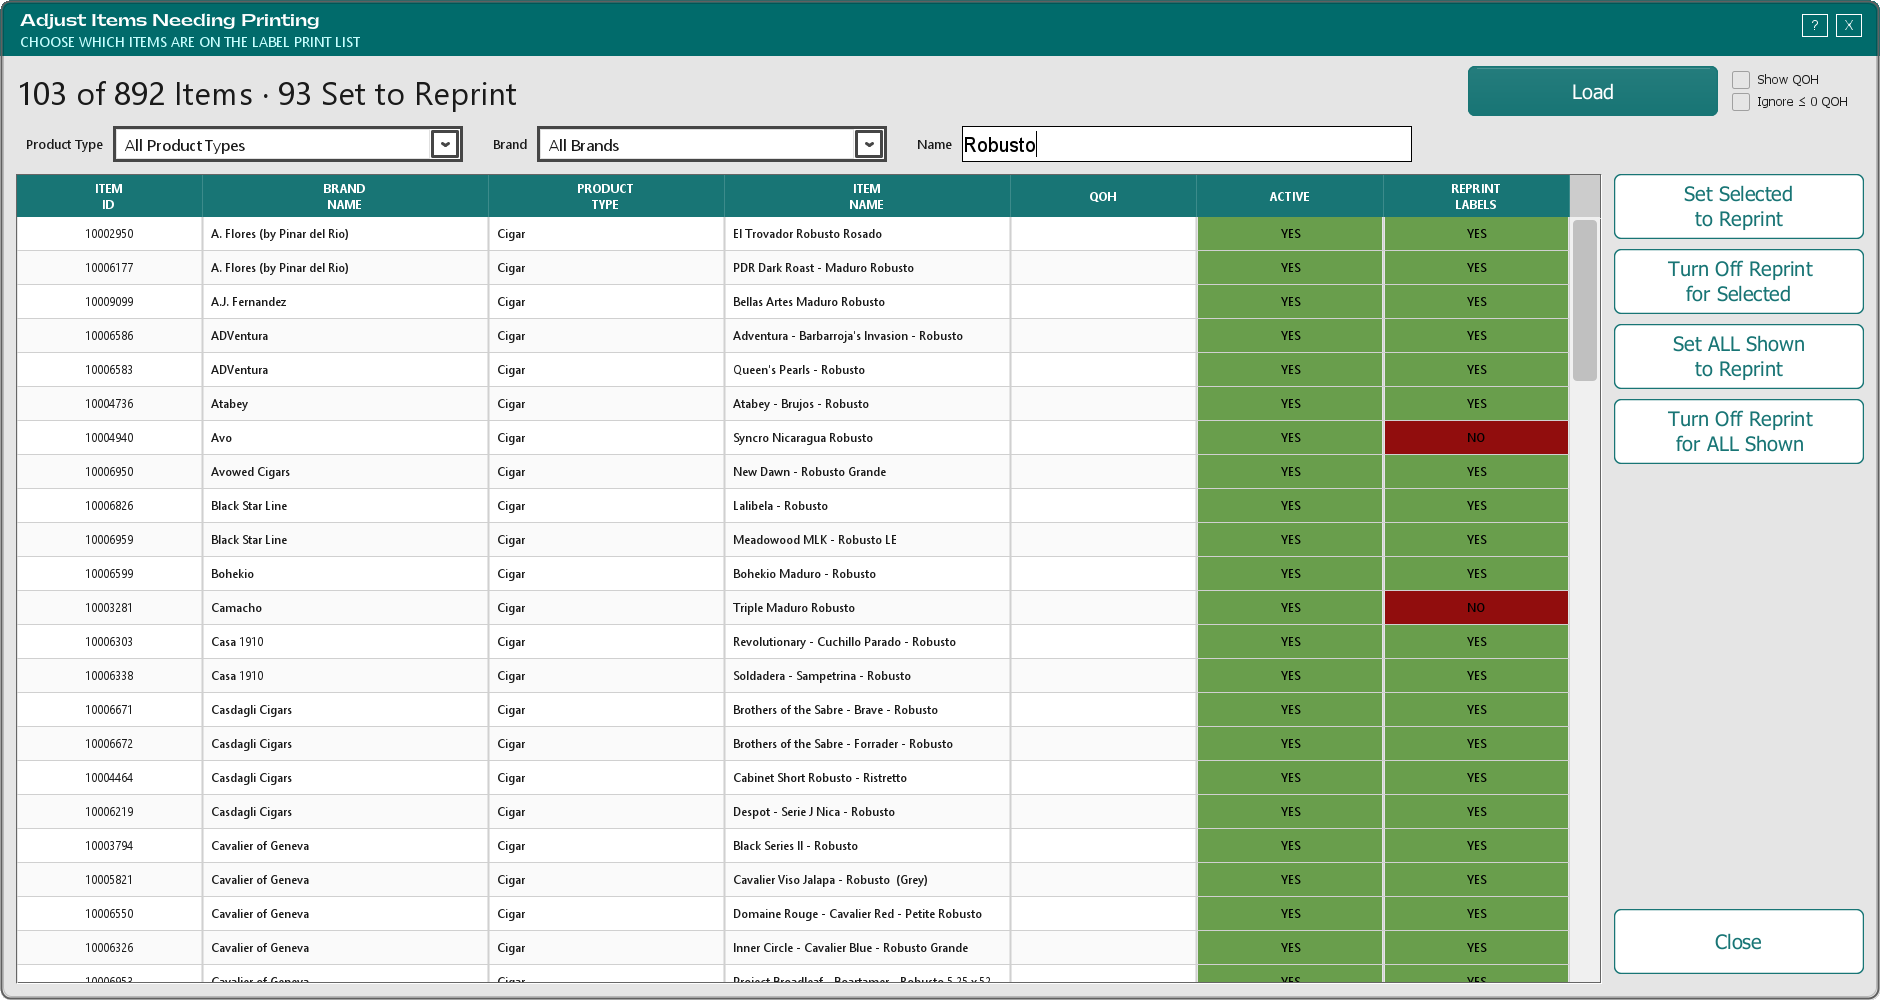
- Set Selected to Reprint and Turn Off Reprint for Selected change just the highlighted rows.
- Set ALL Shown to Reprint and Turn Off Reprint for ALL Shown change every row showing, after you confirm. Use the filters first if you only mean part of the list.
These changes are saved as soon as you click. When you close the window, the Bulk Label Printer reloads with the new list.
The Quick Label Printer
The Quick Print Tool card opens the Quick Label Printer. It's built for standing at a shelf with a scanner.
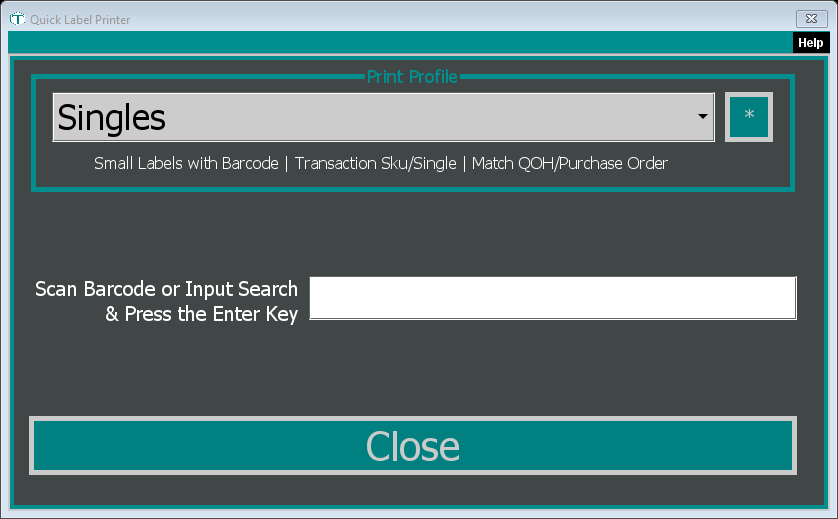
Pick a print profile in the Print Profile box at the top. The line under it spells out what that profile prints. TORO remembers the profile you picked for next time. To add or change profiles, click the * button next to it.
Scan the item's barcode. The label prints right away using that profile. If the barcode isn't linked to an item yet, TORO offers to link it first, the same as at the register.
Or type a search and press Enter. When your search matches several items, the Print Item Selector opens with every match. Highlight the ones you want (hold Ctrl to pick more than one) and click Print, or double-click a single item. If nothing matches, TORO tells you "No Results Found!"
The box clears after each print, ready for the next scan.
This isn't the Label Design Studio's Quick Print. The Quick Print Labels button inside an item's Item Details prints with your own designed templates from the Label Design Studio. The Quick Print Tool on the Dashboard prints TORO's standard labels using print profiles.
Print Profiles
A print profile saves your choices so you don't have to make them every time. Clicking * in the Quick Label Printer, or choosing Select an existing Print Profile? in the Bulk Label Printer, opens Quick Print Profiles.
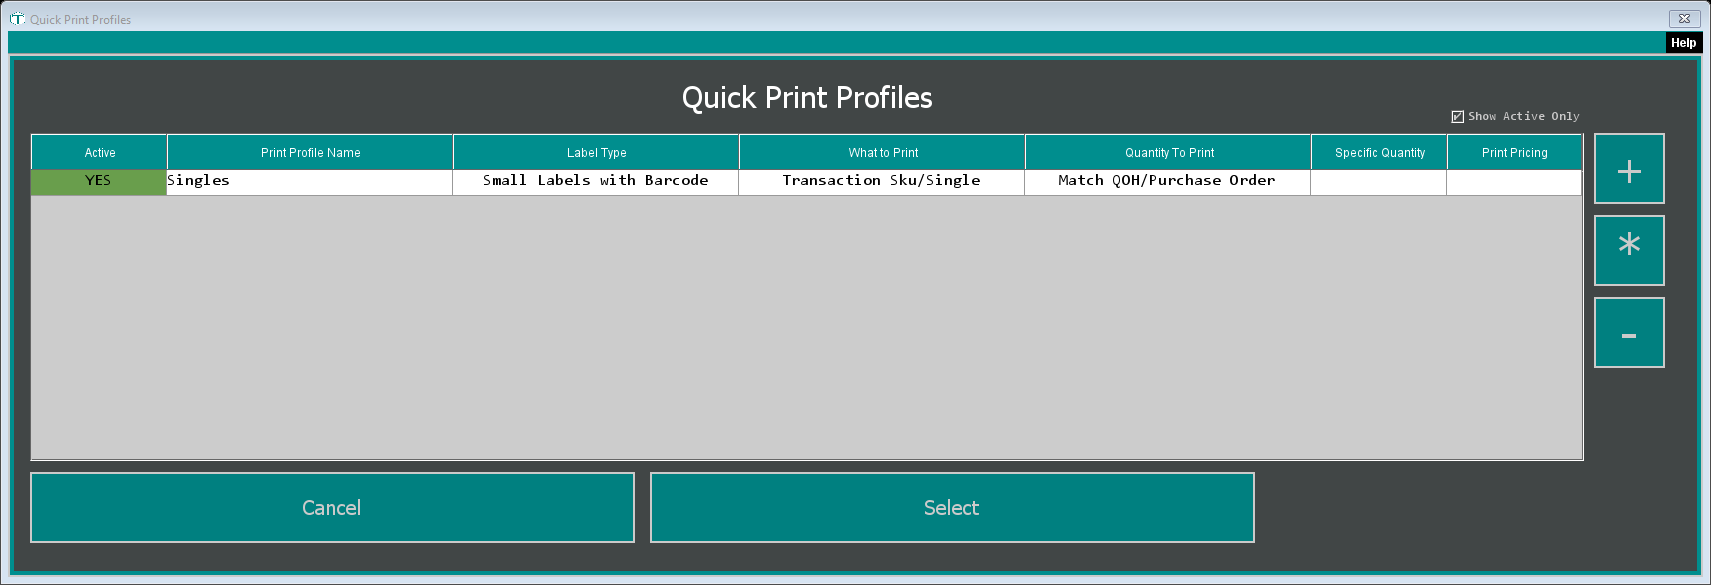
- + creates a new profile.
- * edits the highlighted one (or double-click it).
- - deletes the highlighted one after you confirm.
- Show Active Only hides profiles you've switched off.
- Select uses the highlighted profile.
Setting up a profile
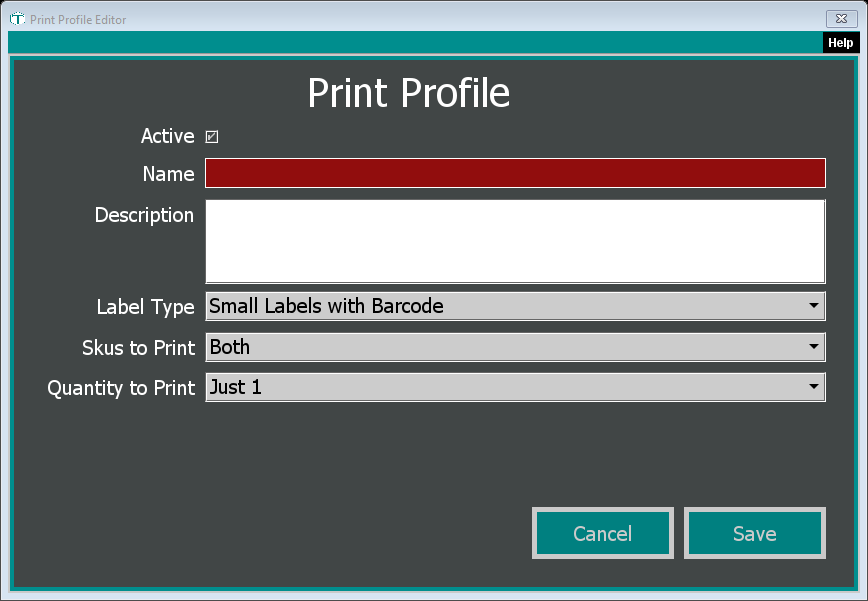
- Active — untick to retire a profile without deleting it.
- Name and Description — name it after what it's for, like "Box labels" or "Singles." A name is required to save.
- Label Type — Medium Labels with Metadata, Medium Labels with Barcode, Small Labels with Pricing or Small Labels with Barcode. Medium Labels with Metadata adds cigar details like size, strength and country.
- Skus to Print — Master Sku/Box for the box label or Transaction Sku/Single for the single. New profiles start on Both; we recommend picking one and making a second profile for the other, then printing each in turn.
- Quantity to Print — Just 1 prints one label per item. Match QOH/Quantity on PO prints one label for every single you have on hand when you're printing singles (a box label still prints once).
- Print Pricing — for the medium labels only, and on unless you untick it. Untick it to leave the price off.
Click Save.
Common Questions
I clicked Print Labels and nothing printed. Make sure you highlighted rows first. Only highlighted rows print. If they were, check that your label printer is on and connected.
Why are there hundreds of items on the list? New items and every price change add to it, so it grows quickly if labels haven't been printed in a while. If your shelves are already up to date, filter to what you've actually tagged, highlight those rows and click Mark Selected Items NOT Needing Labels. Or use Adjust Items Needing Printing to clear whole groups at once.
I need a label for an item that isn't on the list. Untick Only those needing printed in the Bulk Label Printer, or scan the item in the Quick Label Printer.