Setting Up a New Employee
New hire starting Monday? TORO walks you through it one question at a time, and it takes about a minute. When you're done they have a PIN and can clock in, ring sales, and start building their history that day.
Getting There
From the Dashboard, tap the Employees tab, then Manage Employees. You'll see everyone who works for you. Tap New Employee at the bottom left to start.
Adding someone is a permission most staff don't have. Rather than simply refusing, TORO offers you a way through: an owner or manager can enter their password to authorize it, or you can request a temporary access code from TORO support.
Step 1: Their Phone Number
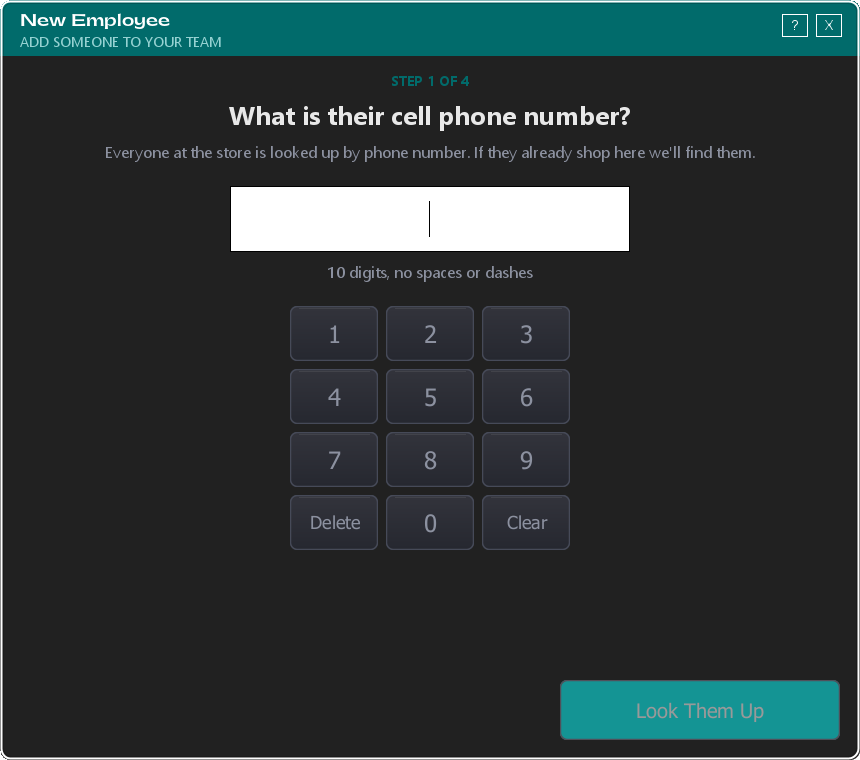
Everyone in TORO is looked up by phone number, so that's where you start. Type their ten digits and tap Look Them Up.
TORO is checking whether they already exist in your system. Cigar shop employees are almost always customers first, and if they've ever signed up for your loyalty program, TORO will find them and reuse that record instead of creating a duplicate.
One phone number, one employee. If that number already belongs to someone on your staff, TORO stops right here and tells you who. Two employees can't share a number — every sale, clock-in and override is tied to a person, and a shared number breaks that.
If TORO Finds Them
You'll see everyone using that number — families share phones, so there may be more than one. Tap the right person and TORO carries their name and details forward. If none of them are your new hire, tap Add Someone New.
Step 2: Their Name
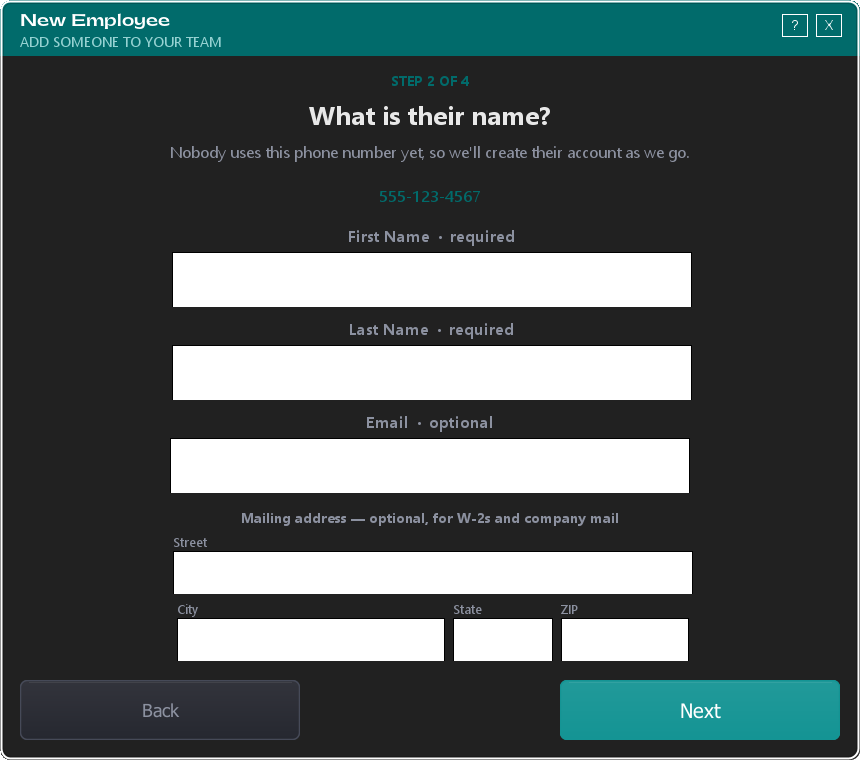
If nobody uses that number yet, TORO creates their account as you go.
First and last name are both required. Unlike a walk-in customer, an employee needs a full name — it shows up on payroll, commission and sales reports, and it forms part of their employee ID.
Email is optional. Plenty of good staff don't have one, or don't want to give it out. Leave it blank. The only time you'll want one is if you plan to email them reports or invoices.
The mailing address is optional too. It's there because it's the address TORO uses for company mailings like a 1099 or W-2, so it's worth filling in for anyone you'll be paying — but nothing stops you from skipping it and adding it later.
Step 3: What They Can Do
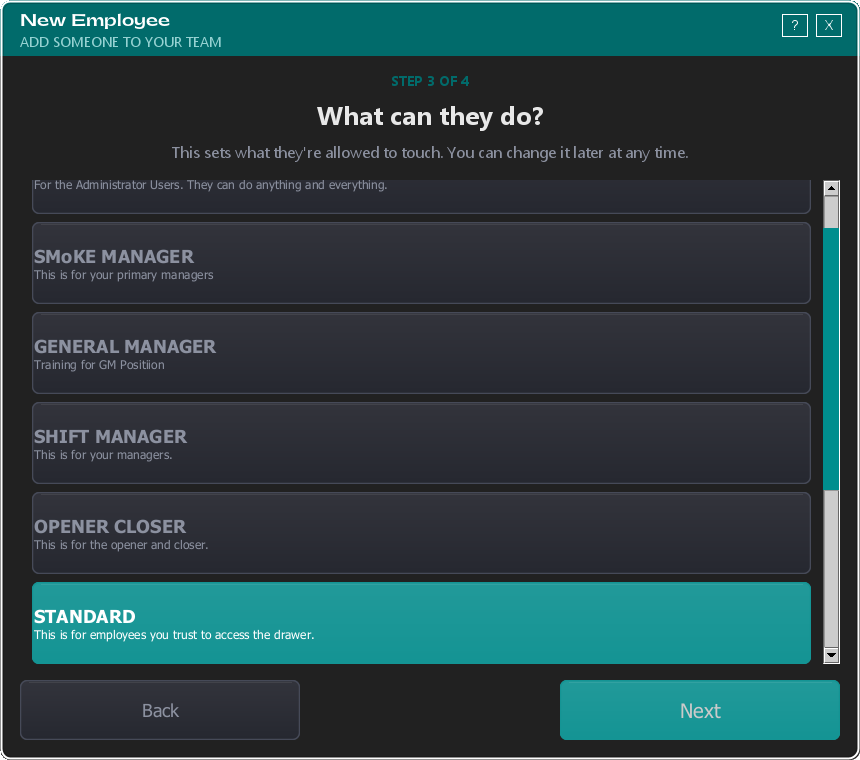
This is the decision that matters most. Access levels control which screens they can open, what reports they see, and what they're allowed to override.
TORO pre-selects Standard, which suits most new hires. Each level shows a short description of who it's for, so read them rather than guessing from the name — your store can rename and reconfigure these, so yours may differ from another shop's.
A stock TORO install ships with these, strongest first:
- Admin — everything, including employee management and system settings
- SMoKE Manager — your primary managers
- General Manager — a step down, often used while training into the role
- Shift Manager — day-to-day management
- Opener Closer — trusted to open and close the store
- Standard — trusted with the drawer; the usual choice for a new hire
- Basic — minimal access: clock in and out, work tabs
- Business Partner — for partners rather than staff
You'll only see Admin on this list if you're an admin or owner yourself.
The principle is the old one: give people the access they need and nothing more. A brand-new cashier has no business in payroll reports. You can raise someone's level the day they earn it, and the new permissions apply immediately.
Step 4: Their Login PIN
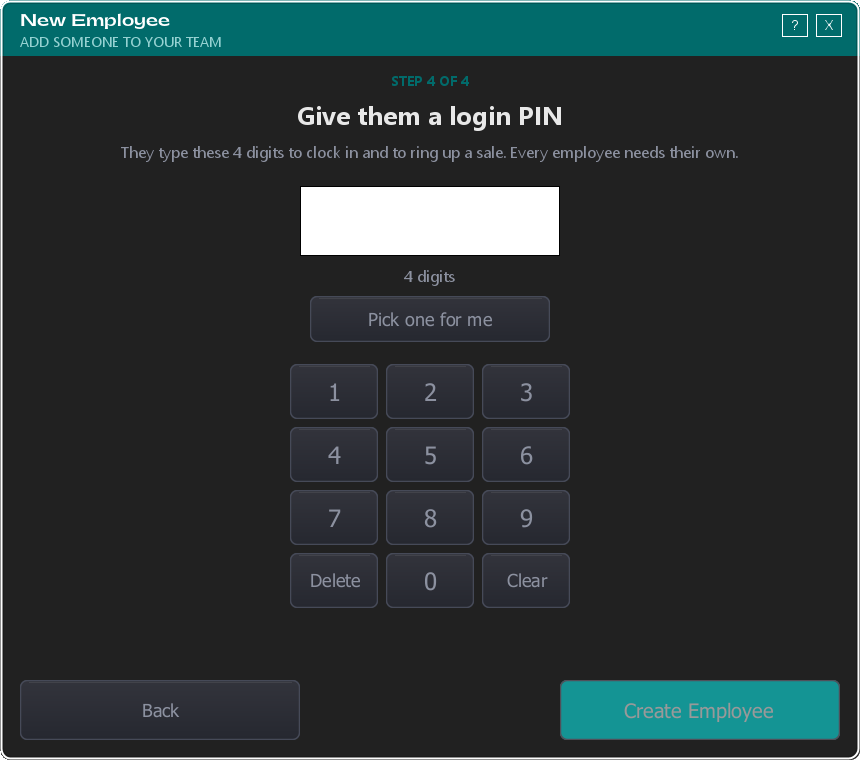
Four digits, and it's how they identify themselves for the rest of their time with you — clocking in, ringing a sale, authorizing an override.
Type one, or tap Pick one for me and TORO finds a free one. It tells you straight away whether the PIN works: no two employees can share one, 1234 is reserved, and 0000 isn't allowed. If the PIN is taken, TORO says so before you save rather than after.
Tap Create Employee and you're done. Nothing is saved to your system until you press that button, so you can back up and change anything right until the end.
They're Ready
The last screen confirms who you created, their PIN, and their access level. Write the PIN down for them.
Most staff can't change their own PIN — on a stock TORO only the manager levels can. If someone needs a different one, open them from the employee list and tap Edit Employee.
If you're setting up several people at once, tap Add Another Employee and TORO takes you straight back to the phone-number step.
Worth Doing Next
Check their employee settings. When you assign an access level, TORO applies that role's defaults — discount limits, comp limits, transaction viewer access. If your store has confirmed its defaults, your new hire inherits them automatically. See Employee Settings for the full picture.
Fill in their pay details. Open the employee from the list and tap Edit Employee. None of this is required to get someone working, but your reports will have gaps until it's filled in:
- Hourly rate — feeds payroll and labor cost reports
- Paid type — check, cash, or salary
- Commission — turn on if they earn commission on sales
- Exclude from tip split — managers are often excluded from a pooled tip distribution
A Few Things to Keep in Mind
Never share PINs. Every transaction, clock-in and override is recorded against a PIN. When a report says someone voided a $50 sale at 3:15pm, you need that to be true. Two people on one PIN and you've lost the ability to hold anyone accountable.
Don't delete someone when they leave — deactivate them. Open them from the employee list and turn Active off. Every sale they rang and every hour they clocked stays in your reports. Deleting erases that history, and you can't get it back.
Their PIN and phone number stay reserved while they're inactive, so neither can be handed to someone new. That's deliberate — it keeps old reports readable.
Employees keep their customer account. Because TORO builds an employee on top of a loyalty account, their own purchases, points and history stay connected to the same record.